
Hosting Vodia PBX in Google Cloud
In this blog, we will cover the basic steps in setting up the Vodia PBX with Google Cloud. If you don't have a google account, you can sign up at https://cloud.google.com/ and get $300 to spend on Google Cloud Platform over the next 12 months!
If you don't have a Vodia account, signup for free and receive a free license. https://portal.vodia.com/en/register
Getting Started
Once you have access to your Google Cloud Navigate to (Compute Engine) to create a VM.
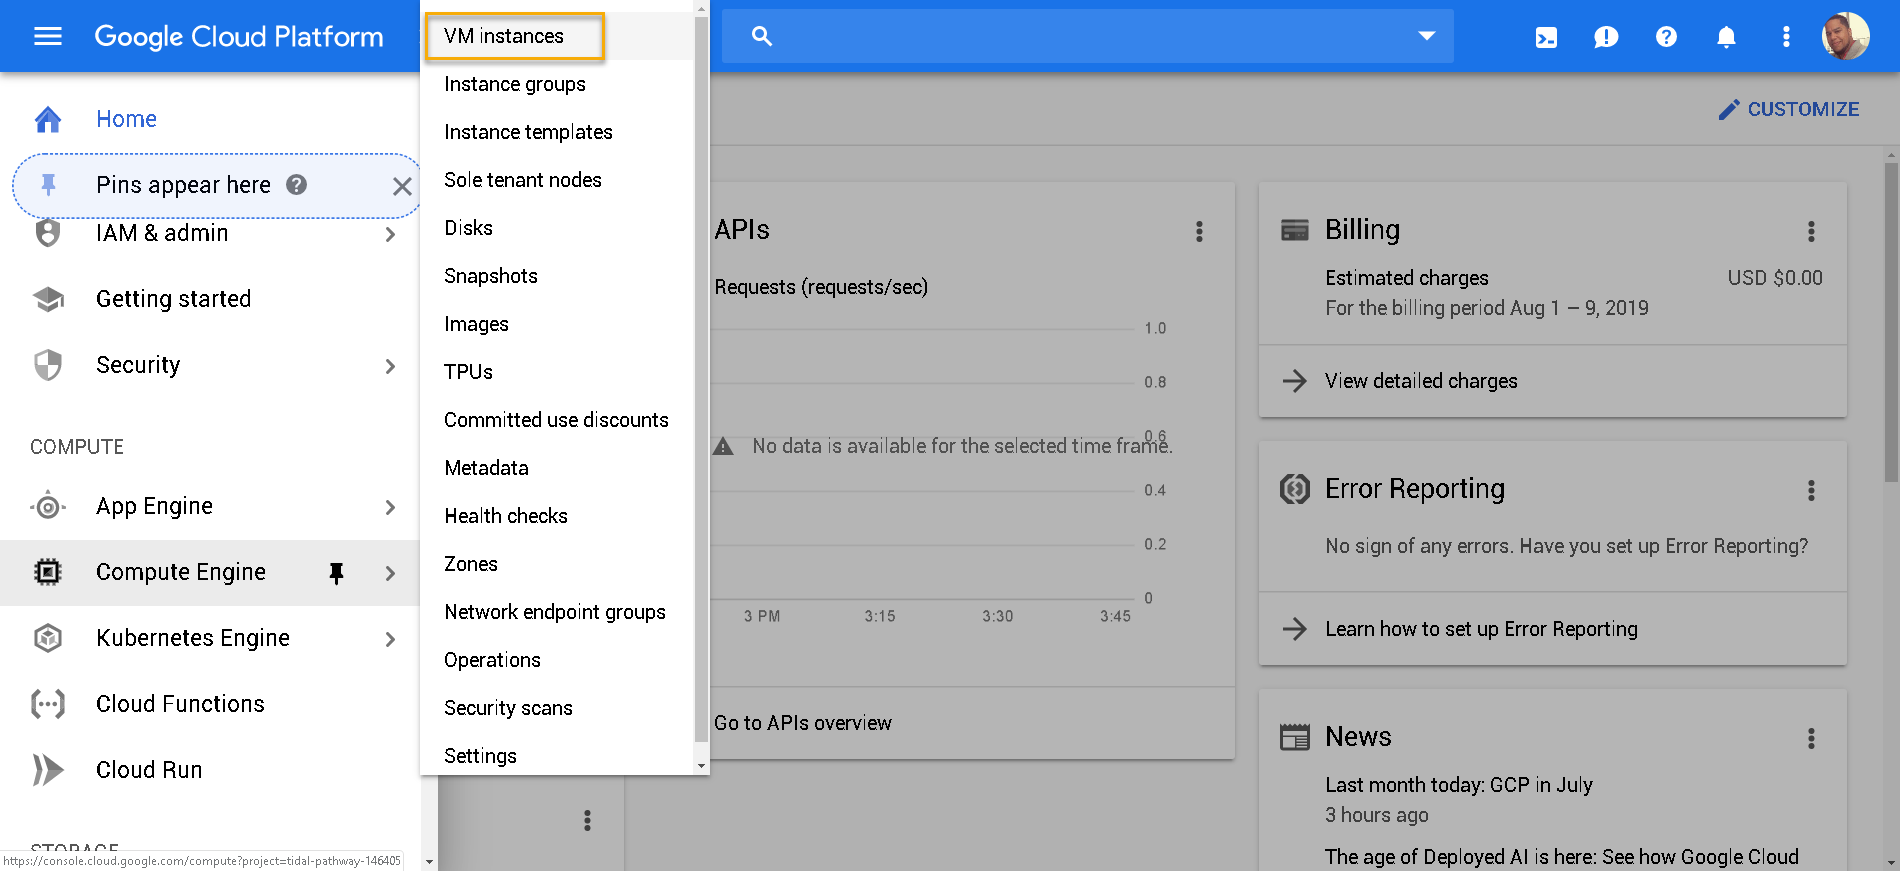
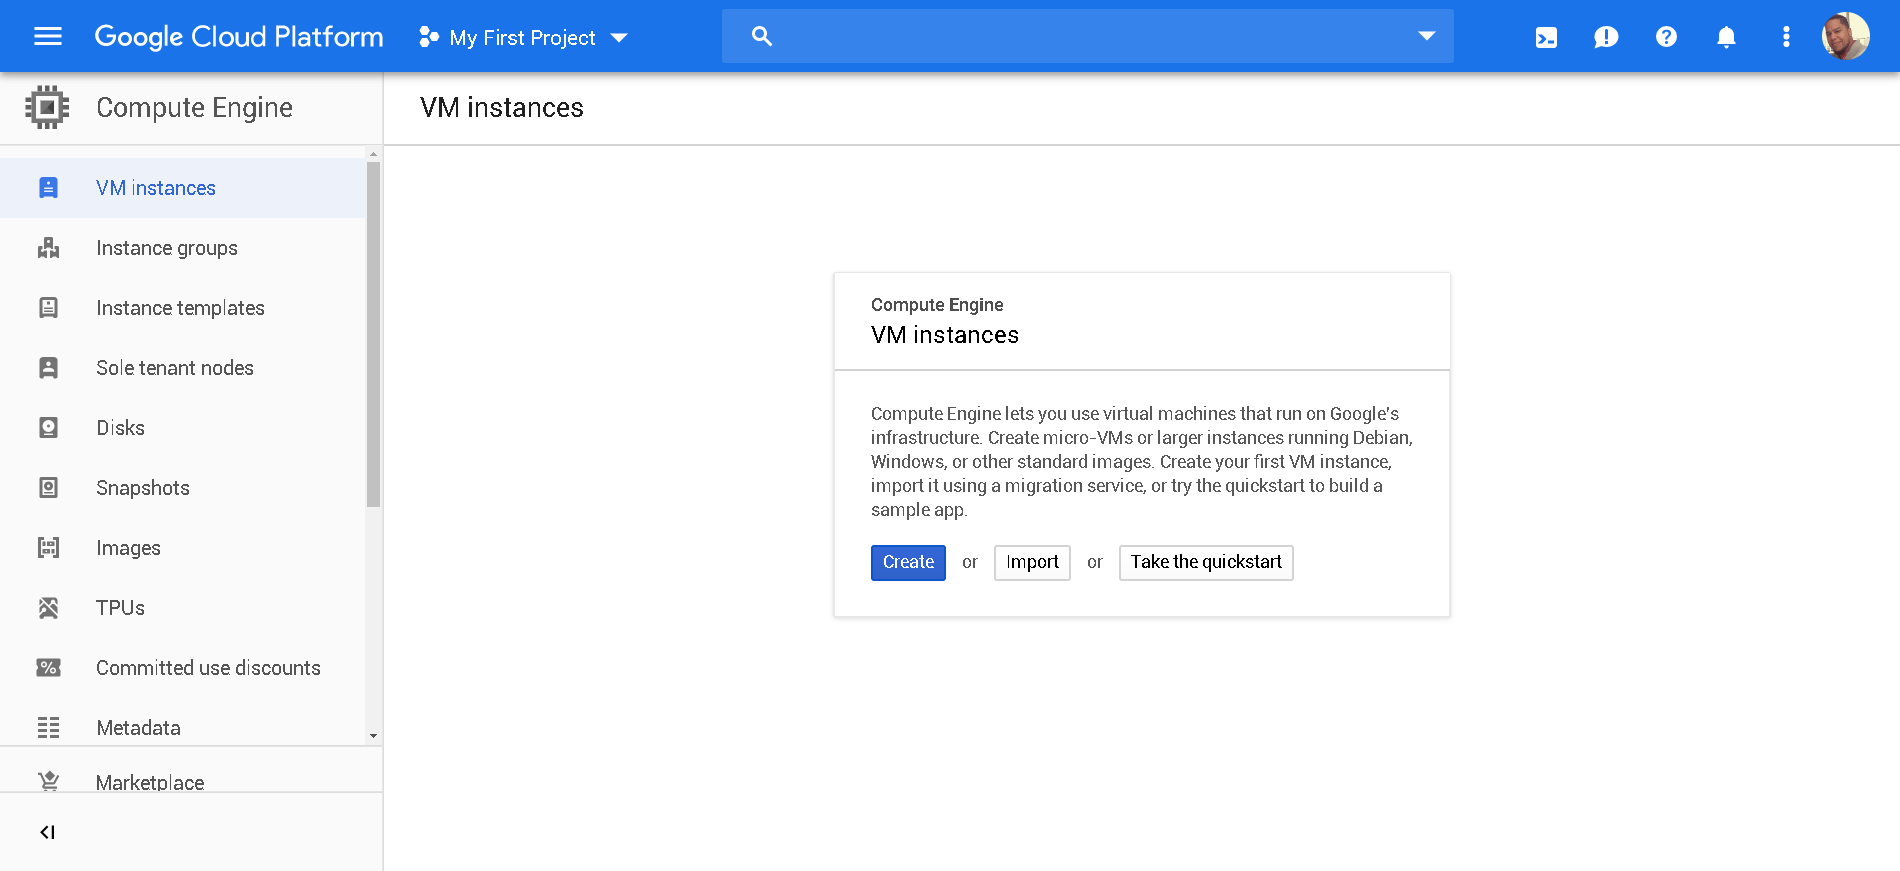
Click on Create
Setting up your VM
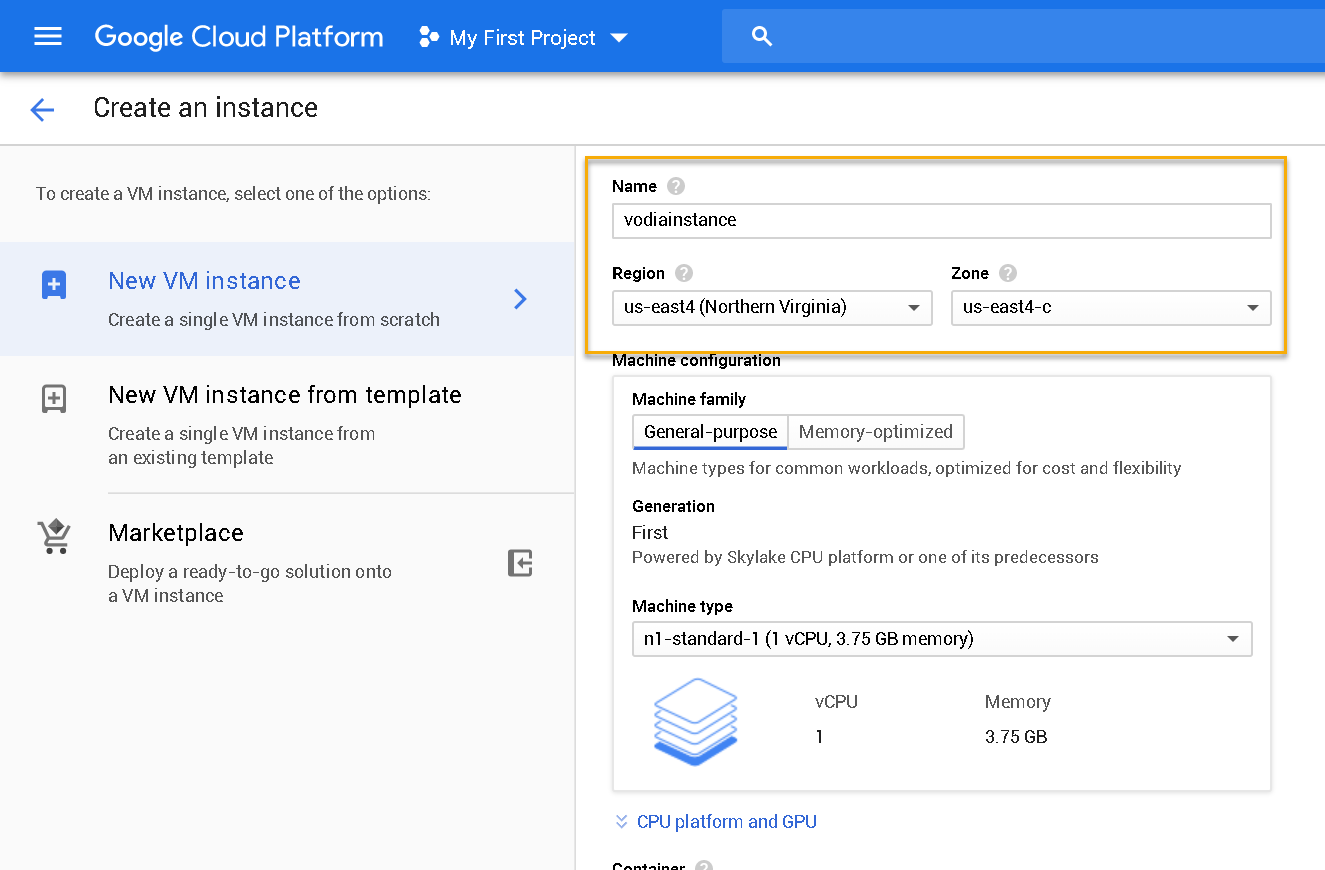
- Name Your instance (lower case, no spaces)
- Choose your region and zone
- Machine configuration (Choose General-purpose)
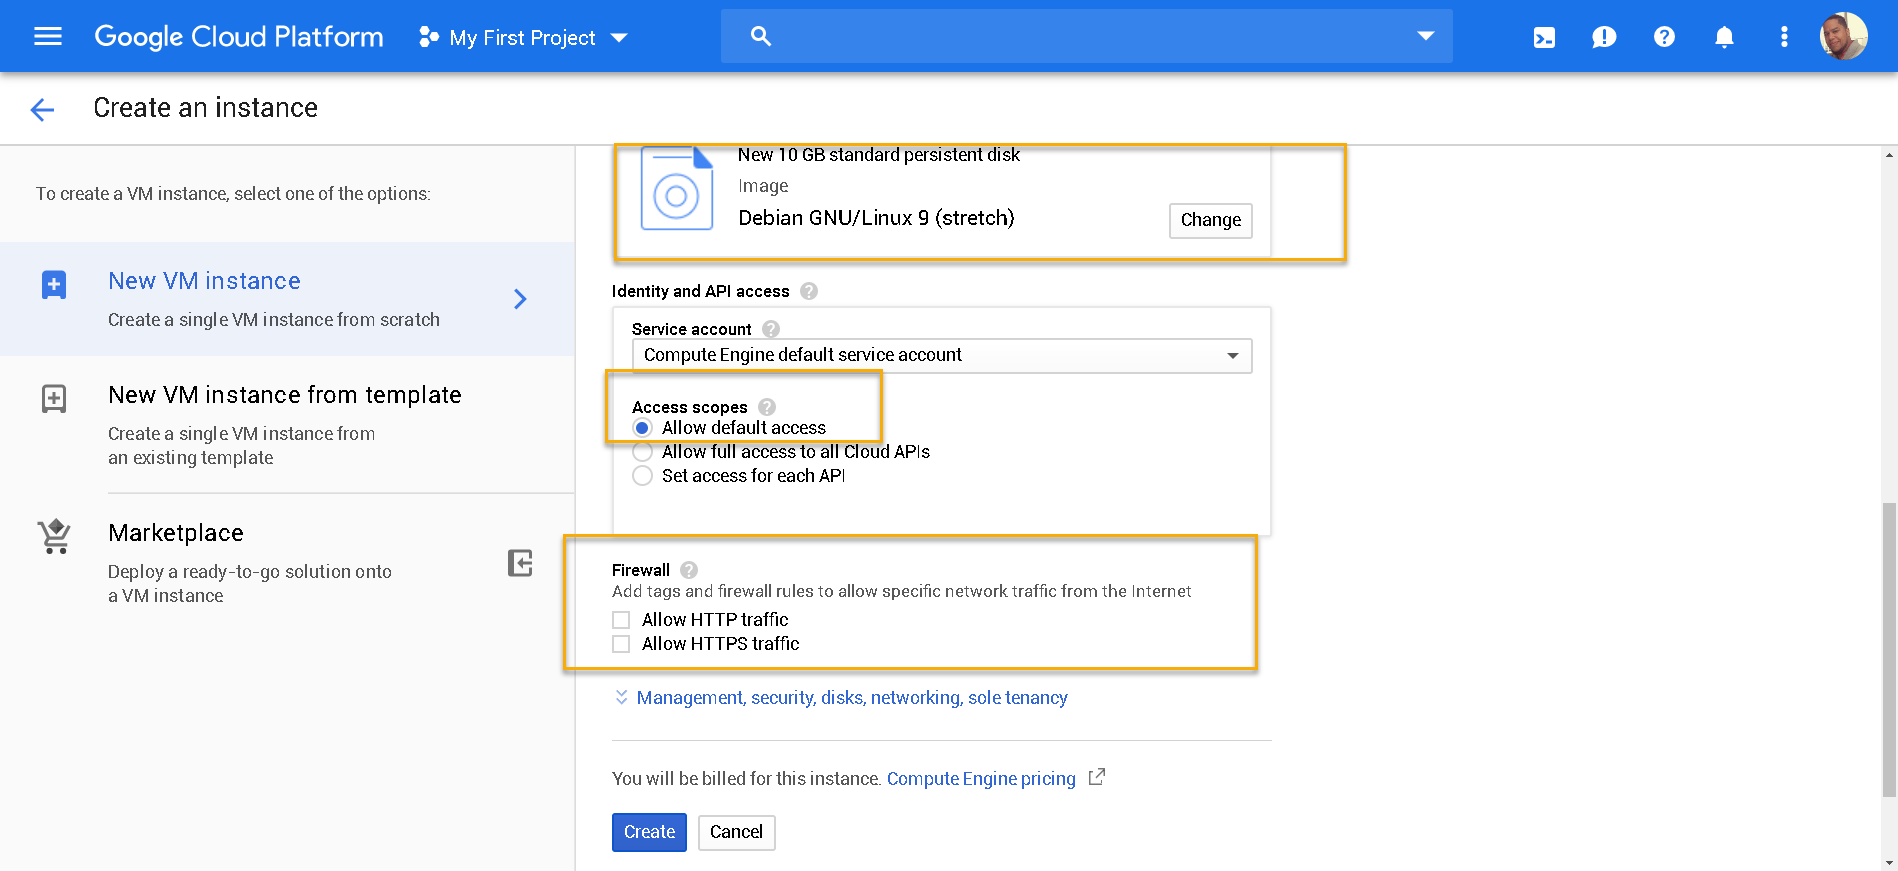
Building your instance
- Choose your operating system. (For this tutorial I am using Debian) You can use Windows or any other Linux flavor.
- Service Account (Choose Compute Engine default service account)
- Access Scope (Choose Allow default access)
- Firewall Setting (Choose Allow HTTP traffic and Allow HTTPS Traffic)
When done, click Create.
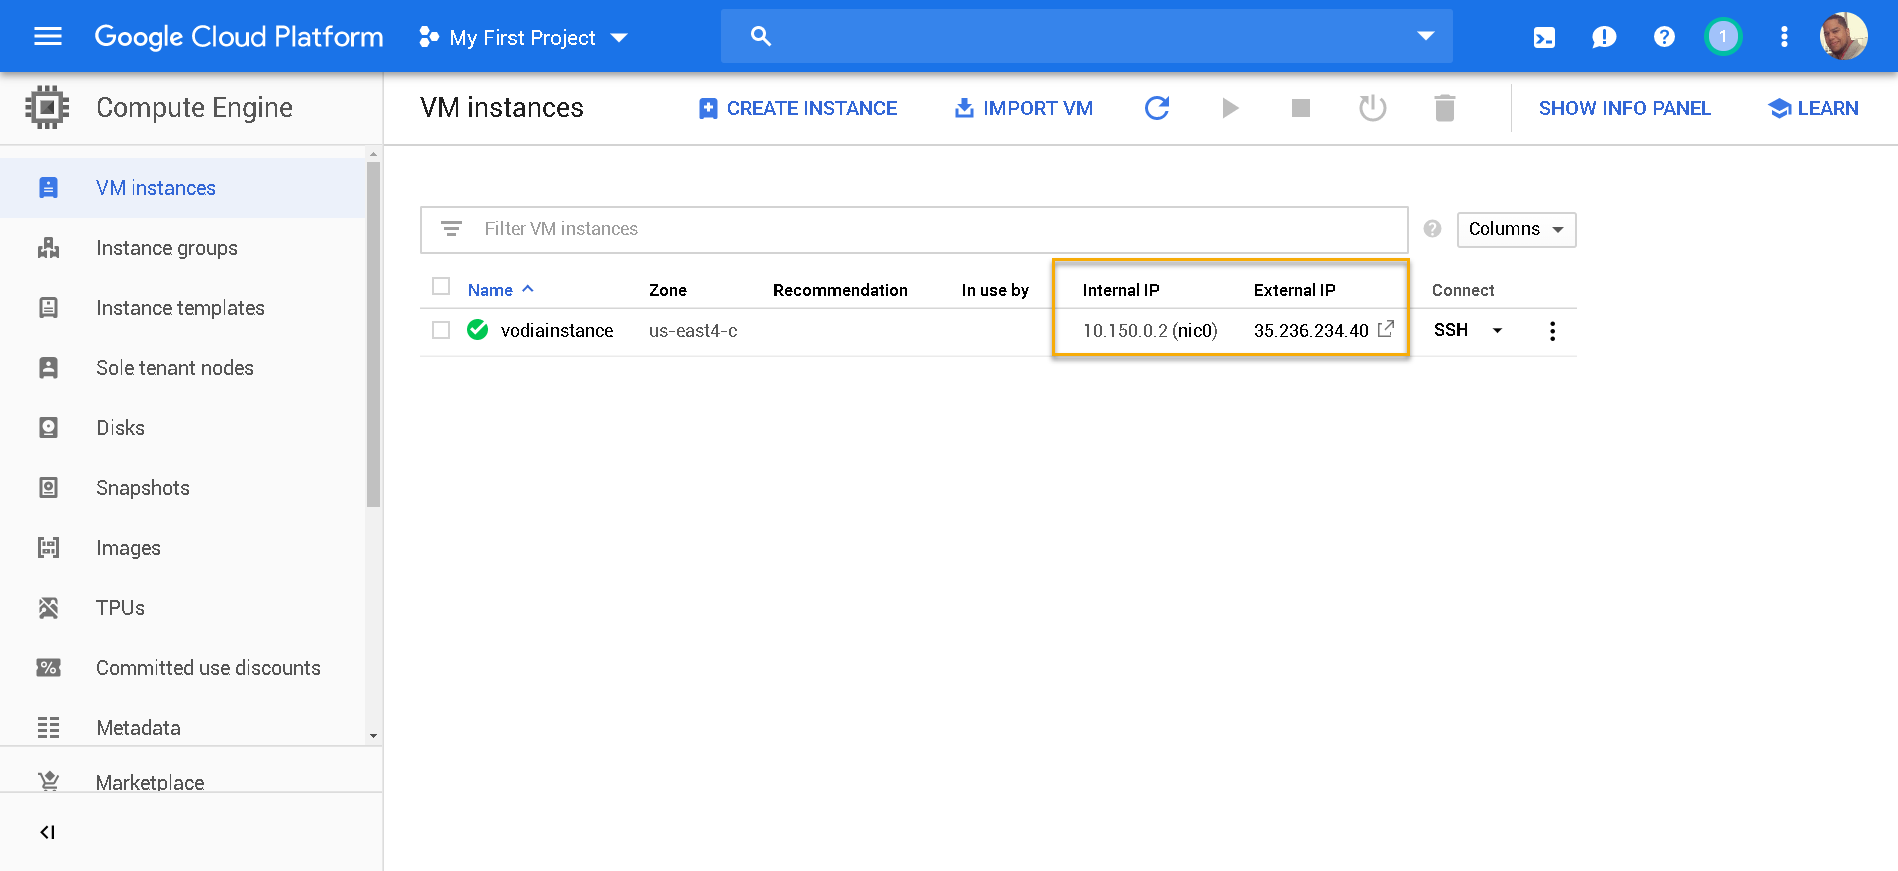
Running instance
Now that the VM is running, Google has provided us with an internal IP and external IP addresses. These IP addresses will be assigned to the Vodia PBX to determine the audio packets.
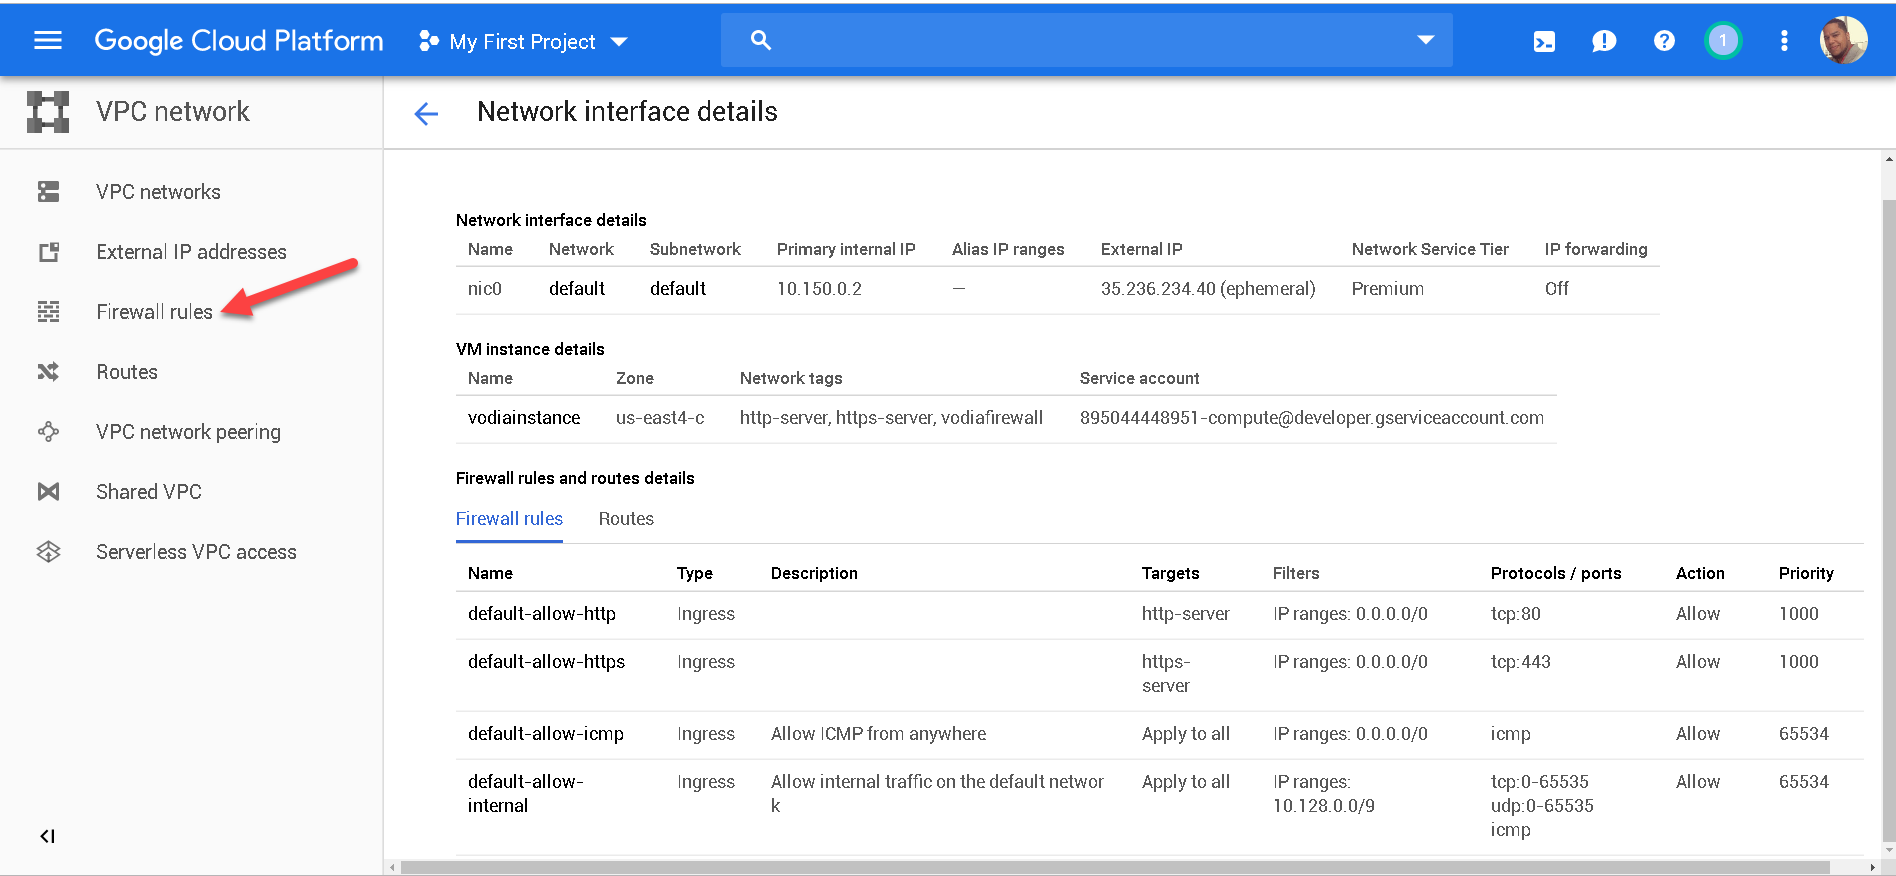
Edit the firewall
Next, we are going to set up the firewall on Google Cloud.
Click on your instance as shown below.

Next, scroll down to (Network Interfaces) and click on (View details)

In the right-hand panel, choose (Firewall rules).
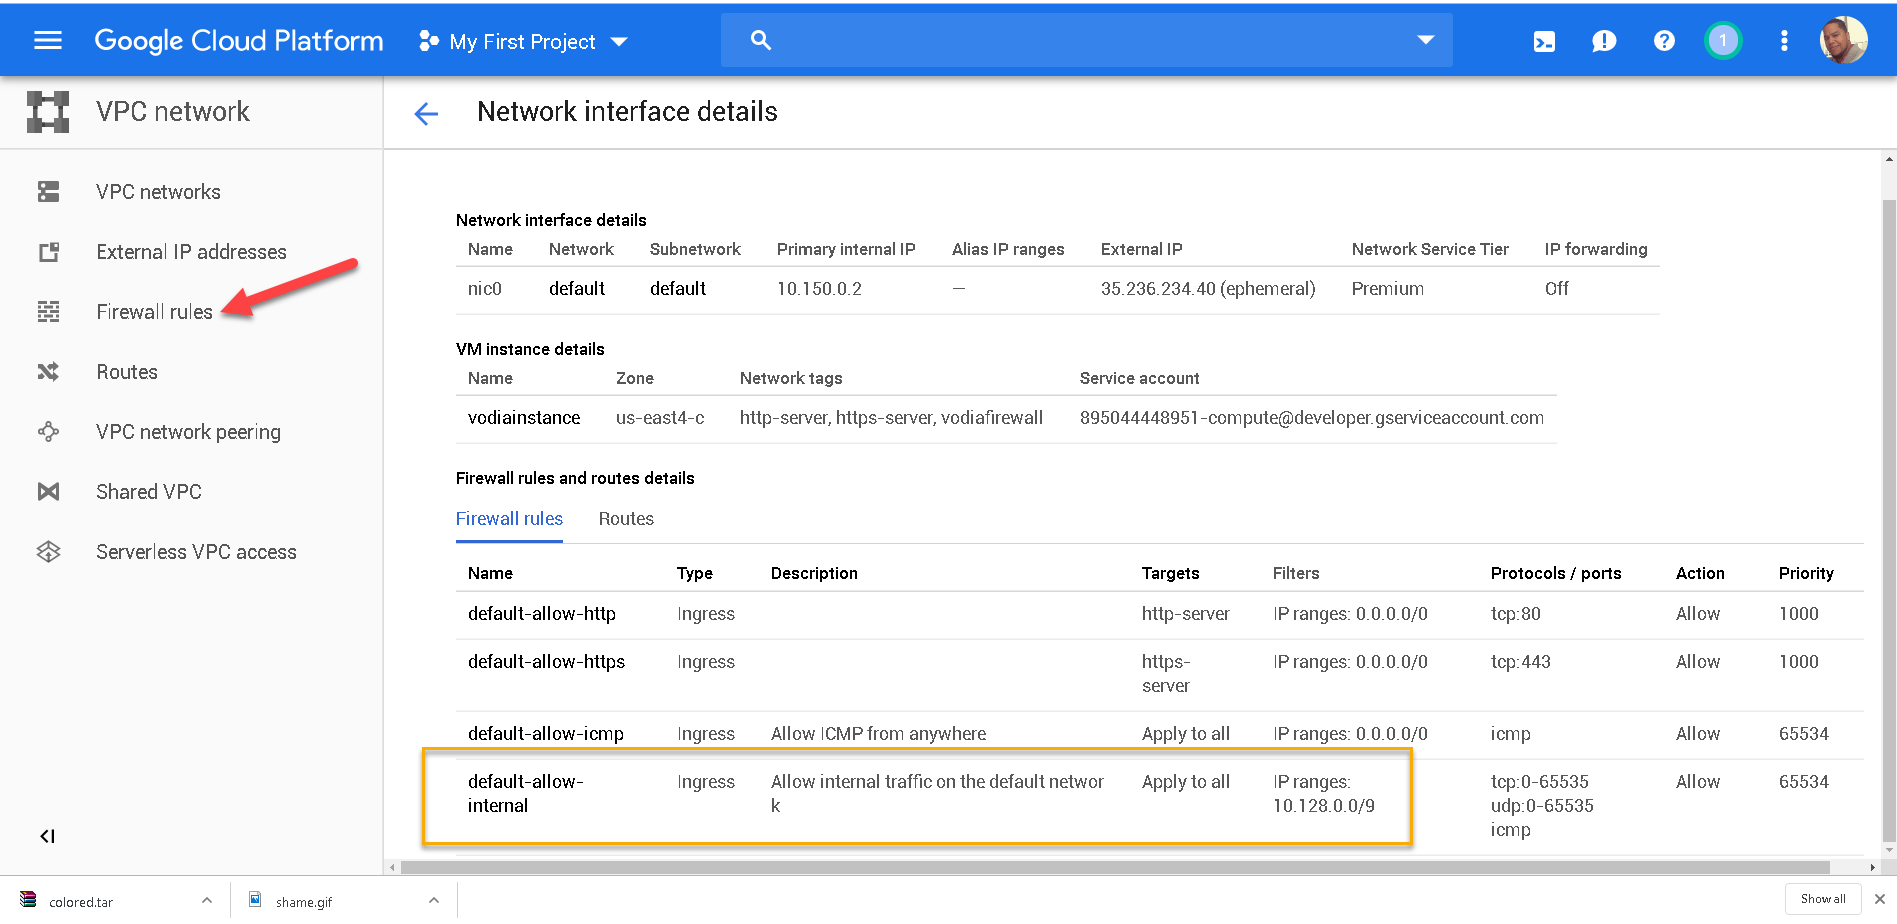
Create Firewall Rules
- Click on (default-allow-internal)
- Change the IP source address from to 10.128.0.0/9 to 0.0.0.0/0 and save.
- This will take care of the following ports
- 80 (TCP)
- 443 (TCP
- 5060 (UDP)
- 5061 (TCP)
- RTP Ports 49152- 64512
- LDAP Ports 2345-2346
Installing the VodiaPBX Phone System
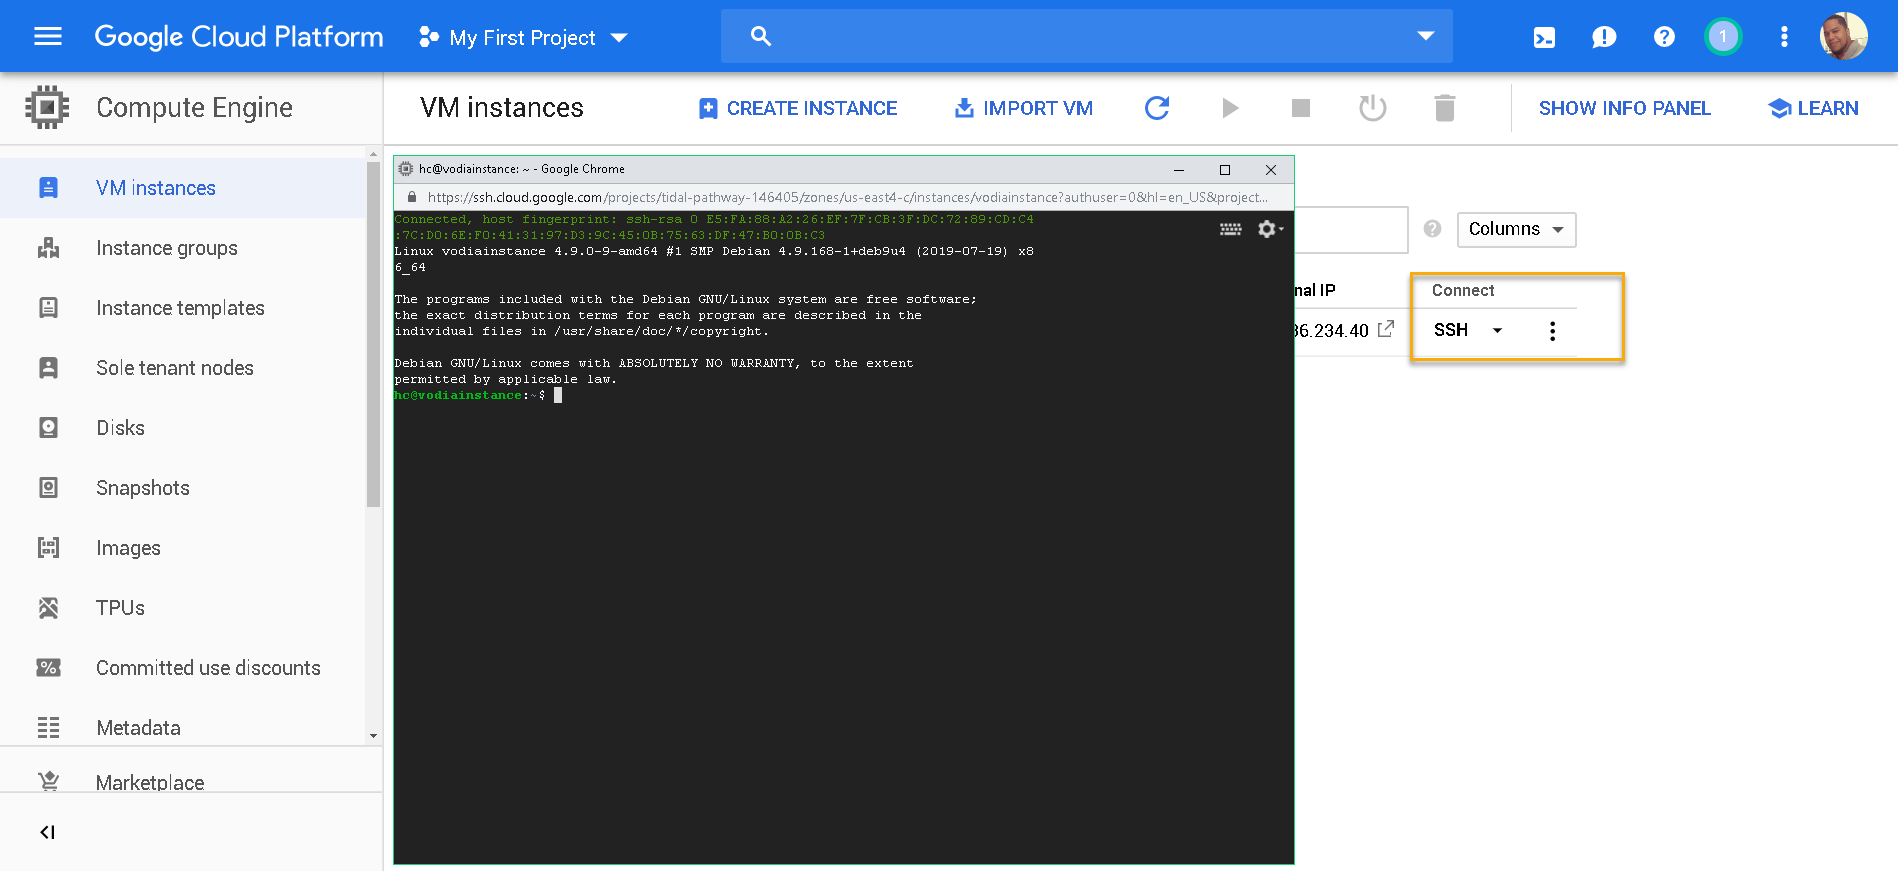
To install the VodiaPBX, we need to log in with SSH. To do this, click on the SSH drop down and choose (Open in browser window).
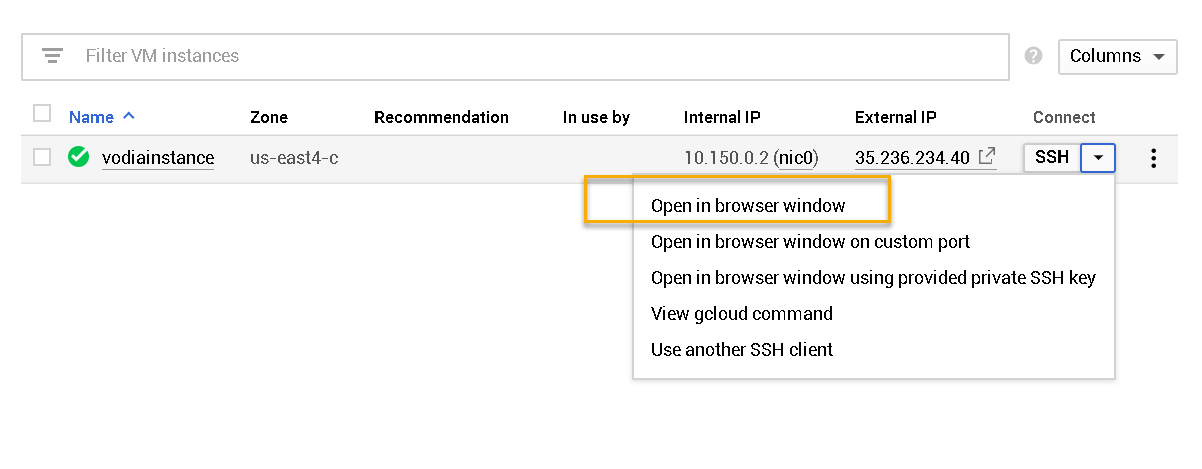
This will open an SSH session on your browser.
Since I am using Debian, I am going to navigate to https://doc.vodia.com/install_linux for the executable script.
In the command line, copy-paste the following in order.
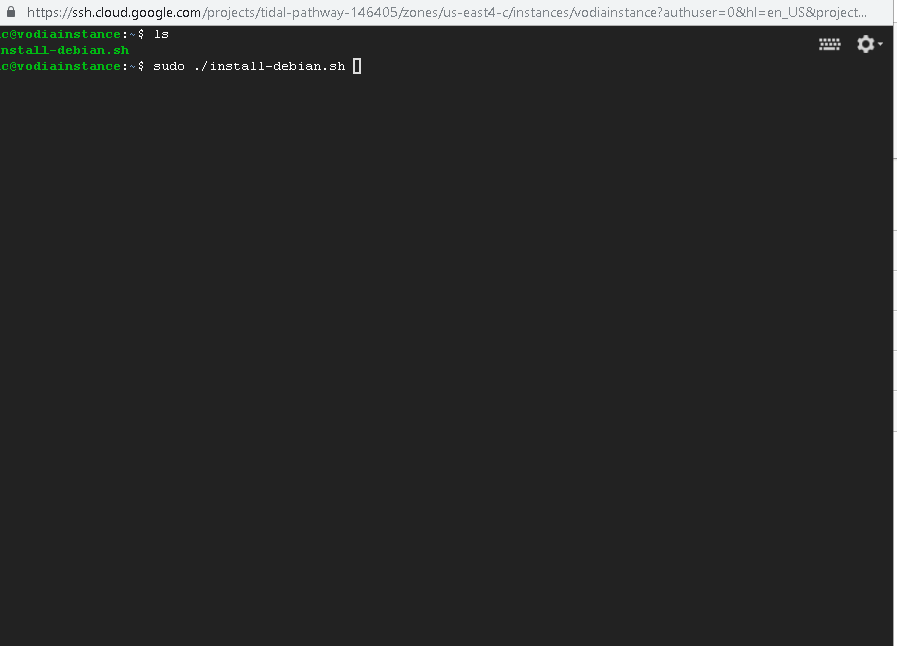
In Debian:
- wget http://portal.vodia.com/downloads/pbx/install-debian.sh after the script has been downloaded, copy-paste the following cmd.
- chmod a+rx install-debian.sh

- To execute the script you will have to use sudo ./install-debian.sh Then sit back and relax!
When the script is done installing, the VodiaPBX will automatically startup.
Logging into the VodiaPBX
To log into the Vodia PBX, you will need to check your external IP address. This can be found in the main page of your VM.
Copy-paste the IP or click on the open browser link.

You will be presented with the Vodia login page, The user login is admin, there's no password configured yet, so we will have to create one.
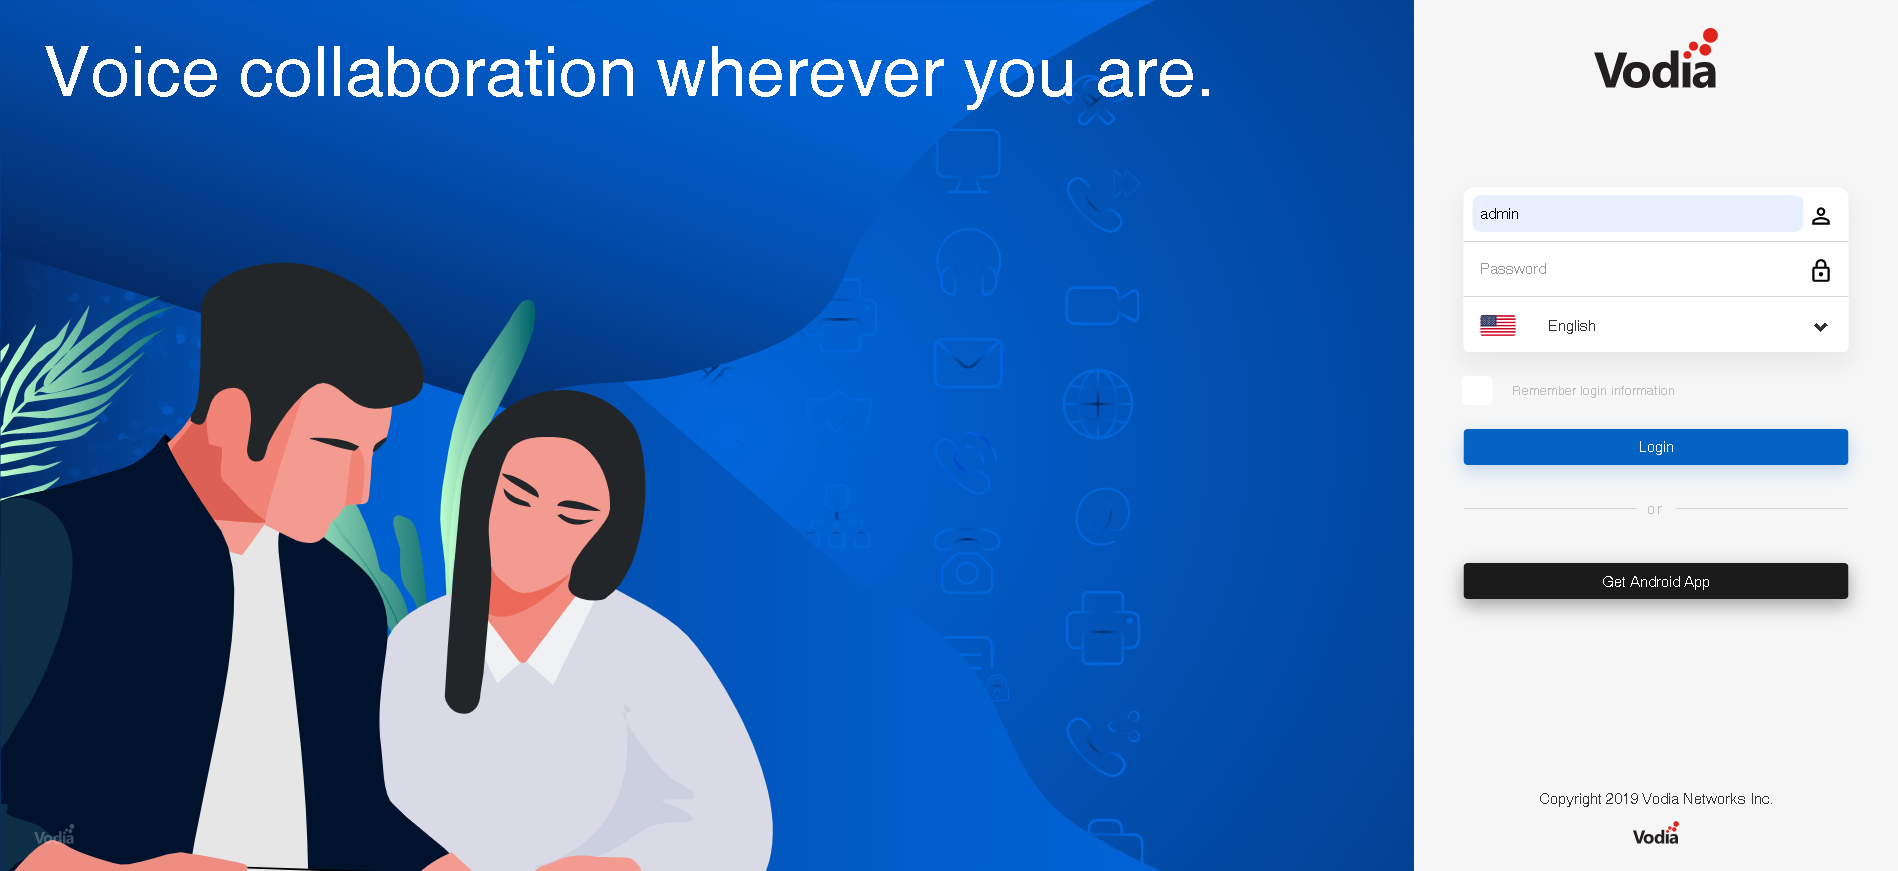
You will be presented with the license terms, click Agree to continue.
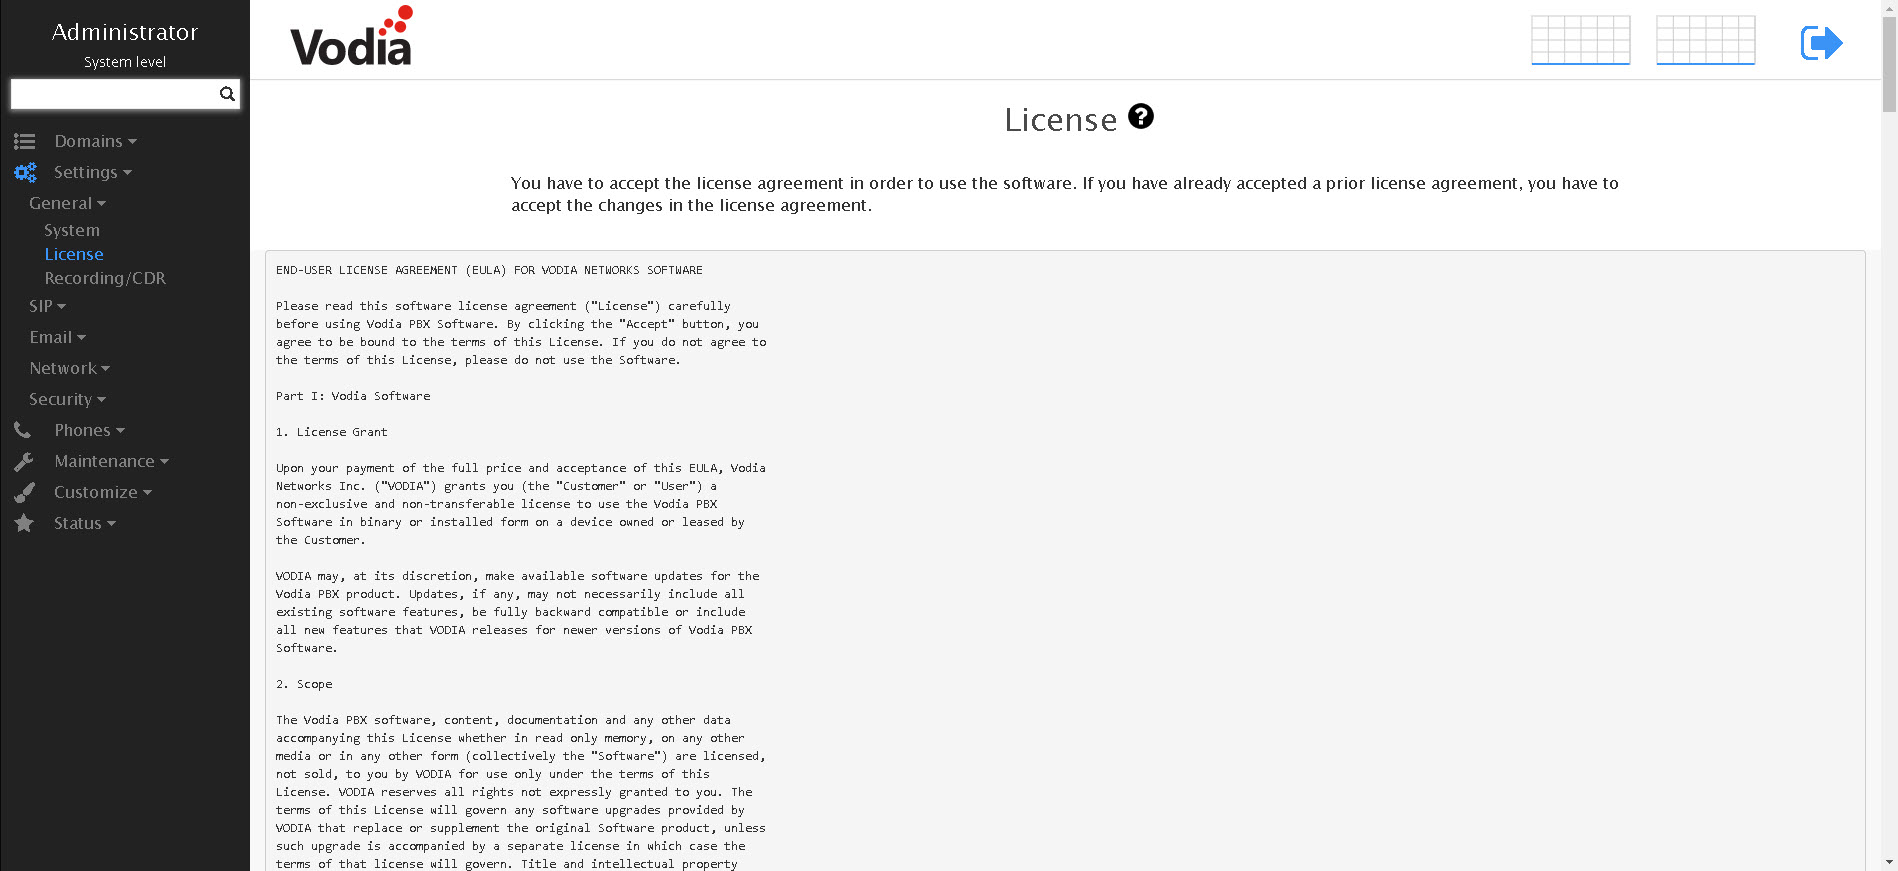
Vodia PBX license
- The Vodia PBX is not licensed. To acquire one, navigate to https://portal.vodia.com/en/register
- Looking to host multiple clients? Ask about out multi-tenant edition https://vodia.com/hosted
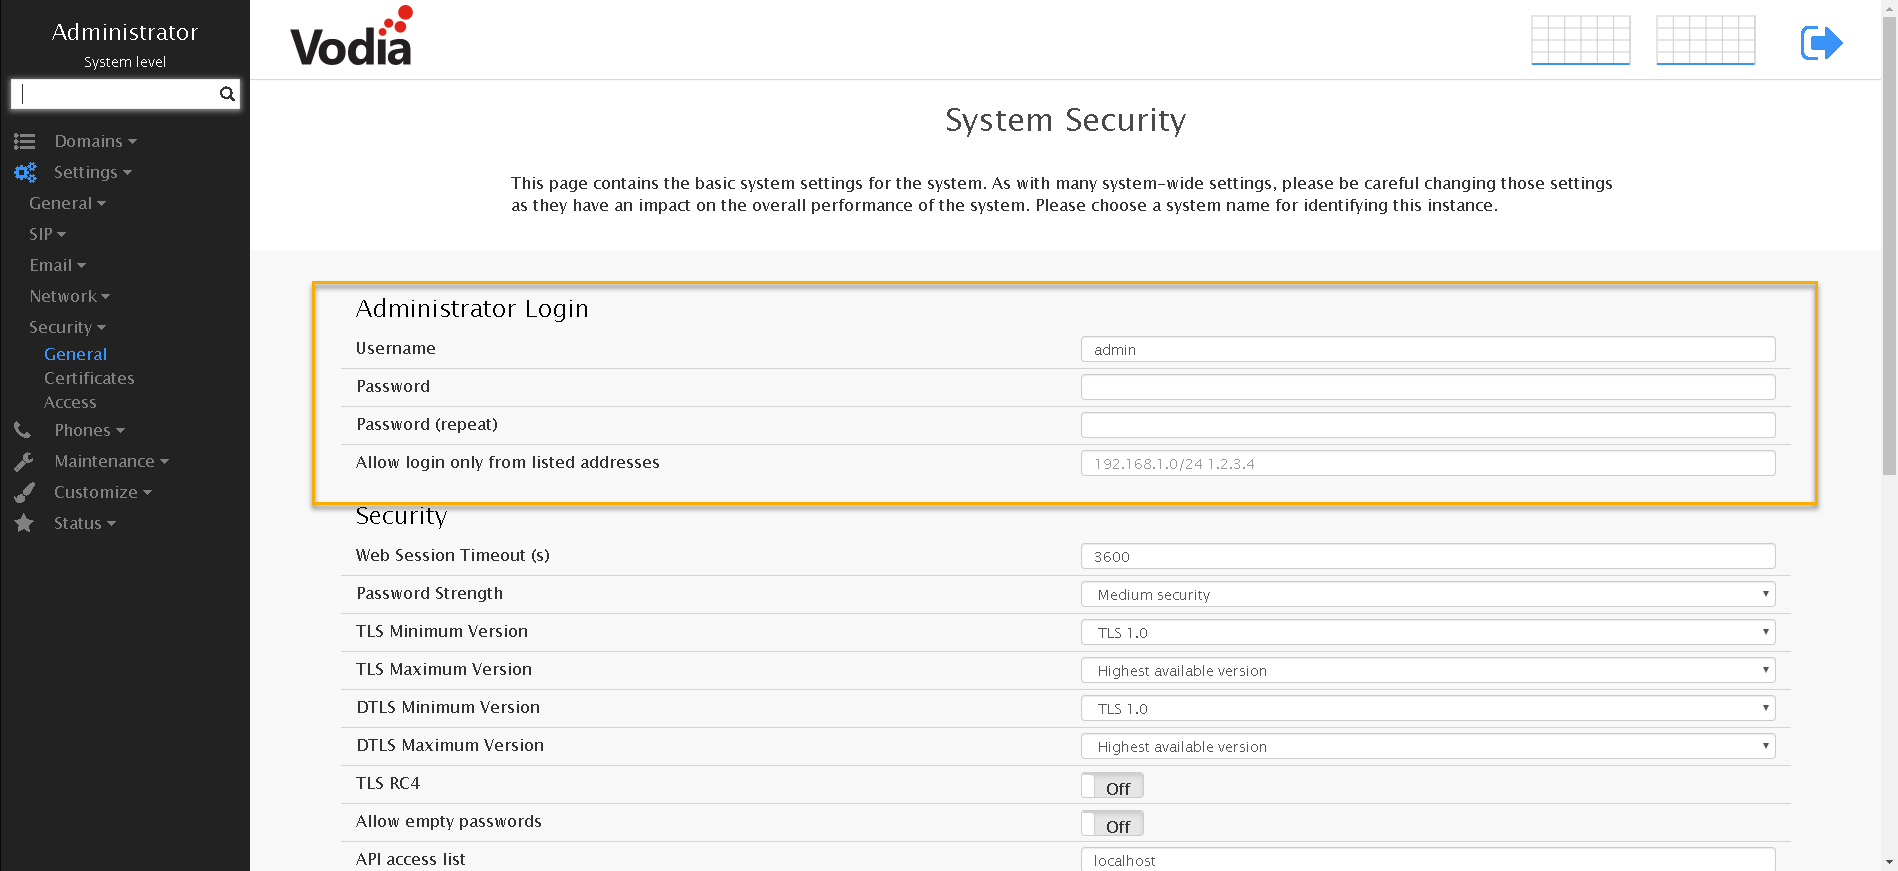
Setting up the login password
Navigate to Settings --> Security -->General
- Enter a username
- Enter a password /repeat
- Allow login only from listed address ( is optional)
- Save the password in a safe place
Behind NAT
Since Google Cloud is behind NAT, we need to program the Vodia PBX to use the external IP address of the VM. The ( IP Routing list ) in the Vodia PBX is used to override the operating system IP routing table. (This setting will be consulted by the system before consulting/using the operating system)
To check your internal/external IP address, click on the three-line icon and scroll down to (Compute Engine)
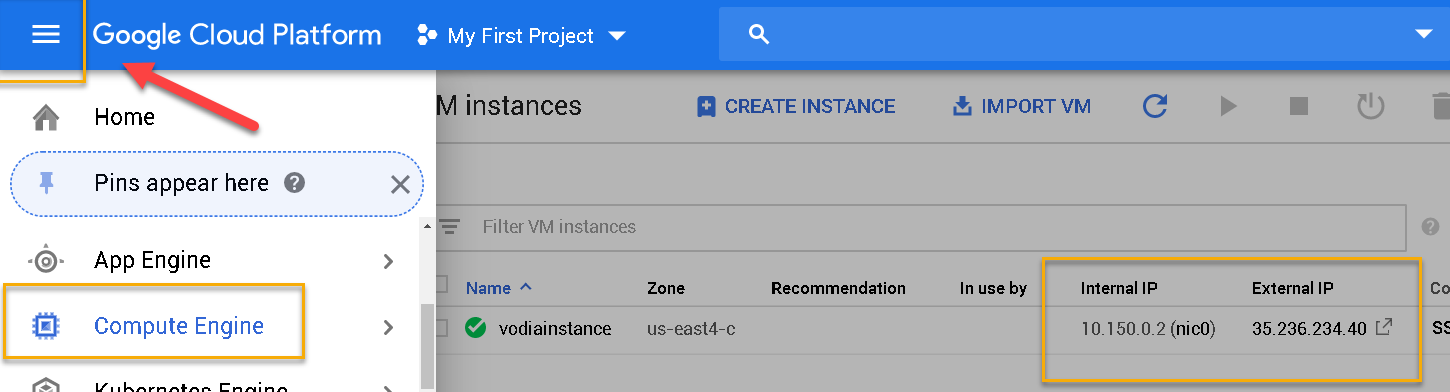
In this example, my internal IP is 10.150.0.2 and my external IP is 35.236.234.40
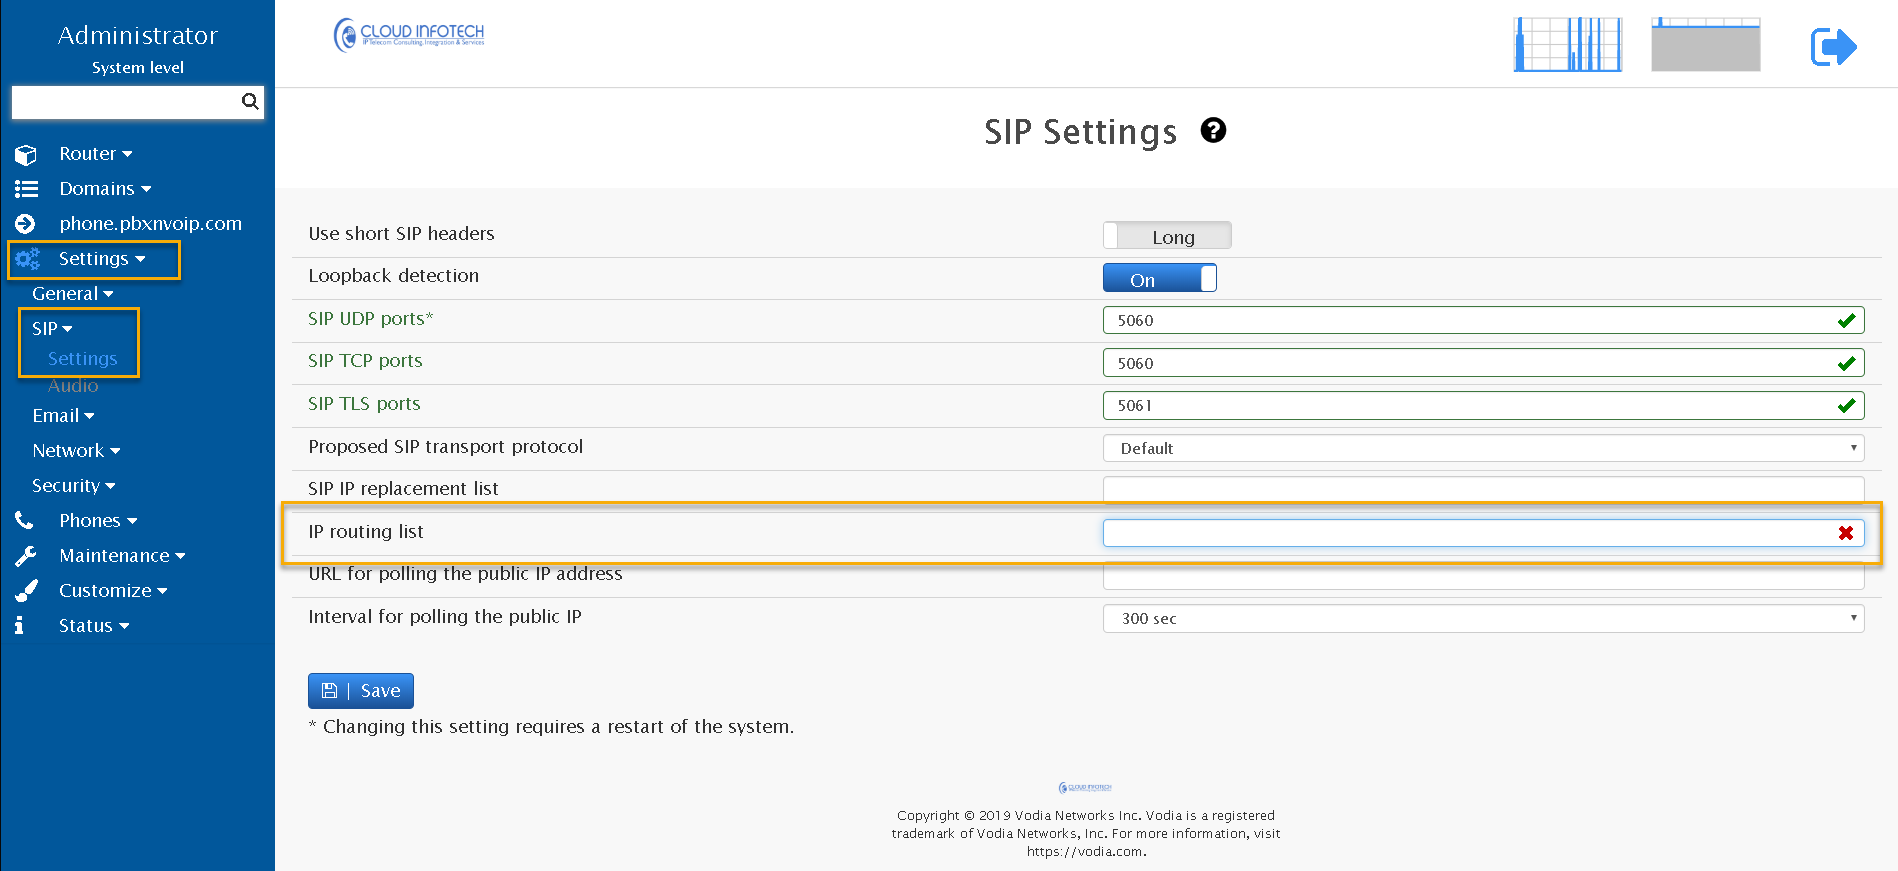
IP Routing list value is as follows..
Example: :10.150.0.0/255.255.255.0/10.150.0.2 0.0.0.0/0.0.0.0/35.236.234.40
To add your IP routing list on the Vodia PBX, navigate to Settings -->SIP --> Setting as shown below, and add your value and save.
Well, that was fun! To learn more about the Vodia PBX phone system, visit us at https://vodia.com/getting-started-with-vodia