
How to configure your Telynx SIP trunk with Vodia PBX
This article will provide you with a step-by-step guide for configuring your Vodia phone system with Telnyx phone service using Registration.
The first thing we need to do is get you set up on the portal.
Configuring your account on the Telnyx
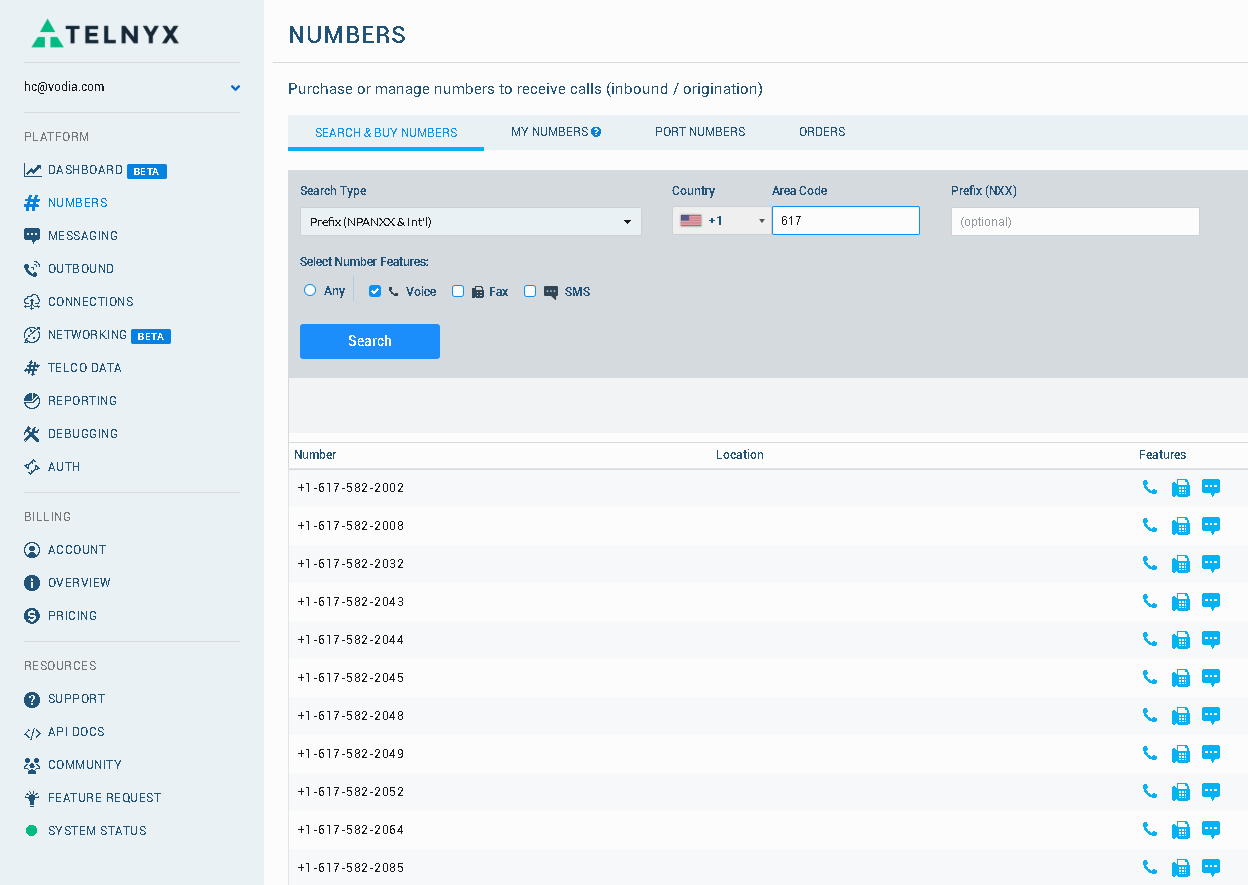
Purchase a Number:
-
Visit the NUMBERS page via the navigation on the left-hand side
-
Select the SEARCH NUMBER tab
-
Select your search type: (NPA-NXX, Region, Toll-Free or Advanced)
-
Input your search criteria and click SEARCH
-
The result will display below
-
Click "+ADD to CART" to select the number(s) you'd like to purchase
-
Click on the Shopping Cart to view your selected numbers and check out
-
Once purchased, your number will be visible on the "My Numbers" tab within the NUMBERS page
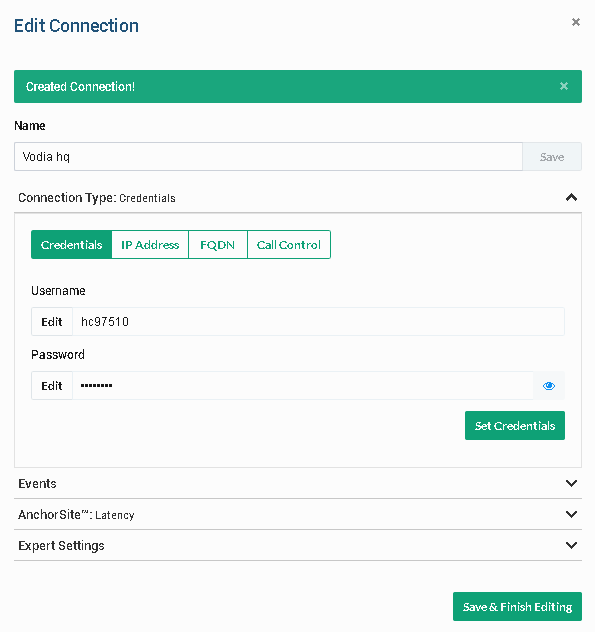
Setup Up You Connection
-
Visit the CONNECTIONS page via the navigation menu on the left-hand side
-
Click the "ADD CONNECTION" button (located toward the top right corner
-
Input a name for the connection
-
Select "Credential" for your authentication Method and input a Username and Password of your choosing and is secure.
-
Click the "CREATE" button to finish creation your connection
Note: You can also set up the connection with the external IP address of your Vodia PBX or the FQDN.
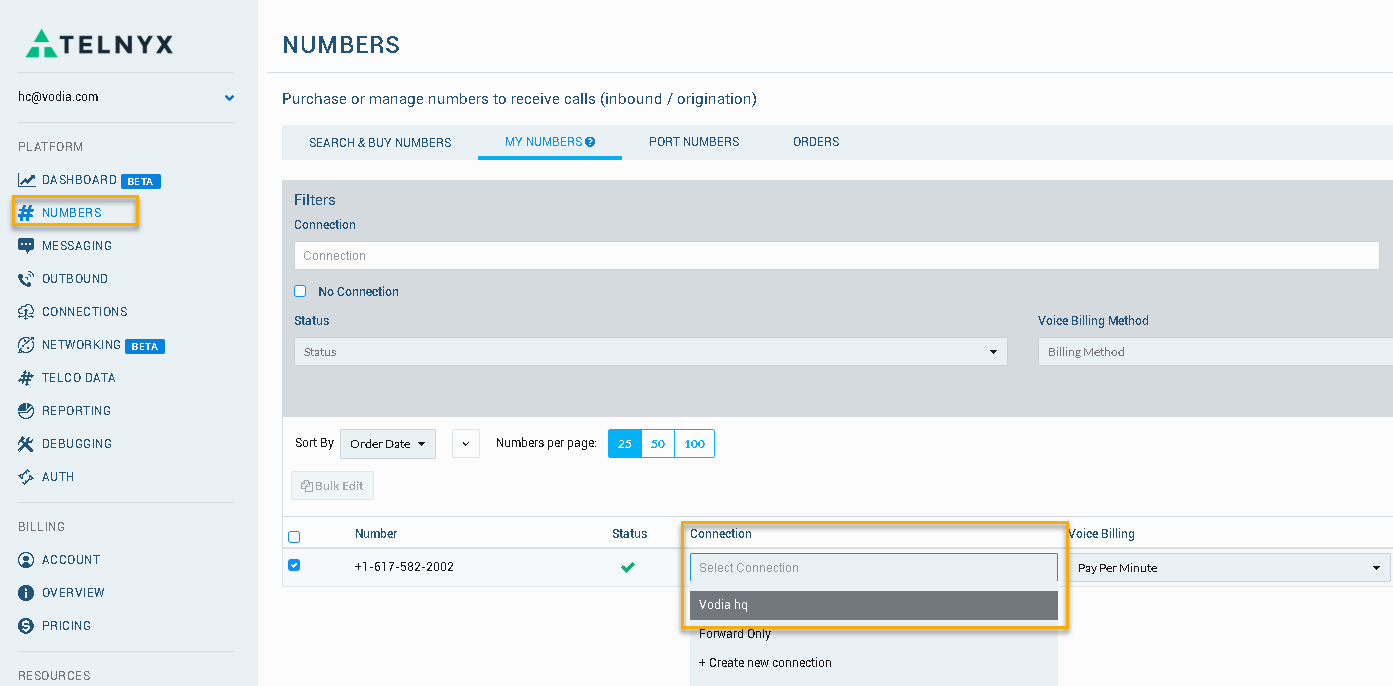
Provision your Number: (Assign to a connection)
-
Go back to the NUMBERS page via the navigation menu on the left-hand side
-
Select the MY NUMBERS tab (This may have defaulted to this already)
-
Click the "Select Connection" drop-down next to your number. You should see the connection you just created -select it
-
Your number is now all set on the Telenyx user portal
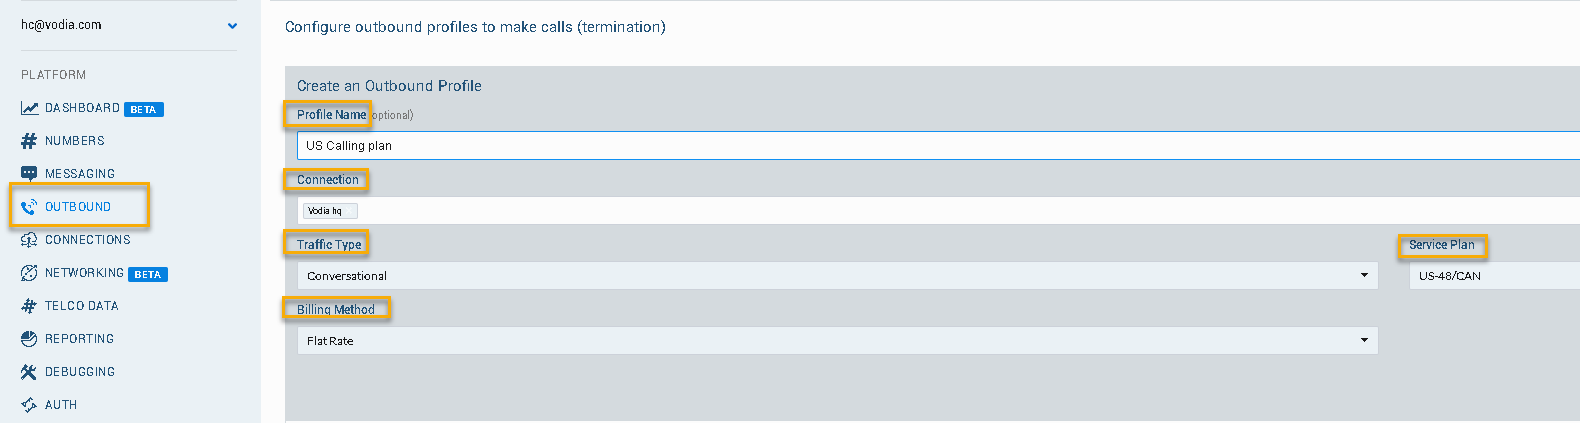
Create an Outbound Profile
-
Visit the OUTBOUND section via the navigation menu on the left-hand side
-
Click the "+ ADD OUTBOUND PROFILE" button (located towards the top right corner)
-
Select the connection you created via the "Select Connection" drop -down
-
Choose the "Traffic Type and "Service Plan" that meets your needs.
-
Click "ADD"
-
You are no setup for outbound calling.
Configuring Vodia PBX User-Pass Authentication
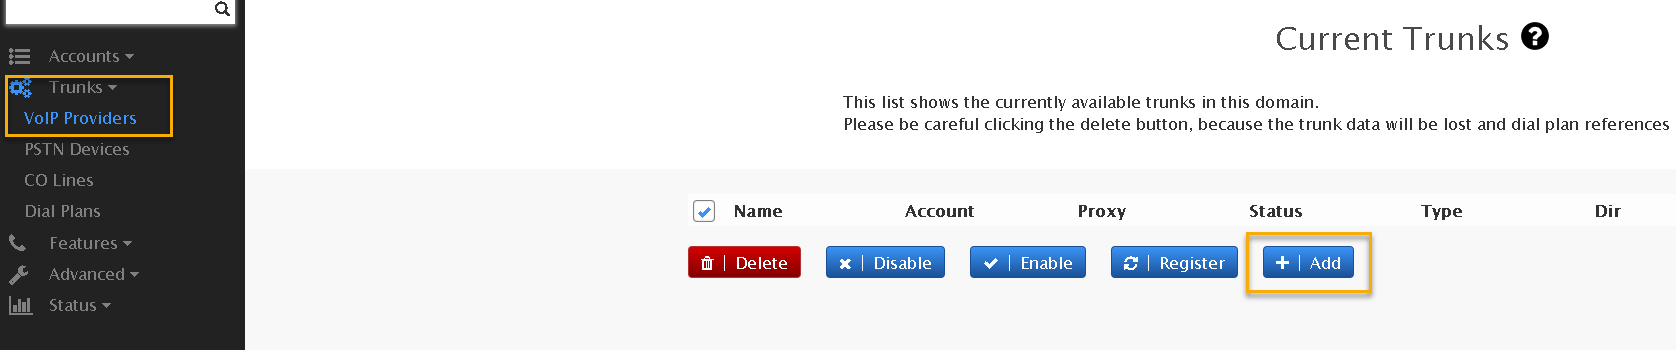
In your, Vodia PBX navigate to your Domain, and on the left-hand side choose TRUNKS ---> VoIP Providers
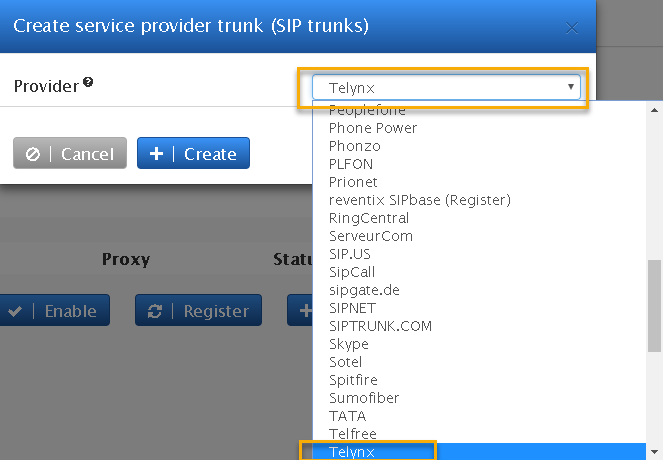
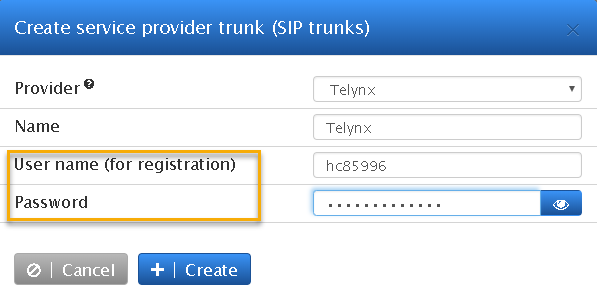
Click on add and choose Telnyx trunk, and enter the user and password you've created in your Telnyx account
Click on create
The Vodia PBX has the Telnyx template built in, so there's no need to enter the SIP outbound proxy and trunk headers configuration. Vodia automatically creates a dial plan for the domain so there's no need to create a dial plan unless you wanted to edit it.
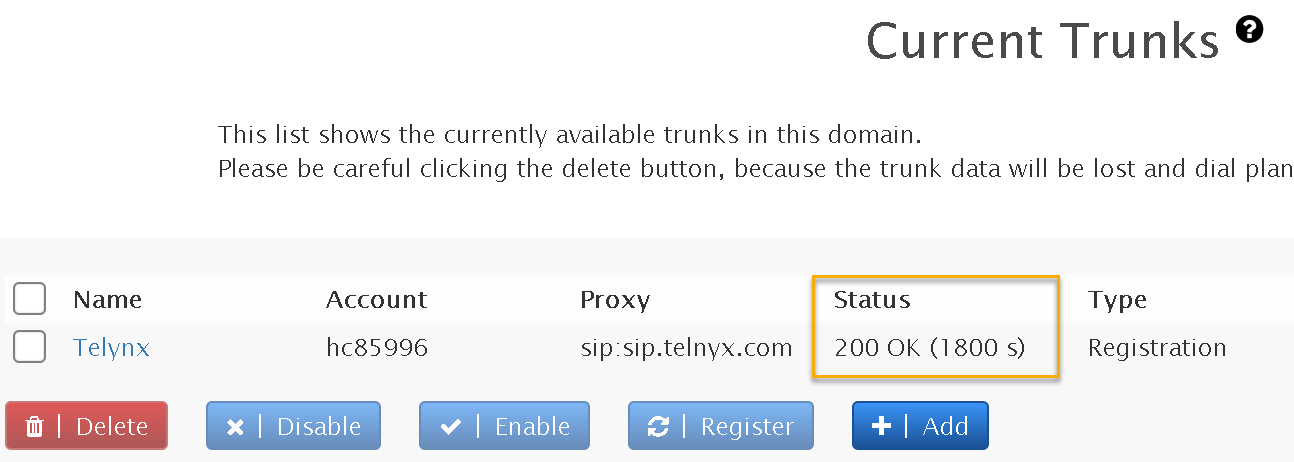
Routing incoming calls
Navigate to your registered Telynx trunk, and scroll down to set the incoming call under "Routing/Redirection"
Vodia supports the following inbound methods.
-
Send all to the destination request URL
-
Send all calls to a specific account
-
Send to a 10 Digit DID
-
Match extension after a prefix
-
Use a list of expression
For this exercise, we are going choose "Send all calls to a specific account" When you call into the system all calls will go the specified extension.

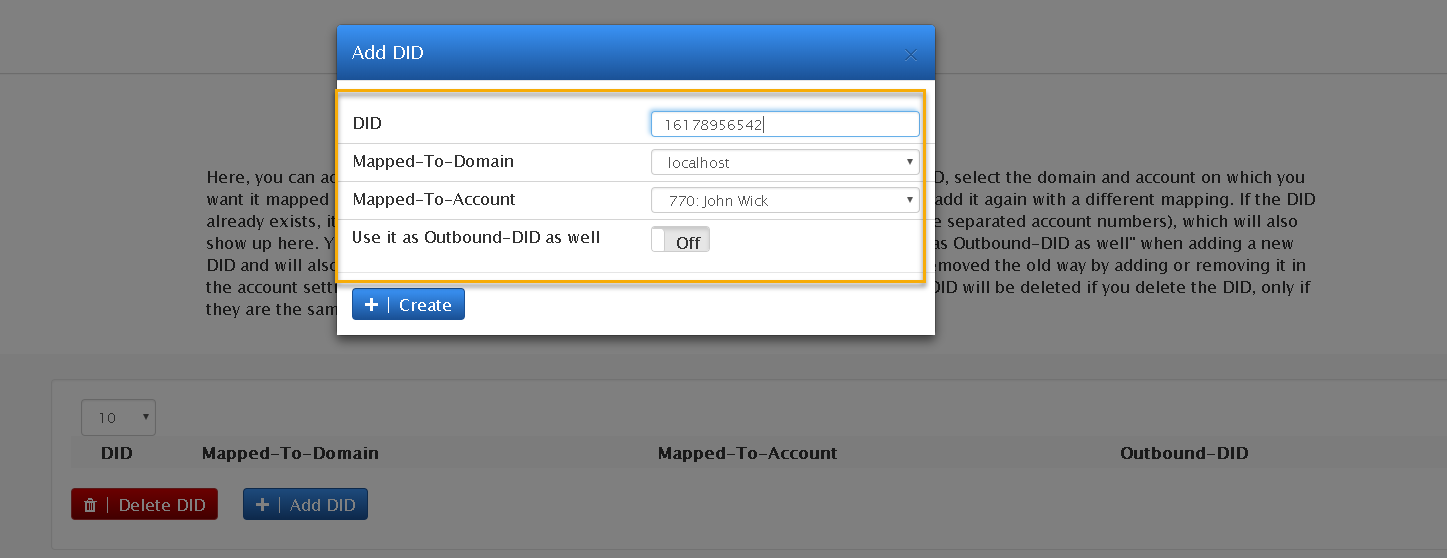
If you have multiple Telnyx phone numbers you would like to route into the Vodia PBX, you can follow these steps:
DID Management
Navigate to DID management in admin mode
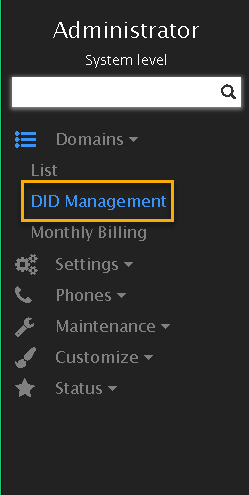
The DID management will help you configure multiple DIDs by assigning them to specific extensions the system.
Navigate to your Telnyx trunk from your Vodia PBX system and scroll down to "Routing/Redirection" and choose "Send all to the destination request URL"
For more technical information about the Vodia PBX visit us at https://doc.vodia.com/