Avaya Sip phone J1 Series plug and play with Vodia

Before deploying the Avaya J179 with the Vodia phone system, please follow these directions https://doc.vodia.com/docs/types-of-phone-provisioning
Avaya J179 series phone can be provisioned to the Vodia phone system in the following deployment scenarios.
1. DHCP Option 66
2. Manual Provisioning
Peering up the Avaya J1 series phone to the Vodia extension
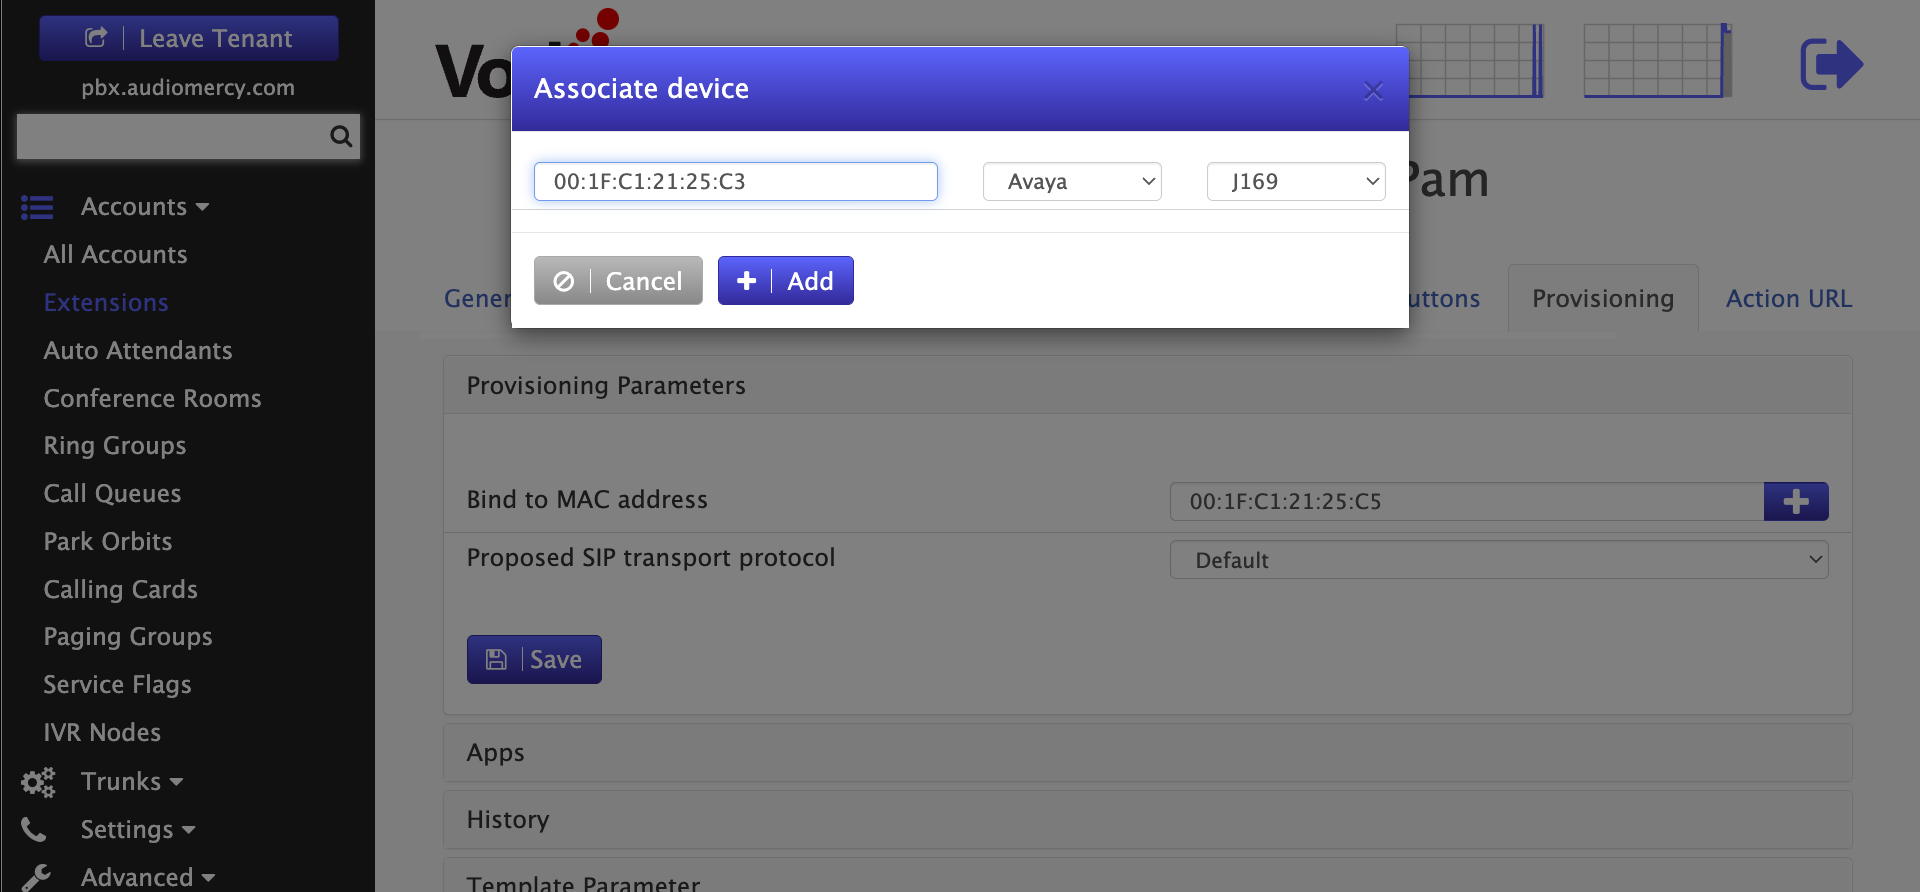
We will enter Avaya's Phones MAC address into the Vodia phone system, to add the MAC address to the extension simply navigate to "All Account" Extensions and then choose an extension you will like to pair the Avaya phone, next click on "Provisioning"
Below you can add the Avaya MAC address by copy-pasting into the MAC address box or you can press plus button + Add button, then you can enter your Avaya MAC address, Manufacture, and your desktop model.
This method creates a button template for the phone automatically which you can also modify. Here's documentation on buttons

Here are the steps the make the Avaya J179 provision with the Vodia phone system.
Avaya provisioning through the phone's display settings
- To log into the unit you will need to press "NO" to "Auto-provisioning now" when the phone is operational
- Press Admin and enter the Administrator code 27238
- Choose "IP Configuration" Scroll down to "Servers"
- Enter the IP address of the Vodia PBX or the DNS of the PBX, you can choose between HTTPS or HTTP
- The phone will reboot and provision to the phone system
Avaya Web Interface provisioning
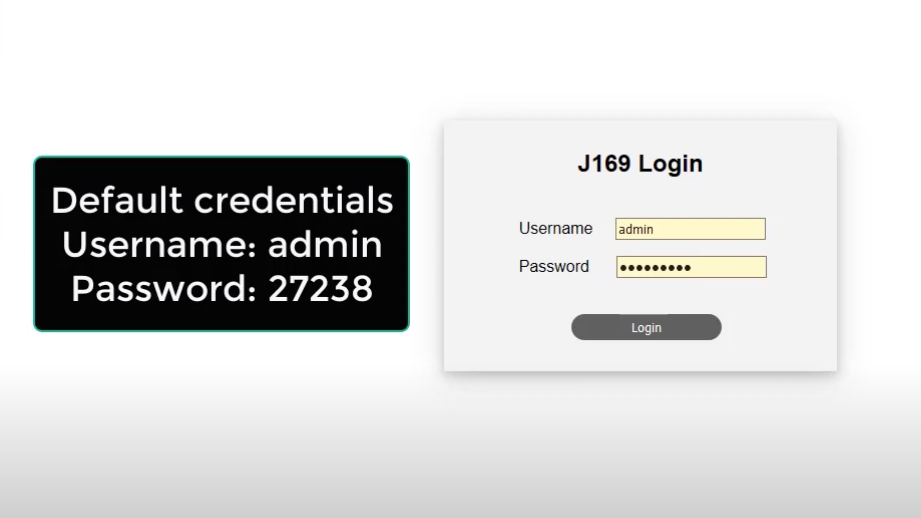
- Enter the Avaya J1 IP address
- User: admin Password: 27238
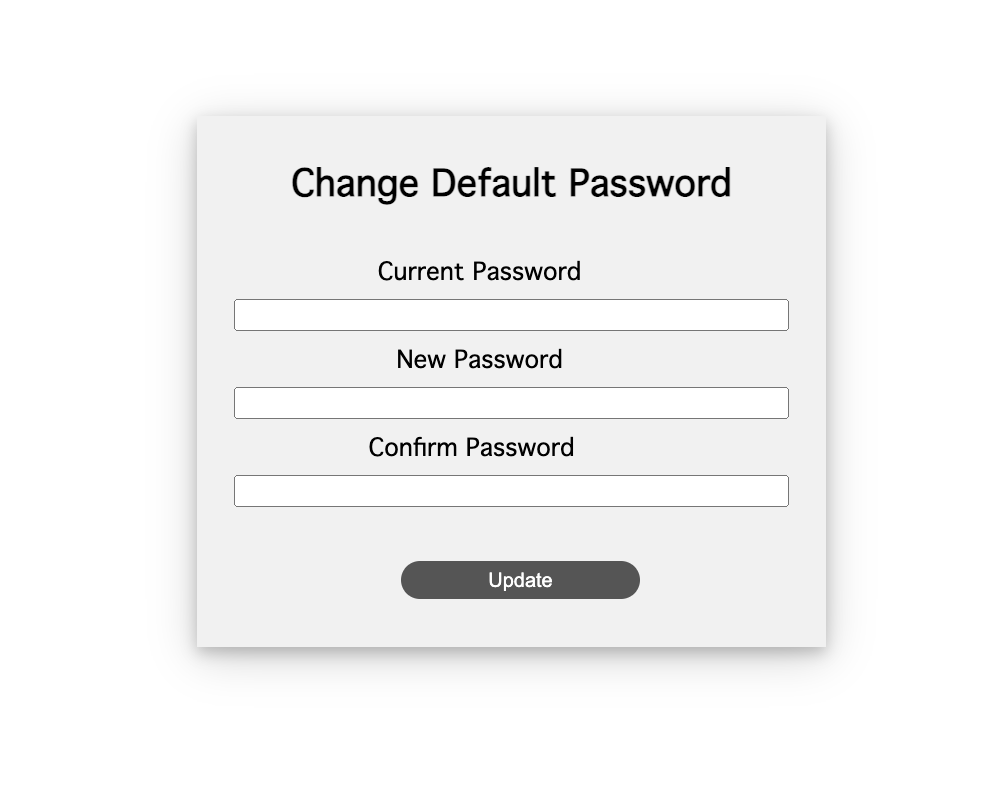
- You will be presented with another page to enter a new password for the device as shown below.


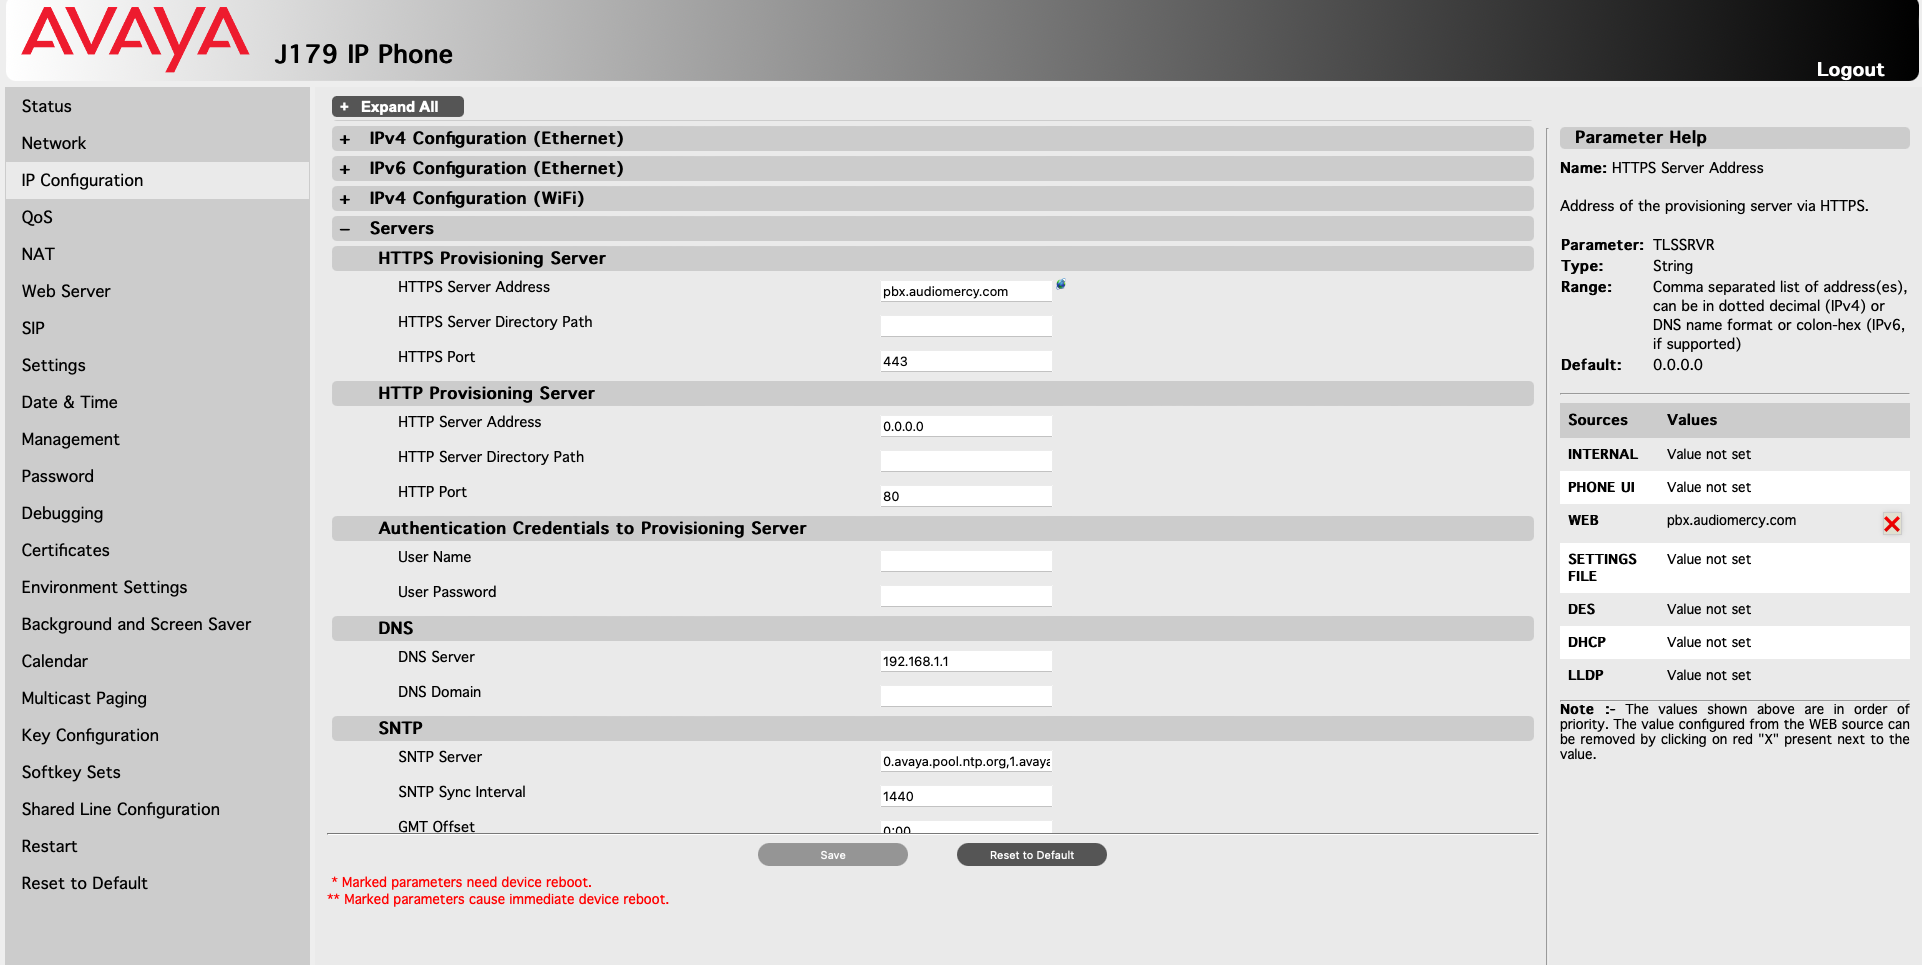
Avaya J179 Web server
- Navigate to IPv4 Configuration (Ethernet)
- Under HTTPS or HTTP you can enter your Vodia phone system DNS
- Save and reboot the unit
- The unit should register after reboot.


