
Provisioning Cisco 8800 3PCC Series phone
The Vodia PBX is able to automatically provision Cisco 3PPC devices (68xx, 78xx and 88xx) through zero-touch LAN provisioning. This example is based on the 8841 model but will also work for Cisco phone 7800 and 6800 series.
The devices should be running sip88xx.11-0-0MPP-7.loads or the latest build available.
Upgrading Your Phone
Make sure you host the firmware with an HTTP server or TFTP server,
and it looks like this URL http://ip_address_server_with_files/sip88xx.11-0-0MPP-7.loads. To prevent typos you could just copy-paste the filename.
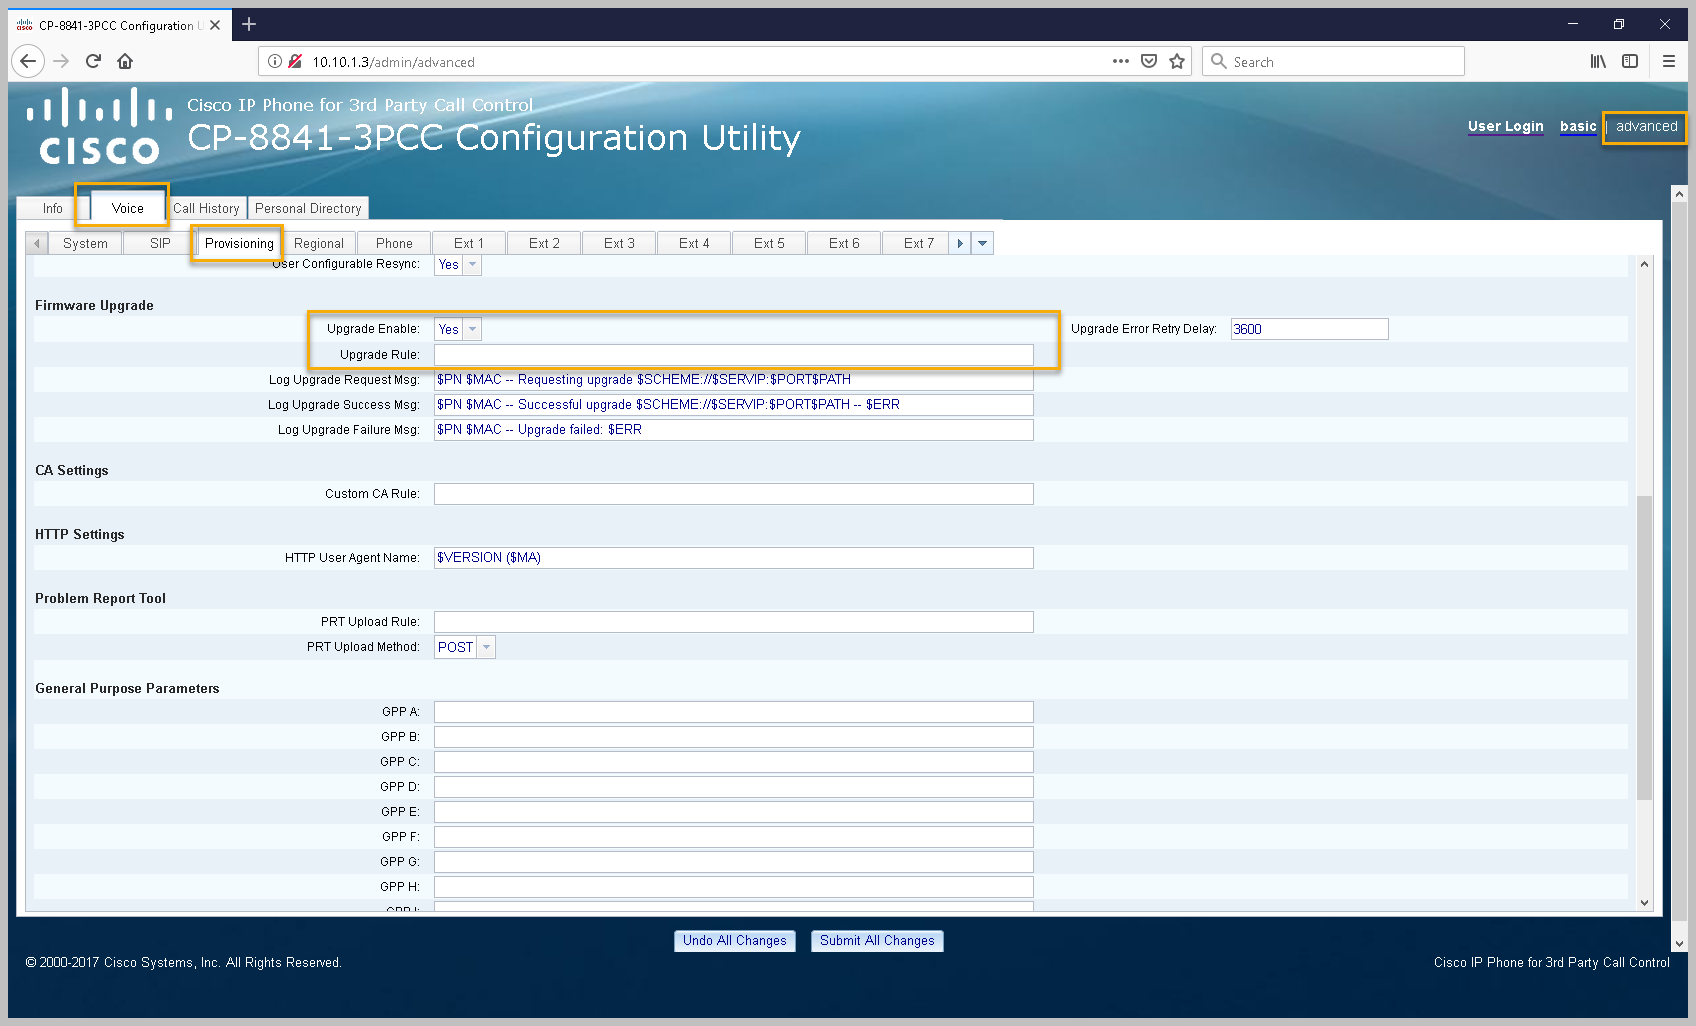
Then submit the upgrade URL under Advance→Voice→Provisioning setting field Upgrade Rule then save the changes
Resetting Your Cisco 3PCC Series Phone
- Remove power from the phone by unplugging the power adapter
- Wait 5 seconds
- Press and hold # and plug the phone back in.
- When the Headset and Speaker buttons are lit, release # and enter the following key sequence: 123456789*0#
Provisioning
When provisioning a Cisco 3PPC desktop phone you should first set the required settings on the Vodia PBX as shown in provisioning document Steps Before Provisioning.
The Authentication user, Authentication password and Authentication PIN settings, enable administrators to use identical usernames and passwords for all devices in a particular domain, simplifying the authentication process from the GUI of the phone when the phone is provisioned to the Vodia PBX.

Setup Devices In LAN
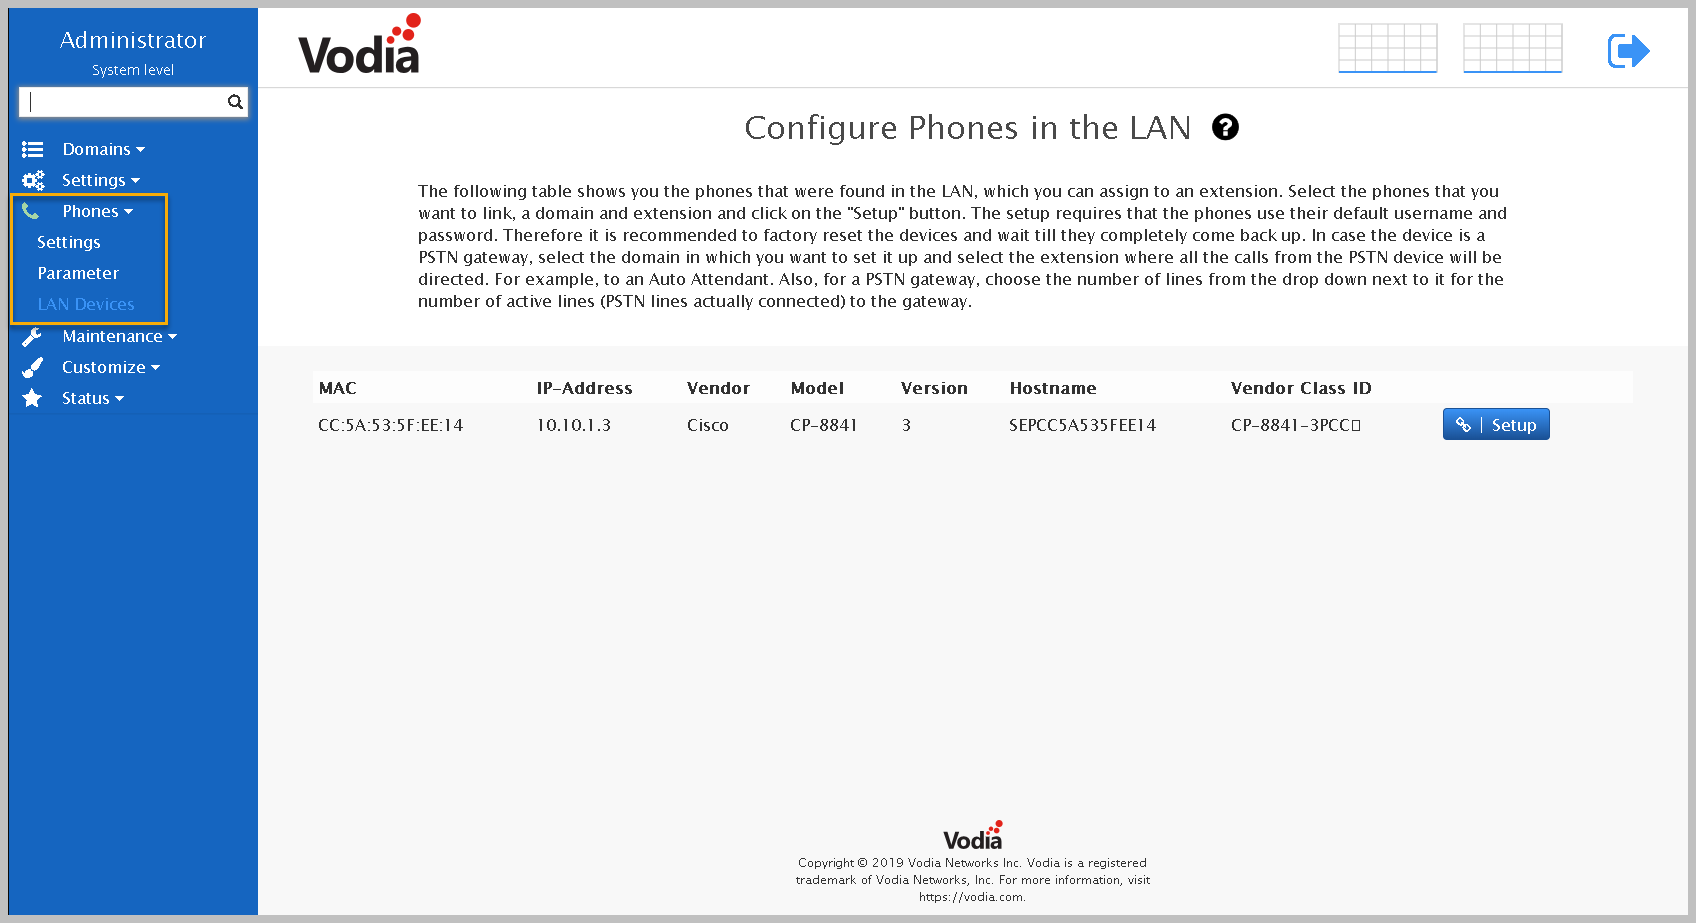
If your phone is in the same LAN as the PBX, you can provision the Cisco 3PCC devices by visiting the (Phones in the LAN) under the Administrator level (Phones→LAN Devices).
Make sure the phone is factory reset (or at least has the default username and password).
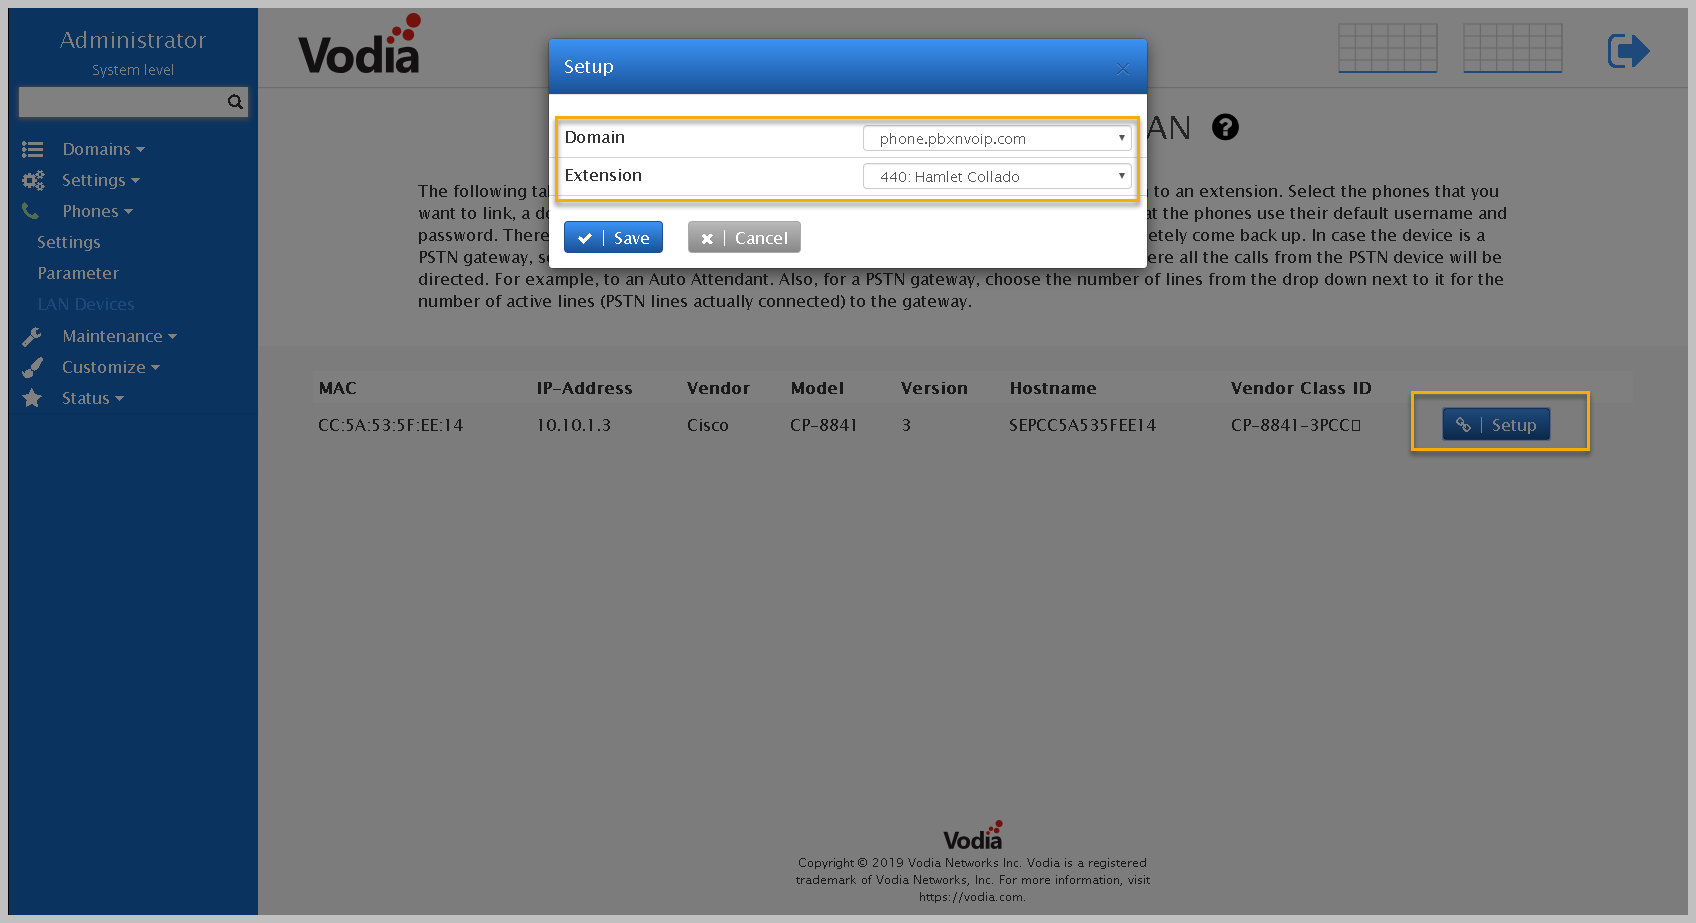
Setup The Extension
Make sure Steps Before Provisioning is complete before proceeding to provision. Continue and choose your Cisco 8800 phone you want to provision, assign each one a domain and extension and press "Setup", and that's it.
The Cisco 8800 will reboot and then be provisioned to the Vodia PBX.
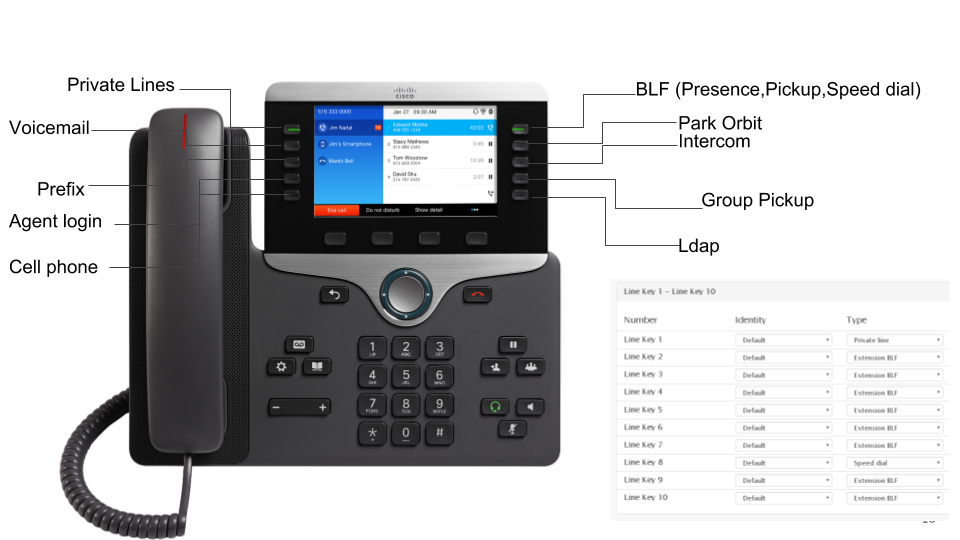
Provisioning Buttons
For a full description visit (buttons). There, you will see how to prepare a new buttons profile, how to set up the individual buttons (like BLF) and how to map that profile to a specific extension.
The numbers for the buttons correspond to the buttons on the phone.
Remote provisioning
If you choose to use the web interface, log into the web interface of the phone, and according to the model, navigate to the page where you can enter the provisioning server address. In models SPA504G and SPA525G, the setting is called Profile Rule found on page "Admin" -> "Advanced" provisioning. In other models, it could be on another page that needs to be found from the documentation of the respective model.
In Profile Rule the setting, add this URL http://PBXIP/csc$MA.cfg where the PBX IP is the IP or resolvable domain of the PBX server. The phone will auto-provisioning without having to reboot it.
Video