Register multiple identities on your SIP desktop phone

Every company has agents that pickup multiple calls, In some scenarios an agent will answer multiple calls for a slew of companies they manage. In just a few steps I will show how to program multiple extensions' identities on a desktop phone, and how to route inbound calls to multiple call agents and make outbound calls with different caller IDs
Overview
- Register multiple identities
- Program multiple identities on your desktop phones
- Program inbound calls
- Show different CID when making an outbound call
Register multiple identities
To register multiple identities on your phone, you will first need to reset the phone to factory default. Next, you will need to find out the IP address of the phone and log into the unit with default credentials.
Next you will need to locate the MAC address of the unit.
- Factory reset the unit
- Find the MAC address of the unit.
- Check if the desktop phone supports multiple identities.
Adding the MAC address
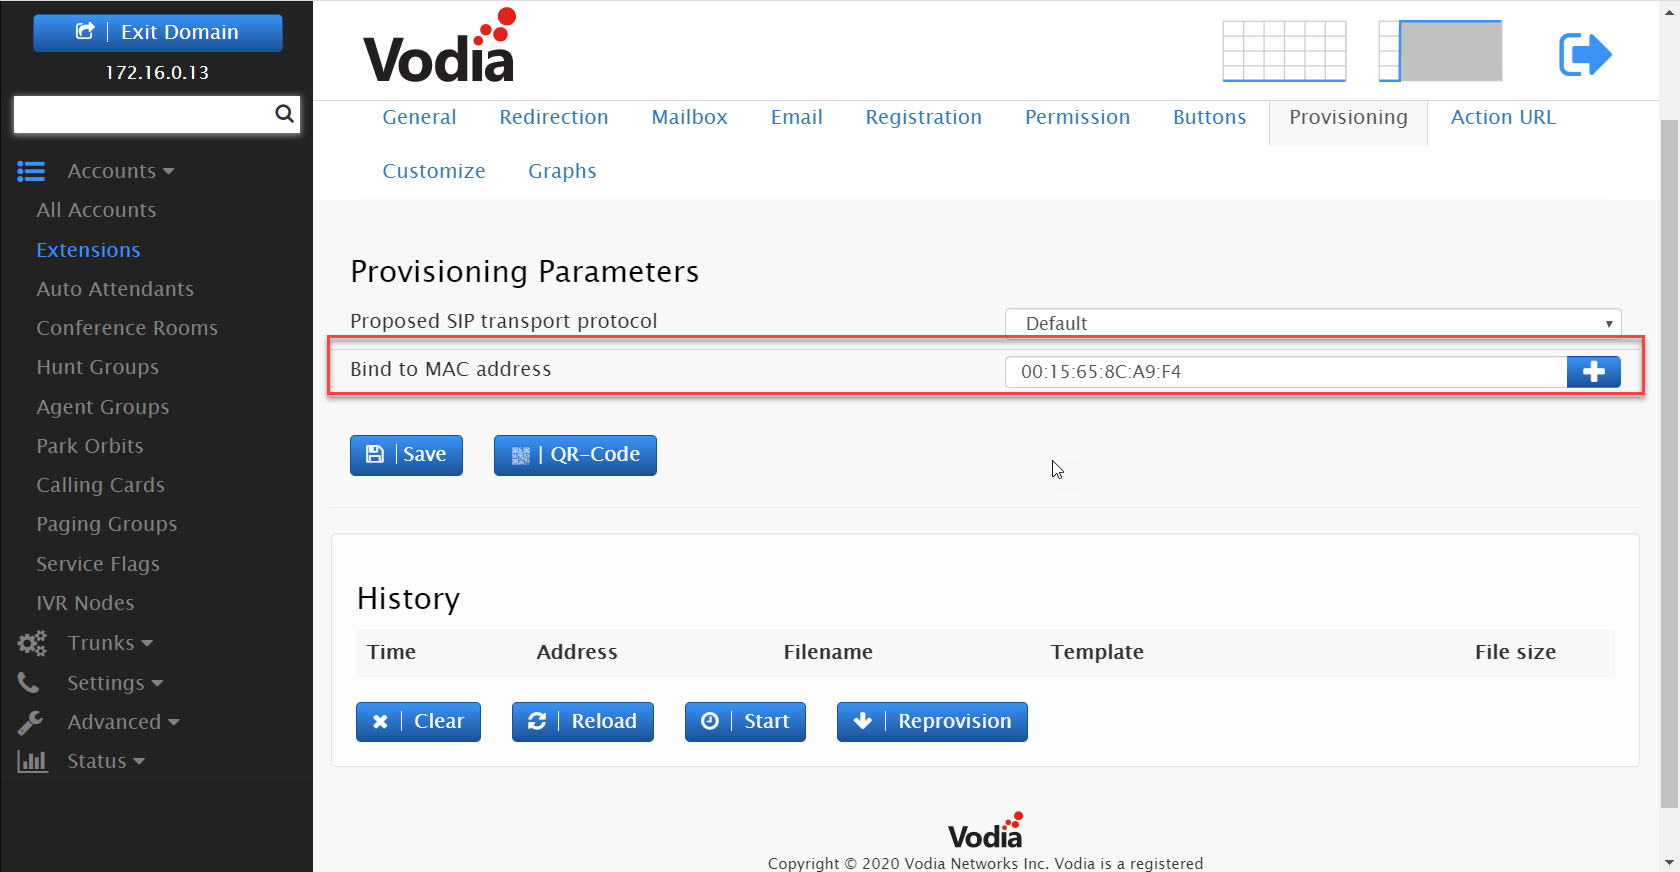
You will need to add the MAC address of the phone to the extensions in order to register multiple identities.
- Log into your Vodia PBX
- Navigate to All accounts and choose extensions
- Choose multiple extensions you would like to register and append the MAC address to each extension.
- Navigate to "Provisioning" and add the MAC address to each extension under "Bind to MAC address"
Open MAC based provisioning
Open MAC-based provisioning on the Vodia PBX is based on a timer. It allows the phone to register based on a timer. If not set, the Vodia PBX will reject the request for provisioning.
- Navigate to extensions
- Tick box, the extensions you've added the MAC address to
- Scroll down to "Please select an action" and choose "Open account for MAC-based provisioning"

Activate Open MAC based provisioning

Manual provisioning
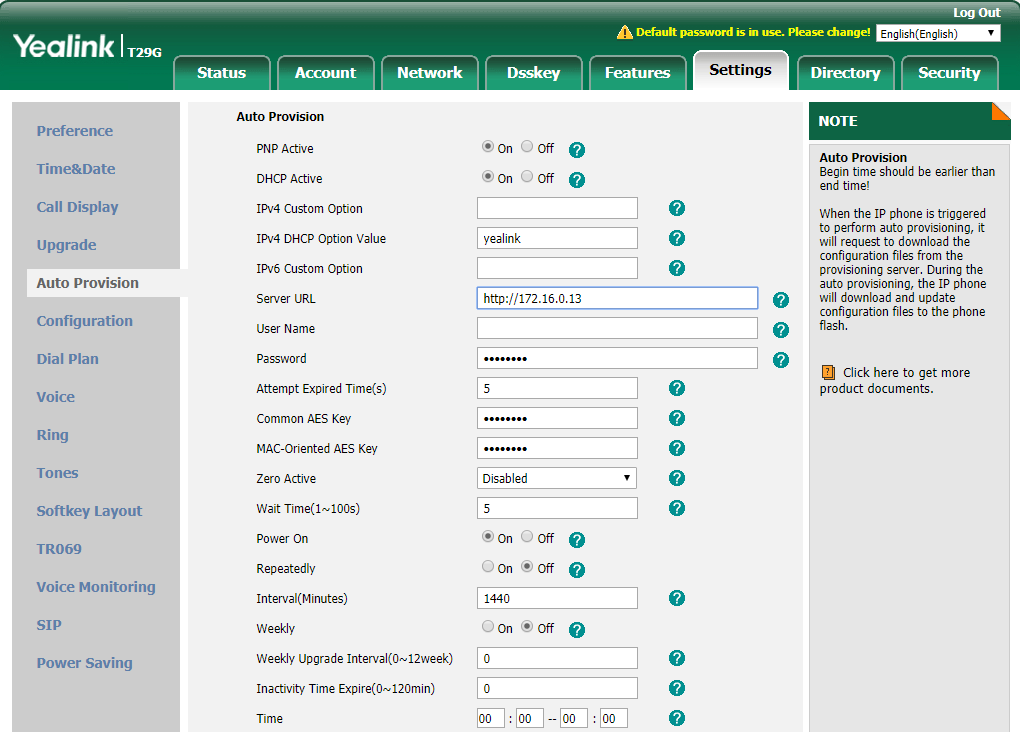
For this tutorial, I am logging into the phone and manually adding the Vodia PBX URL, this can be the following.
- The IP address of the Vodia PBX
- FQDN
- Option 66
- RPS
I am using a Yealink T29G but the procedure is the same for all the phones, that support multiple identities.
Log into your Desktop phone by typing its IP address
- Into the URL of the PBX, if it's local you can also enter http://IP_of_the_PBX
- Save and press the auto-provision now button
Success!
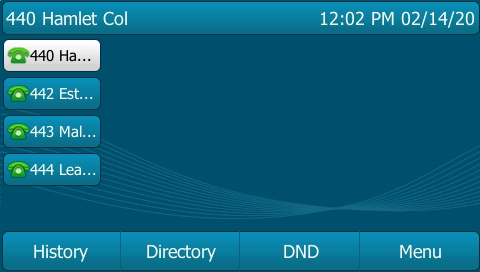
You should now see all registered identities on the phone.
Spicing things up!
Some deployments are unique, for example, let say the customer has the following criteria.
- They need to use multiple CID when making outbound calls, which will show the companie's number
- They need to know how to answer the call when it comes into the queue
Setting up the company name and assigning CID
Since we have registered multiple identities on the desktop phone, all we need to do is change the name of the extensions to a company name and the ANI to each extension.
- Navigate to the extension and choose the extension registered and change the name to their respected company name.
- Under the extension Outbound number (ANI), add the companie's phone number. You can repeat the process for the other extensions.
Note: Since the phone is provisioned to the Vodia PBX, the desktop phone will auto update with the new name.
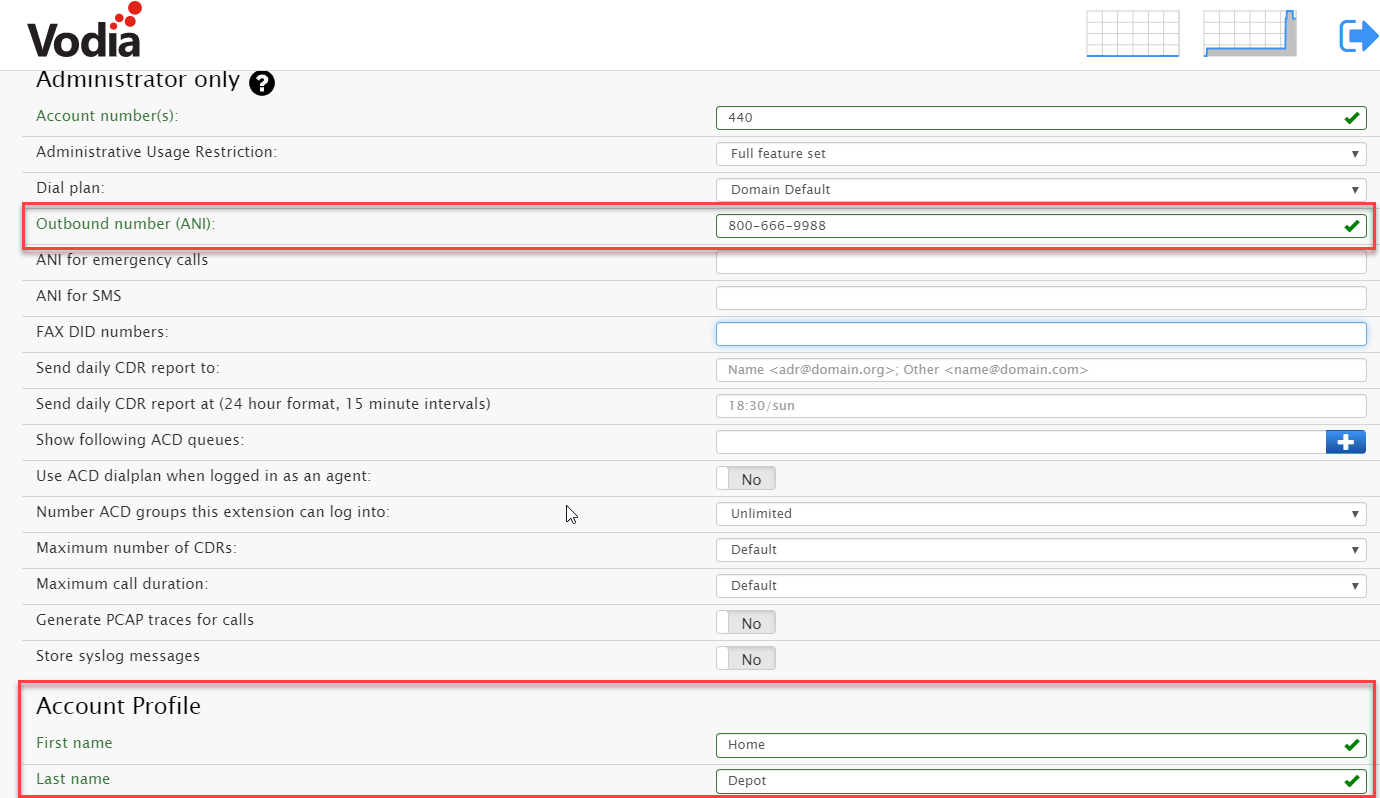
Outbound Call with ANI
As you can see below the user made an outbound call with the company name Home depot with caller ID 800-666-9988.
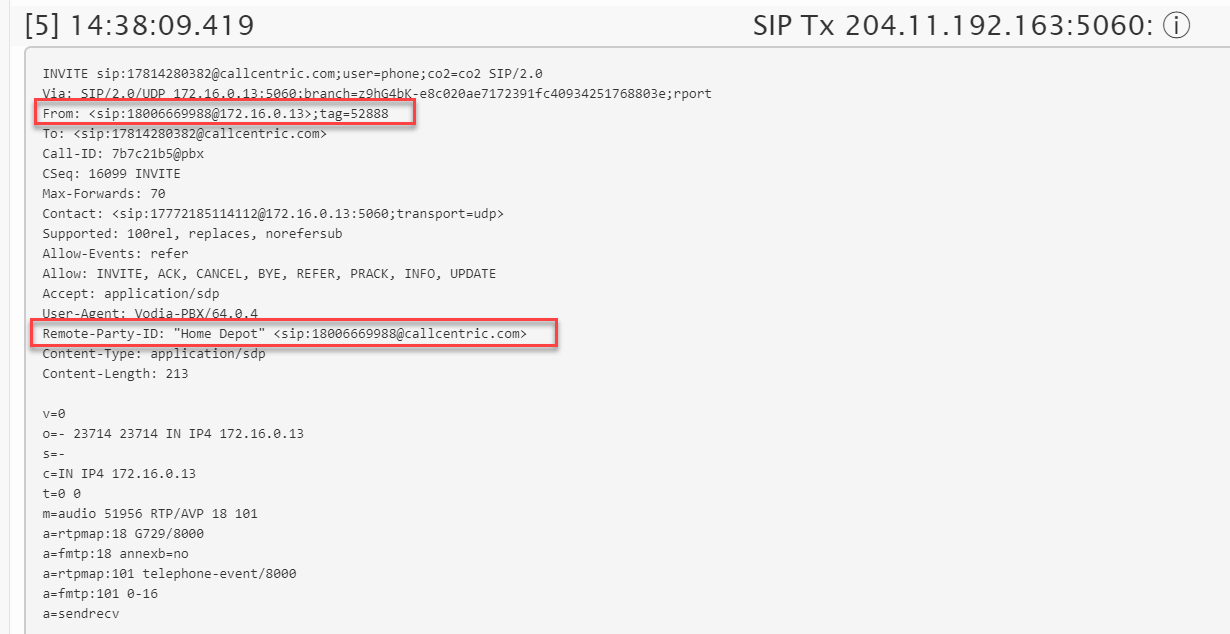
Inbound calls with company from header
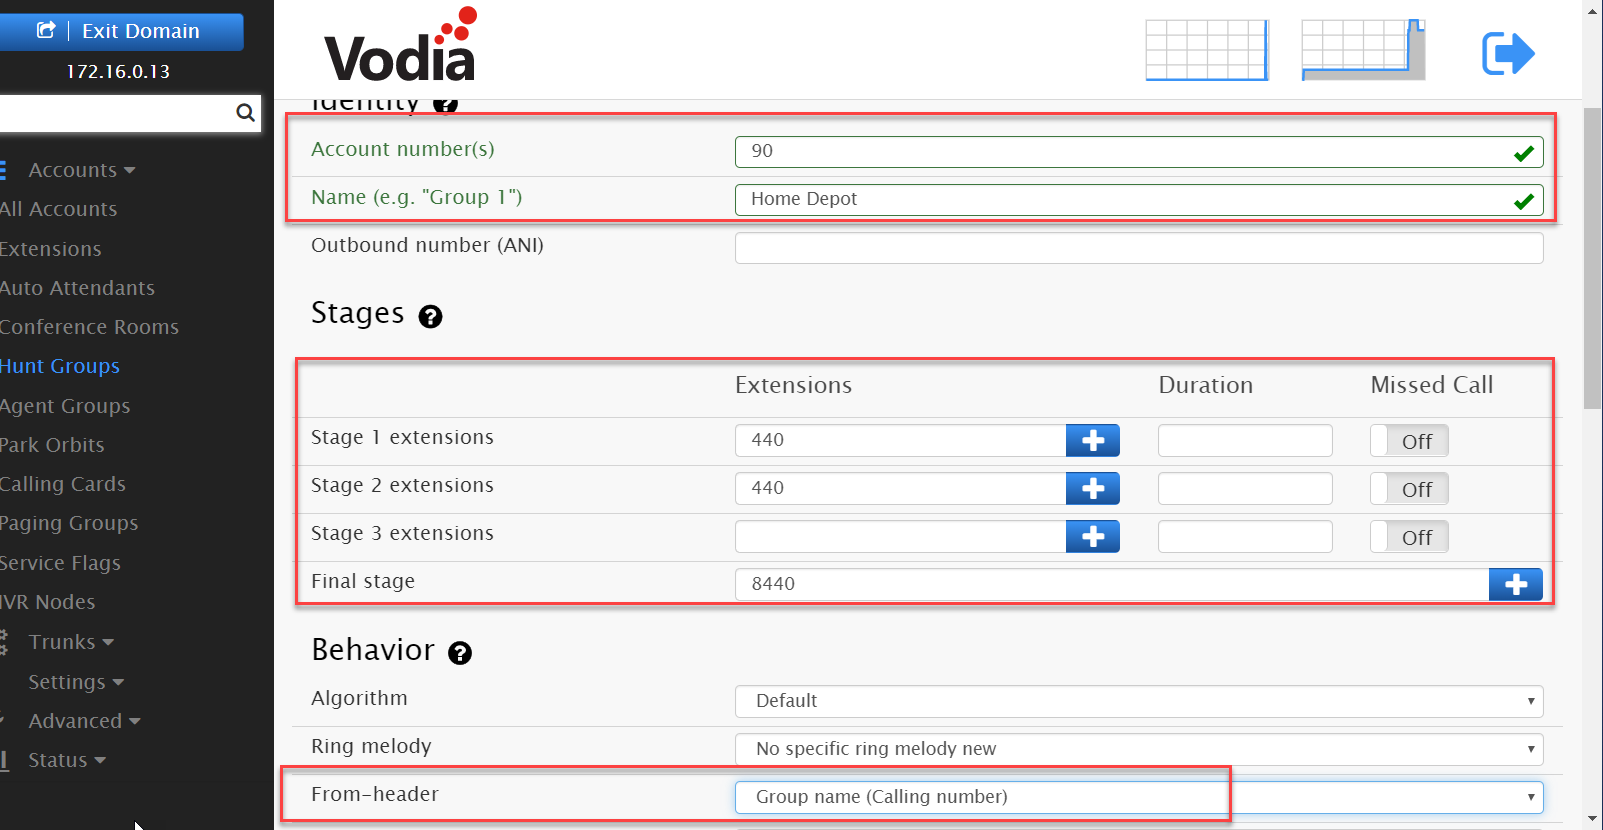
Now that we have the name and CID setup. Let's create a hunt group account/
- Navigate to accounts and choose Hunt groups
- Assign an account number, a DID and the name of the group to one of the company names
Note: When you add a DID to an account, the format is the following: extension number space DID, example 90 1-800-666-9988
- Stage 1-3 can be a specific extension. Final stage can go to voice mail using the prefix 8 and the extension number
- Scroll down below to Behavior and choose the From-header. Here you can choose Group name ( Calling number) or Calling name. This will make it easier for the agent to answer the incoming call with the respective company name.
- Repeat this method for each hunt group and add the extension with their respective company name
Inbound Routing
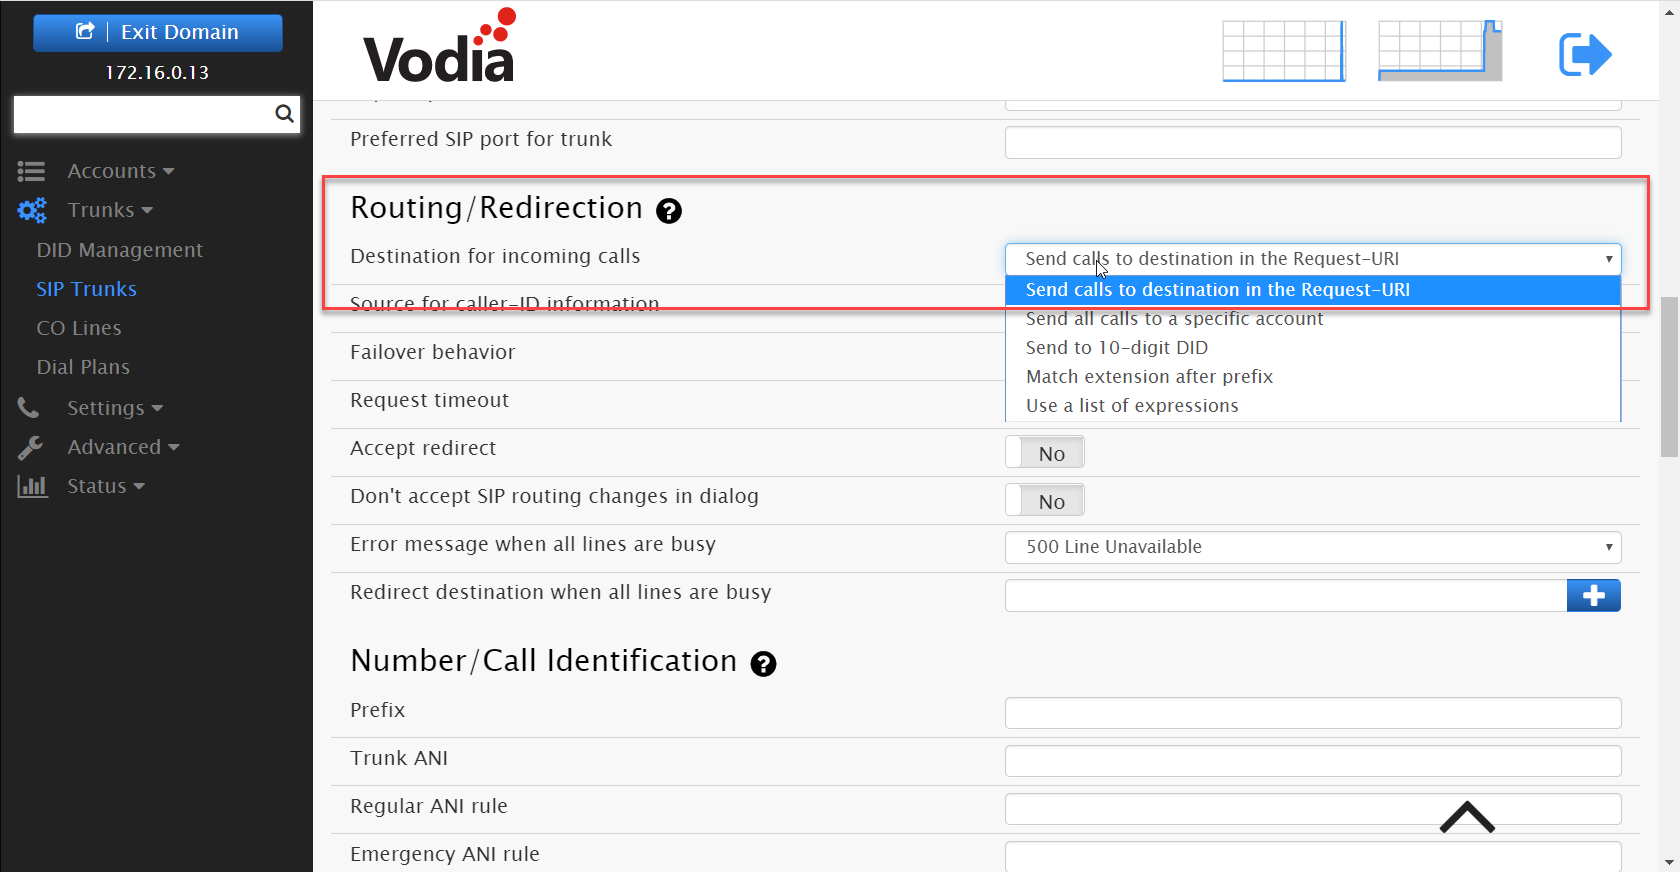
How do we route inbound calls to their respective DID? Well that's easy. Navigate to your SIP trunk and choose the following feature.
- Navigate to Routing /Rediection and choose "Send calls to destination in the Request -URI"
When an inbound call comes into the PBX it will look at the Request -URI and match the incoming DID to the hunt group account.
