
A Step-by-Step Guide to Configuring Poly Edge B20 Desktop Phones with Vodia Phone Systems
Here's a brief guide on how ITSP and MSP can use the Poly B20 series phone with the Vodia phone system
Presquiste
- Vodia PBX must be running version 69.0.3 or higher.
- The Polycom phone must be in its factory default state.
- Your PBX server must be resolvable on the network.
Step one
- Make sure your Polycom phone is powered on and connected to the same network.
- Obtain the IP address of your Polycom phone by pressing the "Home" button and selecting "Settings" > "Network"
- Log into the web interface by entering the IP of the Poly B20
- Default user is admin and password
- The phone will ask you to enter the old password and then enter a new one
- Locate the MAC address of the device under system status and copy your MAC address for later
Step Two
- Log into the web interface of your Vodia PBX
- Note: Version 69.0.3 has a new location in where you will need to enter the MAC address of the unit.
- Navigate to your Tenant ---> Advance ---> VoIP Phones
- Click add and add your model as shown below.
- Enter the phones MAC address under "Bind to MAC address"
- Create

Step 3
1. Log into the web interface by entering the IP of the Poly B20
2. Navigate to System Management --> Auto Auto Provisioning
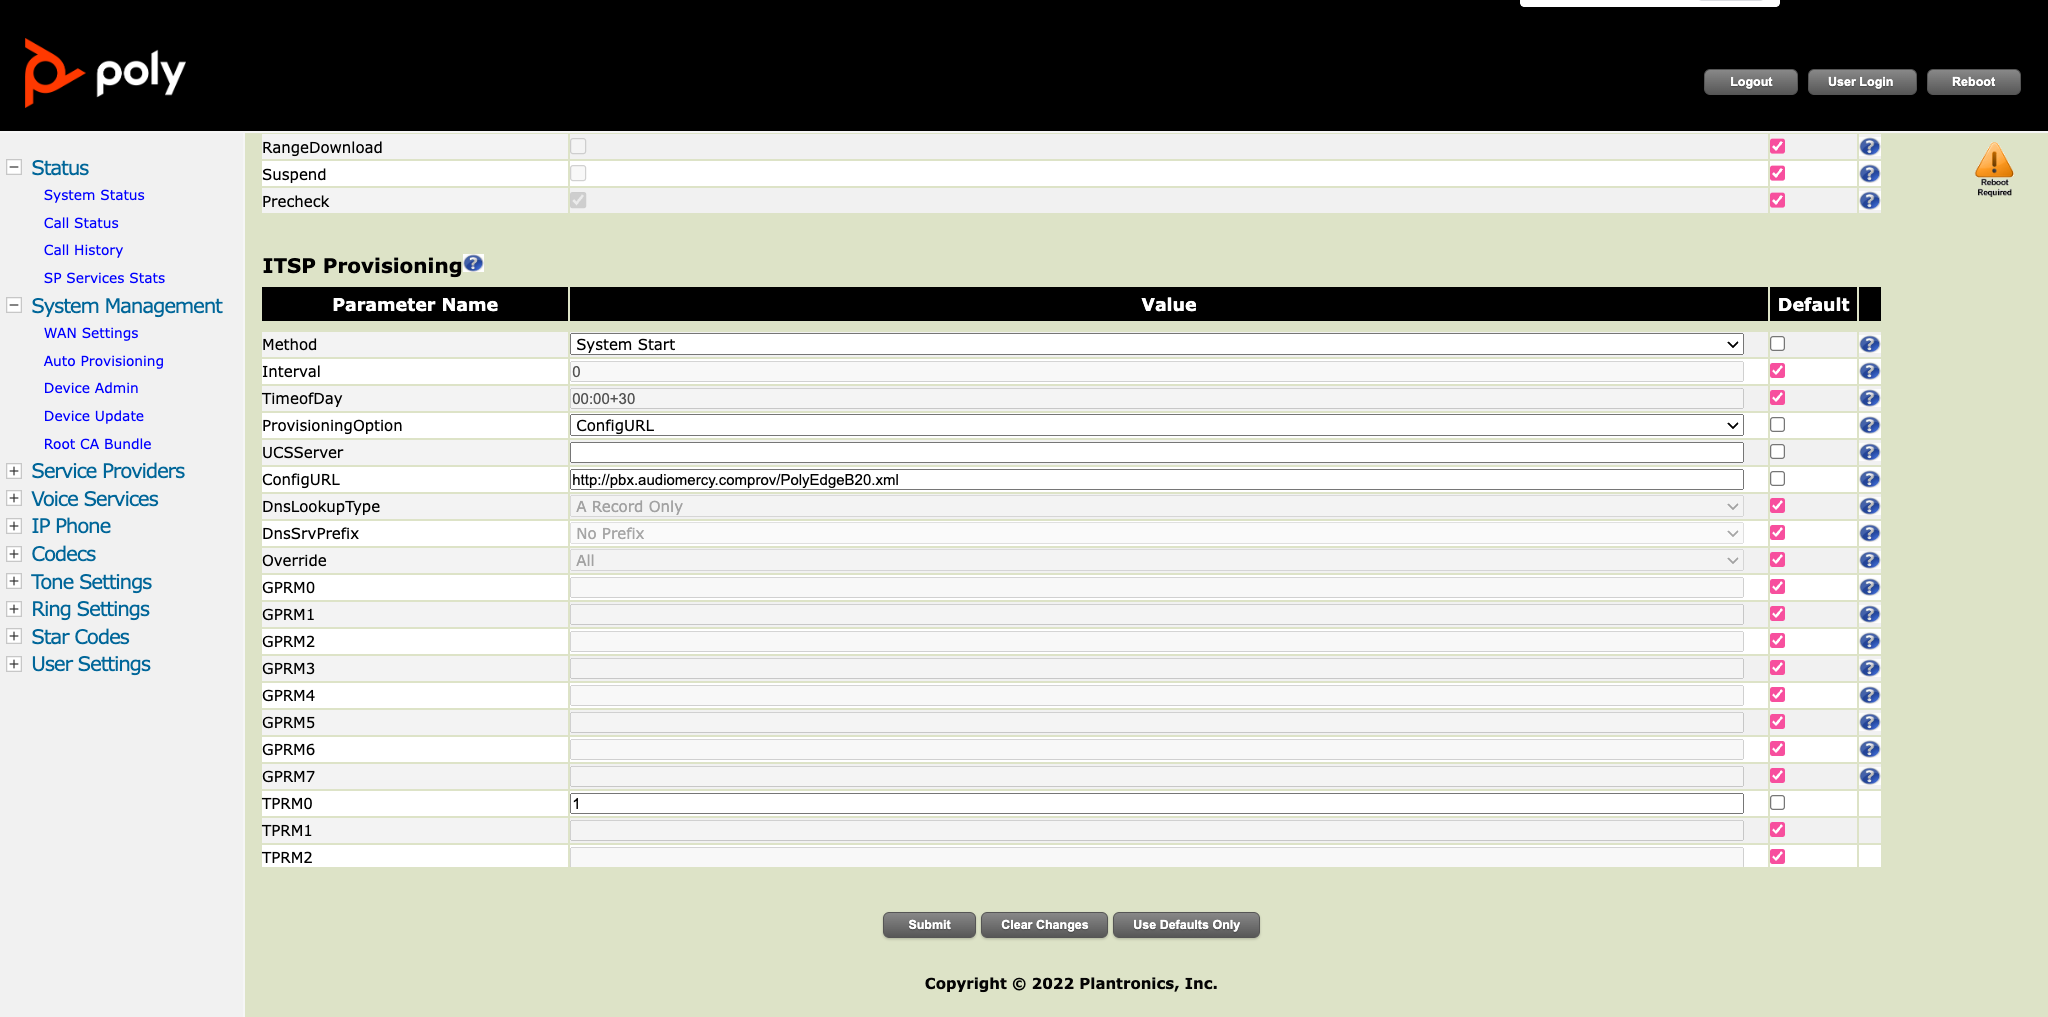
3. Scroll down to ITSP Provisioning
4 Set the following rules as shown below
- Log into the web interface of the Polycom B20 phone by entering its IP address in a web browser. The default username is "admin" and the default password is also "admin".
- Navigate to "Settings" > "Provisioning" > "Provisioning Server"
- Set "Method" to "System Start" and uncheck the default box.
- Set "Provisioning Option" to "ConfigureURL" and uncheck the default box.
- Set "UCSServer" to "Disabled" and uncheck the default box. Also, remove all the Option 66 modes.
- Set "ConfigURL" to "http://PBXDNS/prov/PolyEdgeB20.xml". Note that you should replace "PBXDNS" with your Vodia PBX's A record tenant name to match your tenant since we already mapped the MAC address.
- Click "Save" to apply the changes.
- Reboot the Polycom B20 phone from the GUI by navigating to "Status" > "Reboot".
- After the phone restarts, it will retrieve its configuration from the Vodia Phone system and register with the PBX
Step 4
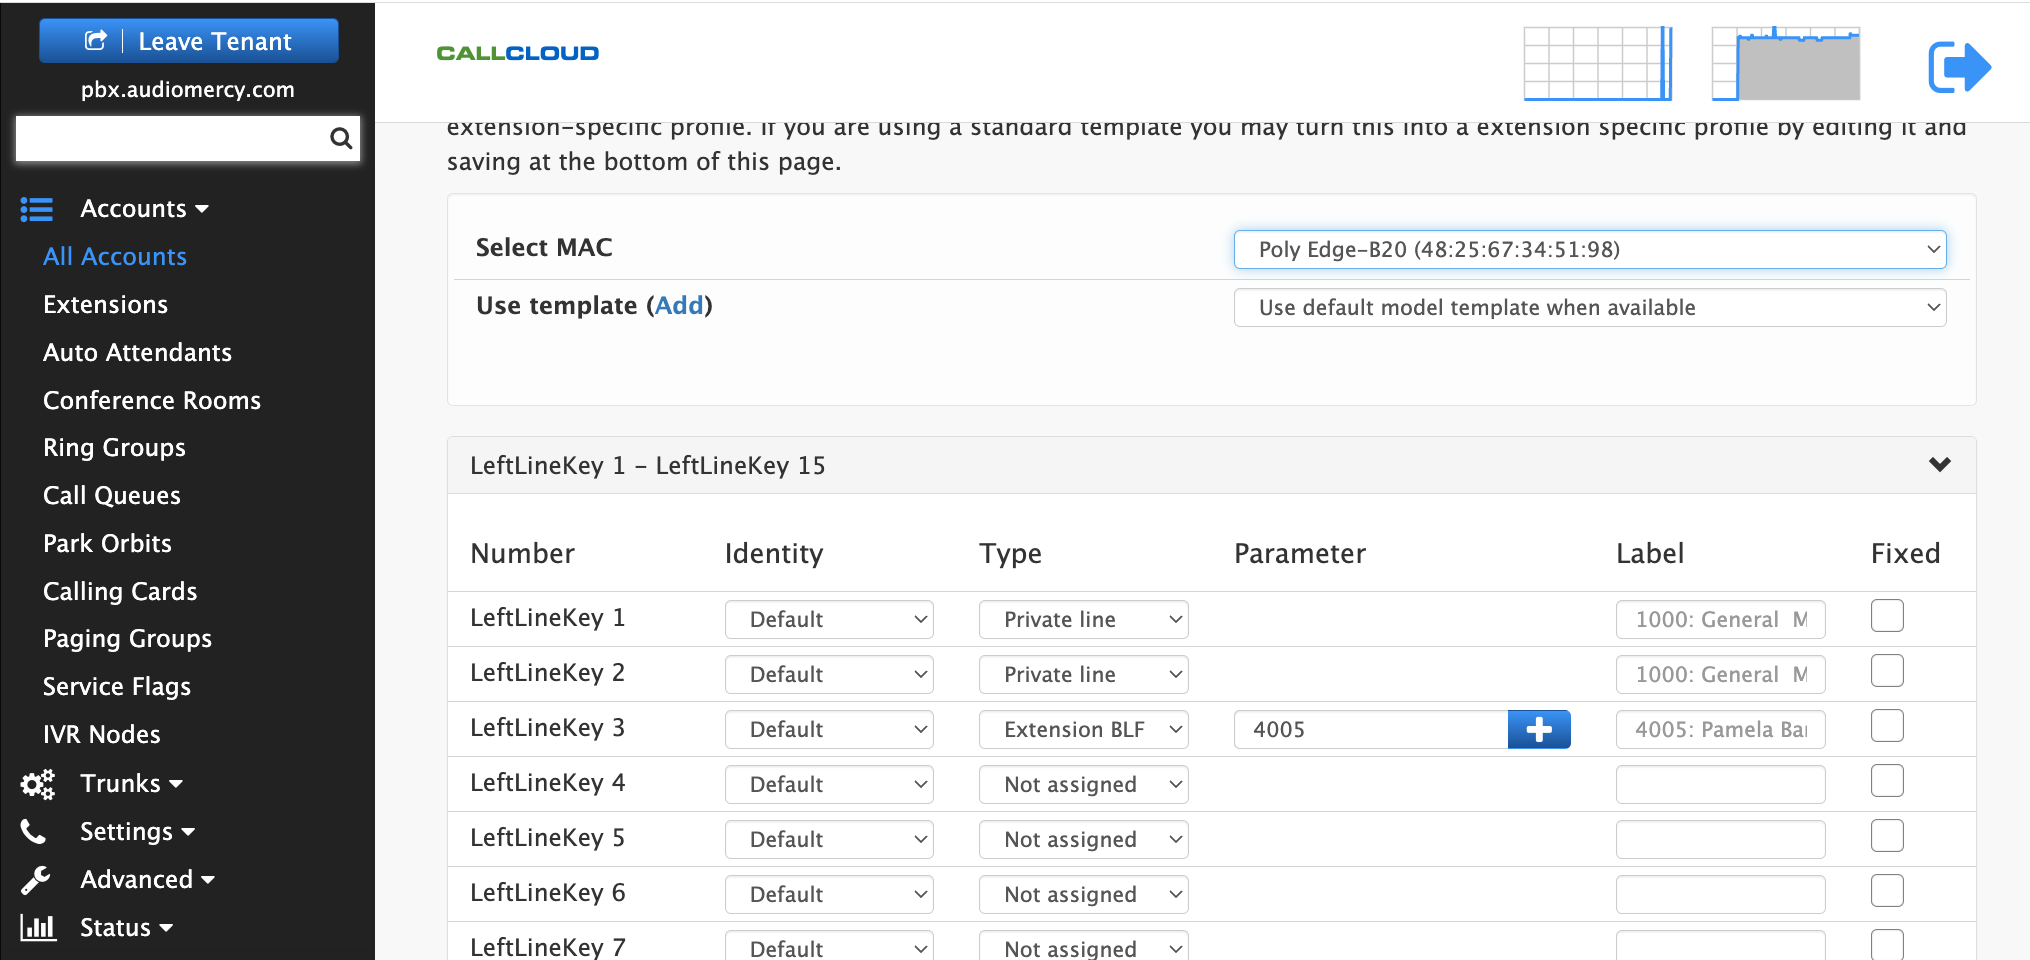
To configure the buttons on the unit, navigate to your extension and then to buttons, enter the buttons you would like to monitor or if choose private line.
By following the above steps, ITSP and MSP can easily plug and play Polycom B20 series phones with Vodia PBX. This will provide a reliable and efficient communication system for businesses of any size. The Polycom B20 phone is an excellent choice for its exceptional audio quality and reliability, while Vodia PBX provides a flexible and robust platform for managing VoIP phone systems.
Please check here for supported ZTP Poly device https://info.ztp.poly.com/docs/begin/supported-devices
If you have any questions you can reach out to us at https://vodia.zammad.com/