
Configuring your US SIP Trunk Provider Skyetel with Vodia
Skyetel is a granular SIP trunk provider that offers many features, like multi-tenant billing for the Vodia multi-tenant PBX, SMS features, DIDs, Endpoint health check, and more.
Today I would like to show how to set up the Skyetel SIP trunk with the Vodia PBX phone system, here is what we will be covering.
Skyetel endpoint
The endpoint is where we will create an endpoint to the Skyetel network and the Vodia PBX routable IP address.
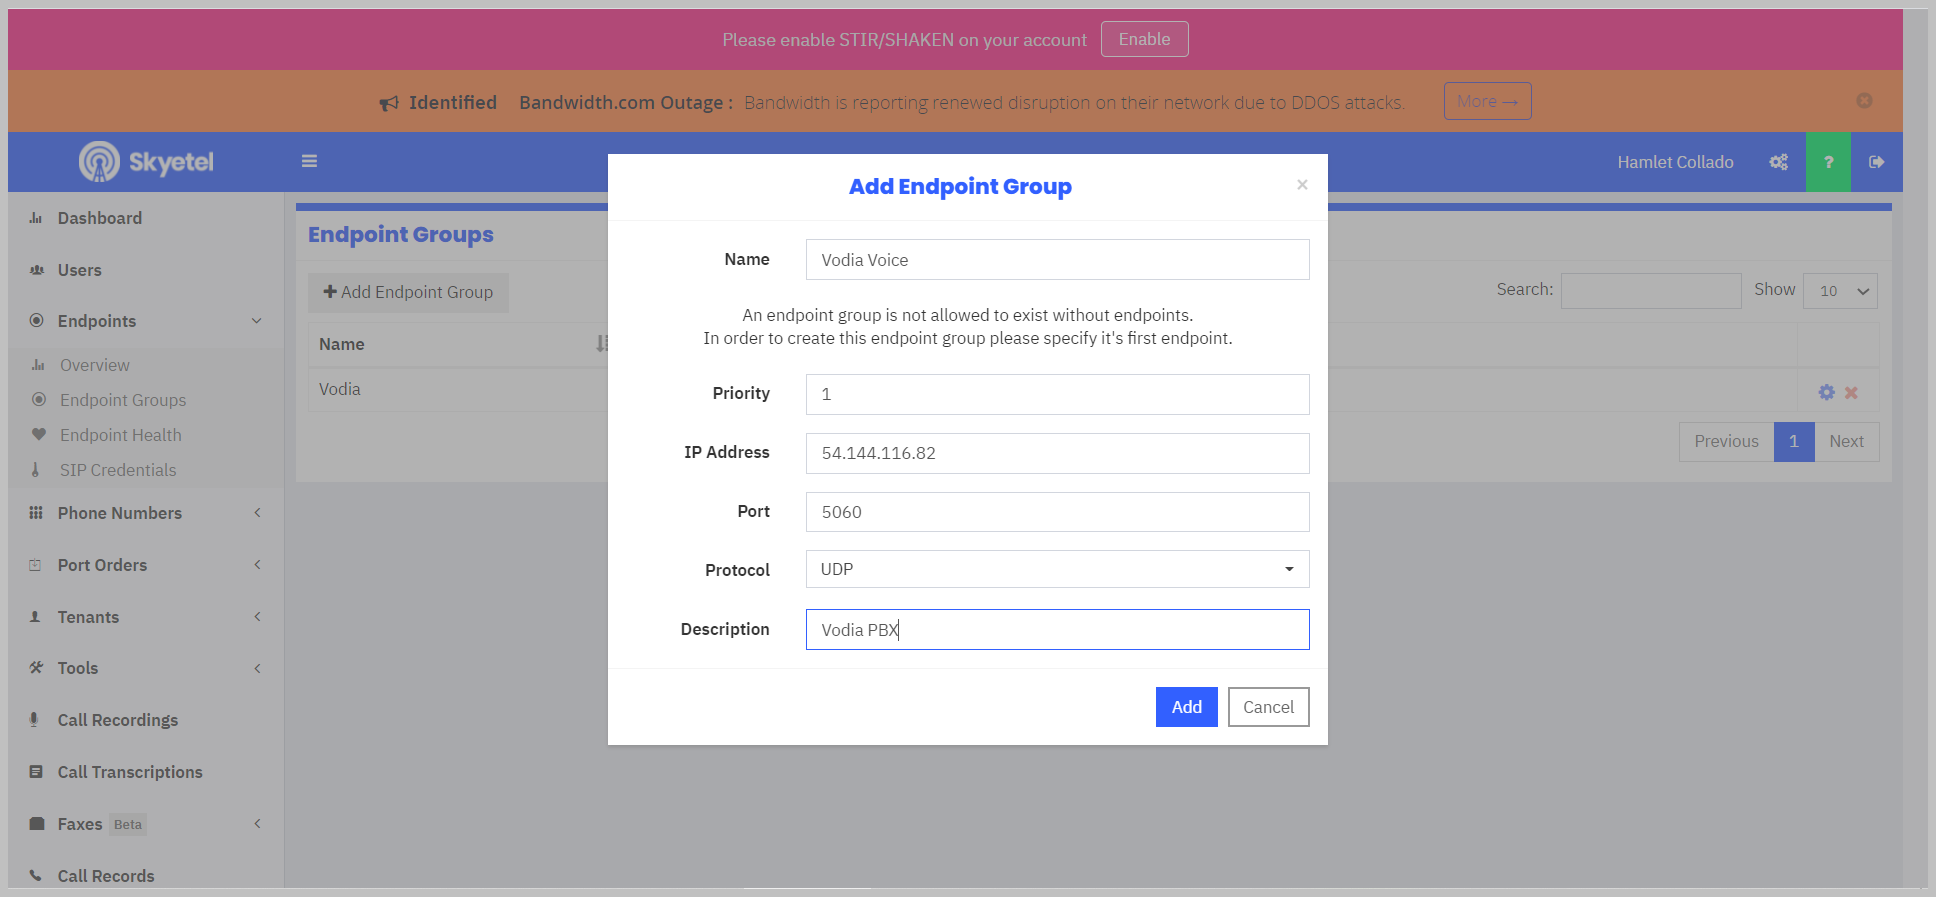
log in to your Skyetele account and navigate to the Endpoint group under Endpoints.
Endpoint Groups
Click on add Endpoint Group and enter the following
- Name: Name of the customer
- Priority: 1
- IP address: External IP address of the Vodia PBX
- Port: 5060
- Protocol: TCP or UDP
- Description: Customer location or customer info
Add the endpoint.
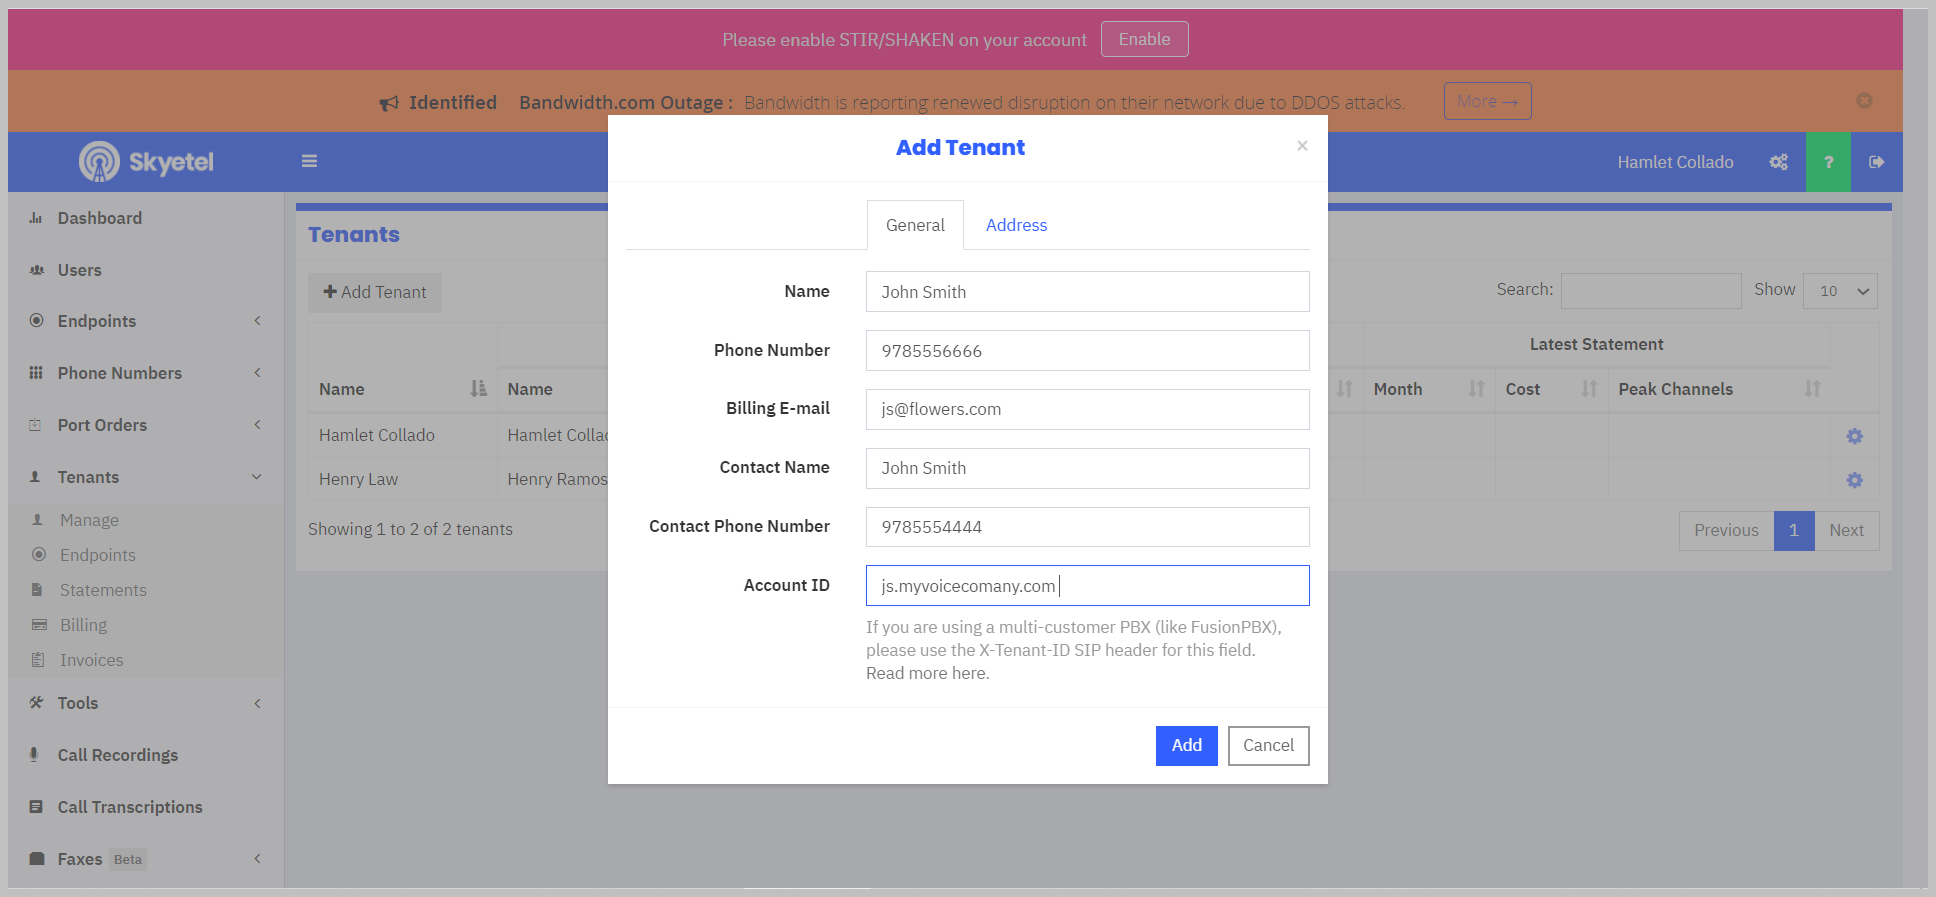
Tenant
Skyetel also has a feature called tenants where you can set up your customer's billing information this also includes the account ID. The account ID is used for billing your tenant separately. Since Vodia is a multi-tenant phone system it's also possible to use the same name under the account ID, in this case, it's best to use the FQDN created on the Vodia PBX, to learn how please visit create add URL: https://blog.vodia.com/skyetel_sip_trunk_vodia
For the tenant, information enter the following
- Name: John Smith
- Phone Number: 7815556698
- Billing E-mails: js@vodia.com
- Contact Name: John Smith
- Contact Phone number: 7815556698
- Account ID jscompany.pbx.com
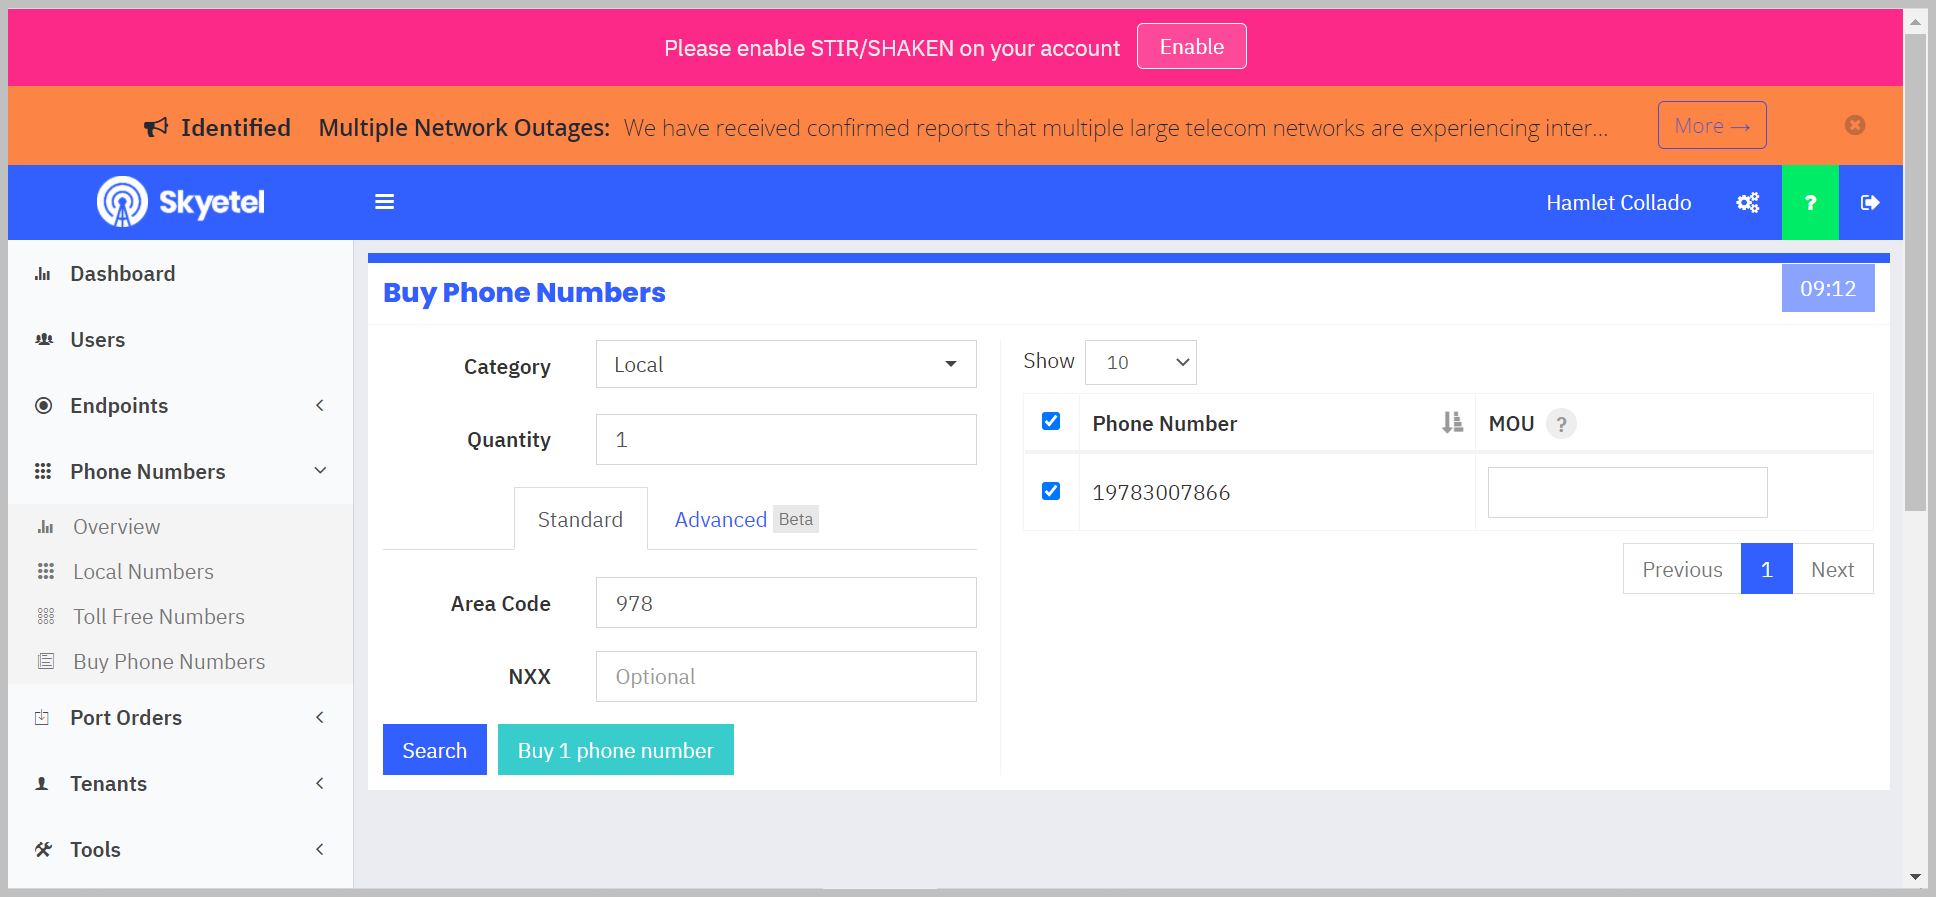
Purchasing a Skyetel Number
Next you'll need to purchase a number for the Vodia PBX system. Navigate to Phone ---> Buy Phone Numbers
- Category Local
- Quantity 1
- Phone Number: tick of the phone number box
- Area Code: Choose your Area code and press search
- MOU "Minutes of use" Here enter you estimate number of minutes that will be used for the number
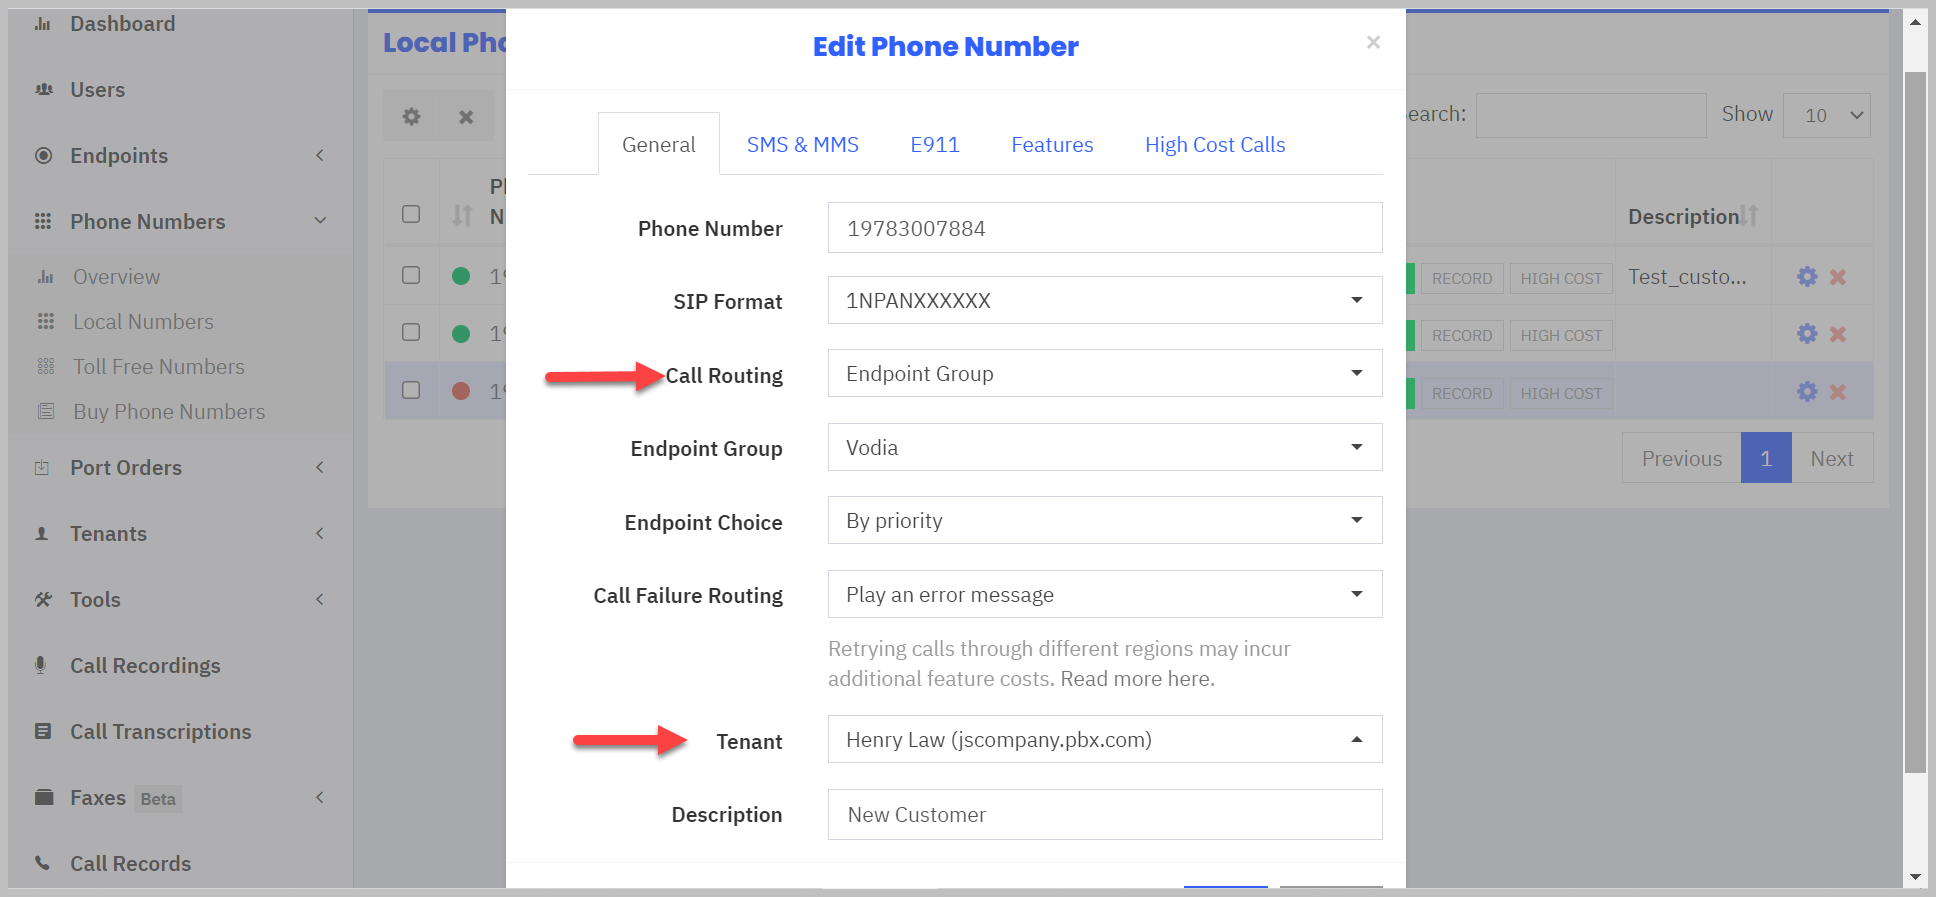
Assign Number
In order to make and recived calls you will need to assign it to a tenant on the Vodia PBX. Once the number has been purchase click on the cog while.
You will see the number with a red dot indicating that the number is not peered to the tenant.
- Phone number: Phone number
- SIP Format: Choose how many digits you want coming into the Vodia PBX phone system
- Call Routing :Choose Endpoint Group
- Endpoint Group: Choose the endpoint c
- Tenant: Choose the tenant you want to bill
- Save the configuation
Setting up the Skyetel on the Vodia phone system
Now that we have the account set up on the Skyetel SIP trunk provider, we will now set up the Vodia PBX to use the account.
Navigate to SIP trunk on your domain PBX and choose Skyetel template to add your customer's DID, then press create. The template has everything set up for you, no need to change any settings.
Also the vodia Dial plan has already been created automatically for you, so you can make test calls.

Sending the inbound call to an account
Navigate to your new Skyetel SIP trunk and choose where you want to send the call to. Here are some of the choices you have:
- Default
- Send calls to destination in the Request -URI
- Send all calls to a specific account
- Send to 10-digit DID
- Match extension after prefix
- Use a list of expression
For this tutorial, we are using default. The Vodia phone system will match the DID that's assigned to the extension and send the call to the user.
check here for more details on DID management https://doc.vodia.com/docs/did-management
