
Snom Phone Provisioning with the Vodia PBX

In this blog, I will show how to successfully plug and play your snom sip desktop phone with Vodia PBX, and take advantage of our unique integration and with the phones.
By default, the snom desktop phones are provisioning with TLS protocol this will give a secure connection and will be able to use the SRTP function on the phone.
We will be covering the following topic:
-
Automatic LAN provisioning
-
Option 66
-
Manual Provisioning
-
SRAPS Provisioning
-
Buttons
Prerequisite
The Provision Parameters are found in the Domain level under Settings, General settings. The setting is used to provision the user/password for all the desktop phones provisioned by the Vodia PBX.
-
Authentication user: Default user is admin
-
Authentication password: is used for the Web GUI password that will be set on the sip phone after provisioning.
-
Authentication PIN: is used for the Web GUI PIN that will be set on the phone after provisioning.
Note: The snom phone model's GUI has two-level access.
-
User mode ( which is where the Authentication password will be used)
-
Admin mode (which is where the Authentication PIN will be used)
Automatic LAN provisioning
The Vodia IP PBX has the ability to detect devices on the LAN, this is a crucial feature if you have a deployment with many phones on the same LAN as the PBX. With LAN detection you will be able to pair up an extension to a specific snom device. To start, we will need to do the following.
To provision, a snom phone on the LAN, simply reset the phone to factory default
-
Power off the device.
-
Press, hold the “#” key and power on the device.
-
Keep holding the “#” button until the message “Rescue Mode” appears
-
Select the 1st option “Settings reset”, by pressing the number “1” on the phone.
-
After a restart, your phone will be successfully reset.
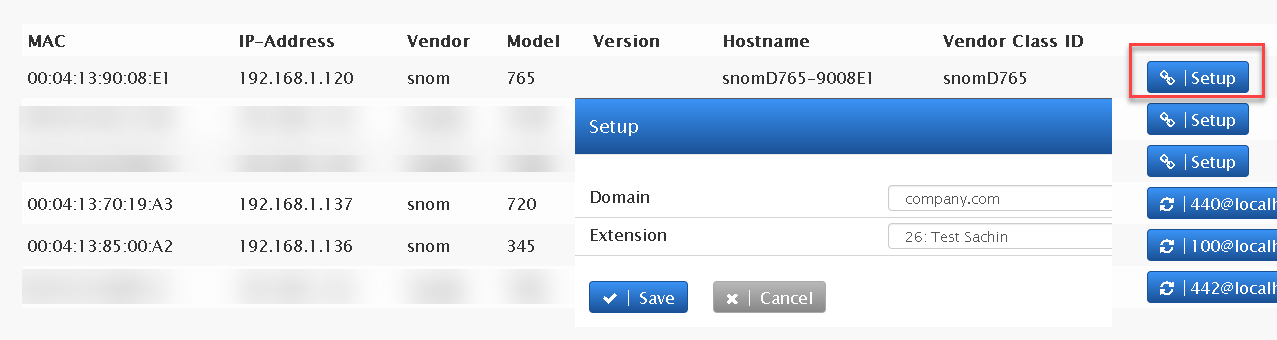
At the administrator level, navigate to Phones, Lan Devices. On this page, you will be able to see all the phones on your LAN, and you will be able to pair up your desktop phones by clicking on the Setup button. Choose a domain and a sip account to start the provisioning process.
DHCP Option 66
Reset the snom phone device to factory default, add your Vodia cloud PBX IP or FQDN in your router settings under Option 66, example (http://voice.pbxnvoip.com)
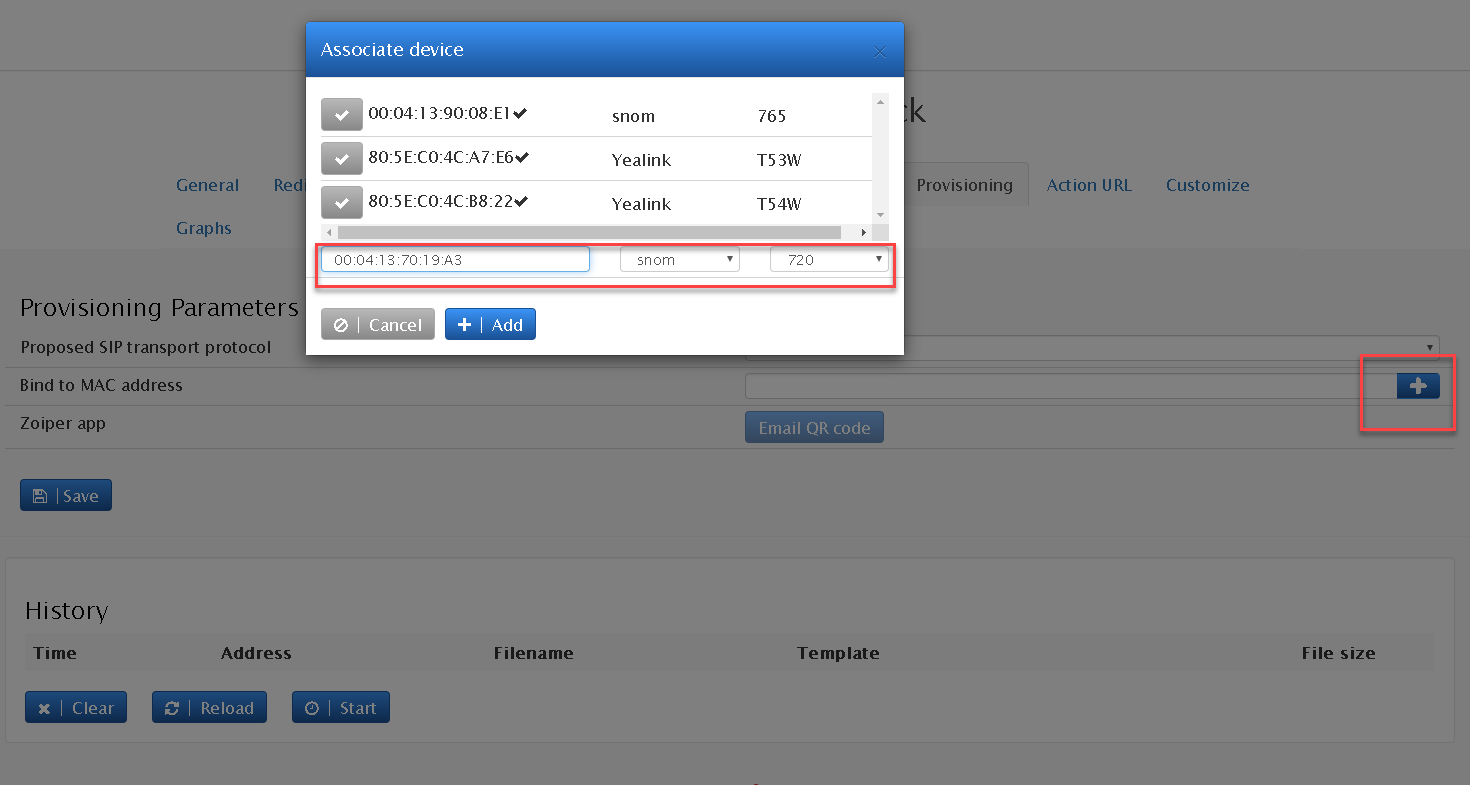
Next, you will need to assign the Phone's MAC address to an extension on the VodiaPBX. To do this, navigate to the extension page and choose an extension that you would like to pair the snom phone to.
Under the extension provisioning tab, ![]()
Click on the add button. Enter the phone's MAC address, phone manufacturer and phone model to complete the pairing.
Note: Once the phone is paired up, Vodia by default automatically opens the MAC based provisioning feature in order to allow the phone to securely provision.
Next, you'll need to reboot the phone so it can contact the VodiaPBX and provision the device.
Manual Provisioning
- Reset the phone to factory default
- Add the MAC address of the device under the extension Provisioning tab ( Please refer to the above steps)
- Open the MAC-based provisioning
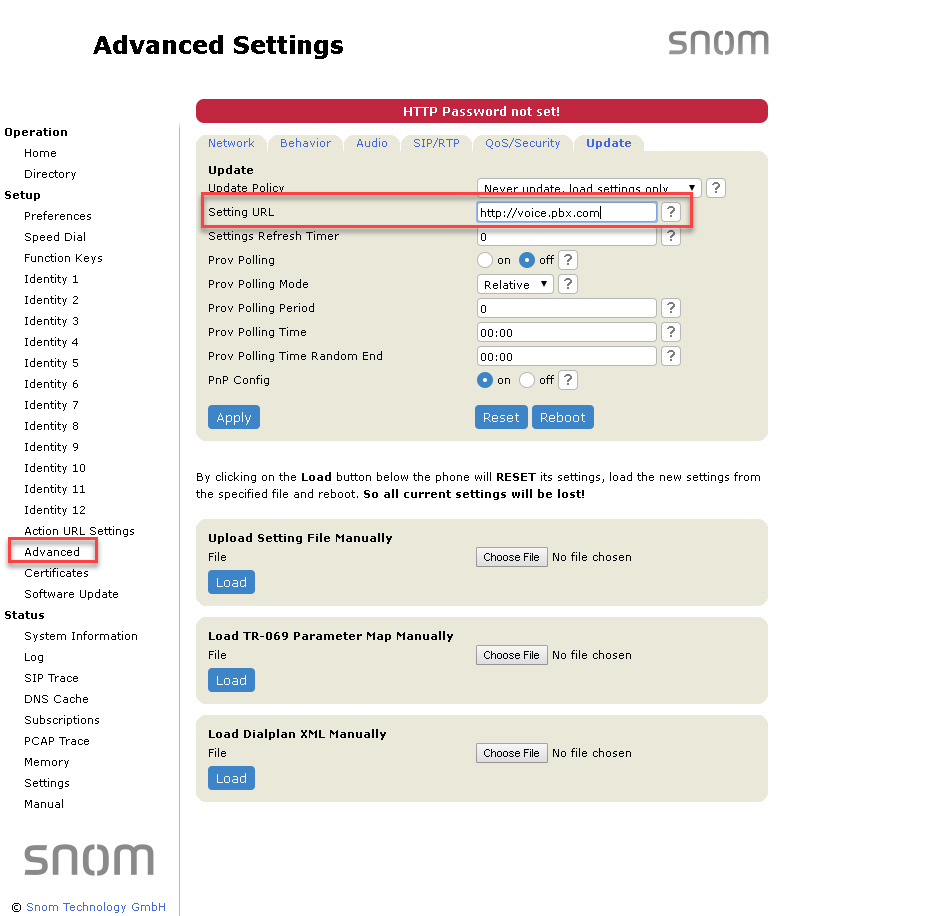
- Log into the snom phone device and navigate to Advanced - >Update and type in your PBX URL example: http://voice.pbx.com
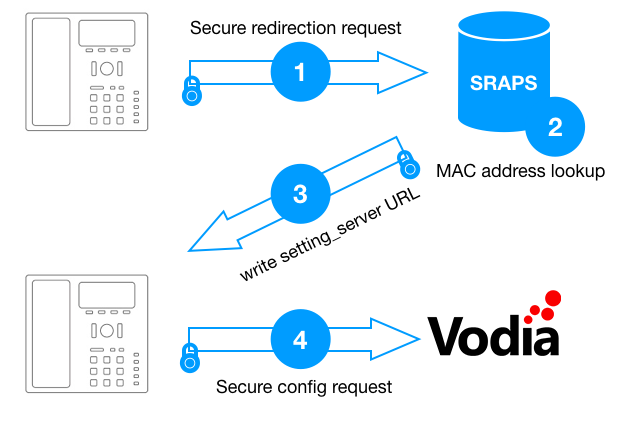
SRAPS (Secure Redirection and Provisioning Service)
The Secure Redirection and Provisioning Service (SRAPS) enables secure zero-touch Phone deployment. As a Reseller, you may remotely manage your Clients and their Phones, avoiding costly on-site visits.
Users may set up Redirection rules and create Provisioning templates anytime, from anywhere.
This service comes completely free of charge to Snom partners, and customers.
Prerequisites
-
Vodia Multi-tenant Edtion (Signup for a free trial)
-
VodiaPBX has to be on the public interface
-
SRAPS account ( To get a free SRAPS account signup here)
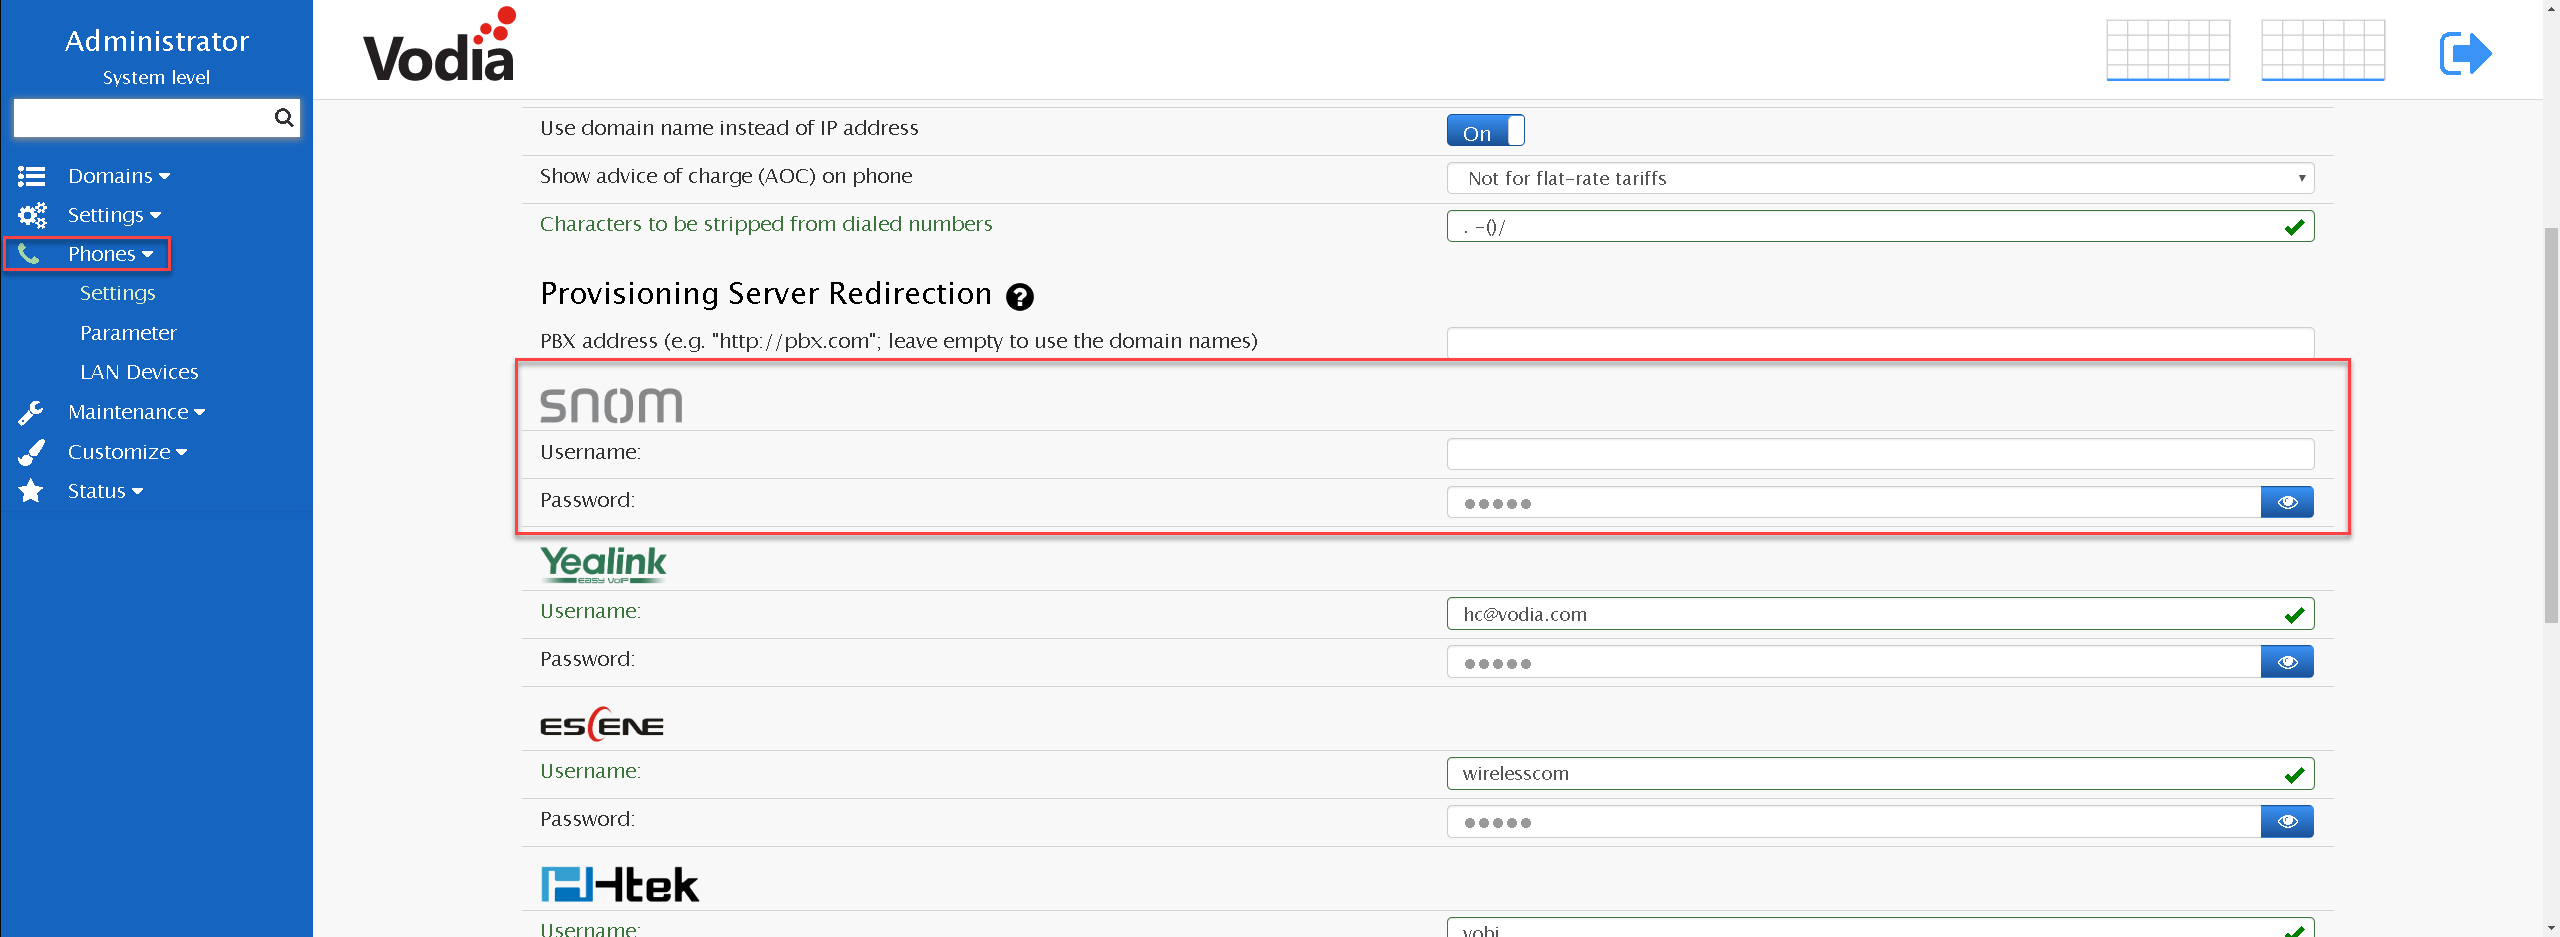
To set up the SRAPS account on the VodiaPBX, navigate to Administrator mode and scroll down to phones then settings.
Under the snom redirection, type in the username and password that were given to you by snom, then save.
Next you can sync all your snom phones on the system, provided that the phones' MAC addresses are associated to extensions.

Vodia will then scan all the snom MAC addresses on the system and contact the SRAPS server, so that the phones register to a particular domain on the system.
If it's your first time using SRAPS, make sure that the phone is factory reset and that you follow the "Prerequisites" found in this article.
Button Templates
Configuring buttons on the Vodia PBX is not that complex, and can be easily created on the system for all types of snom handsets.
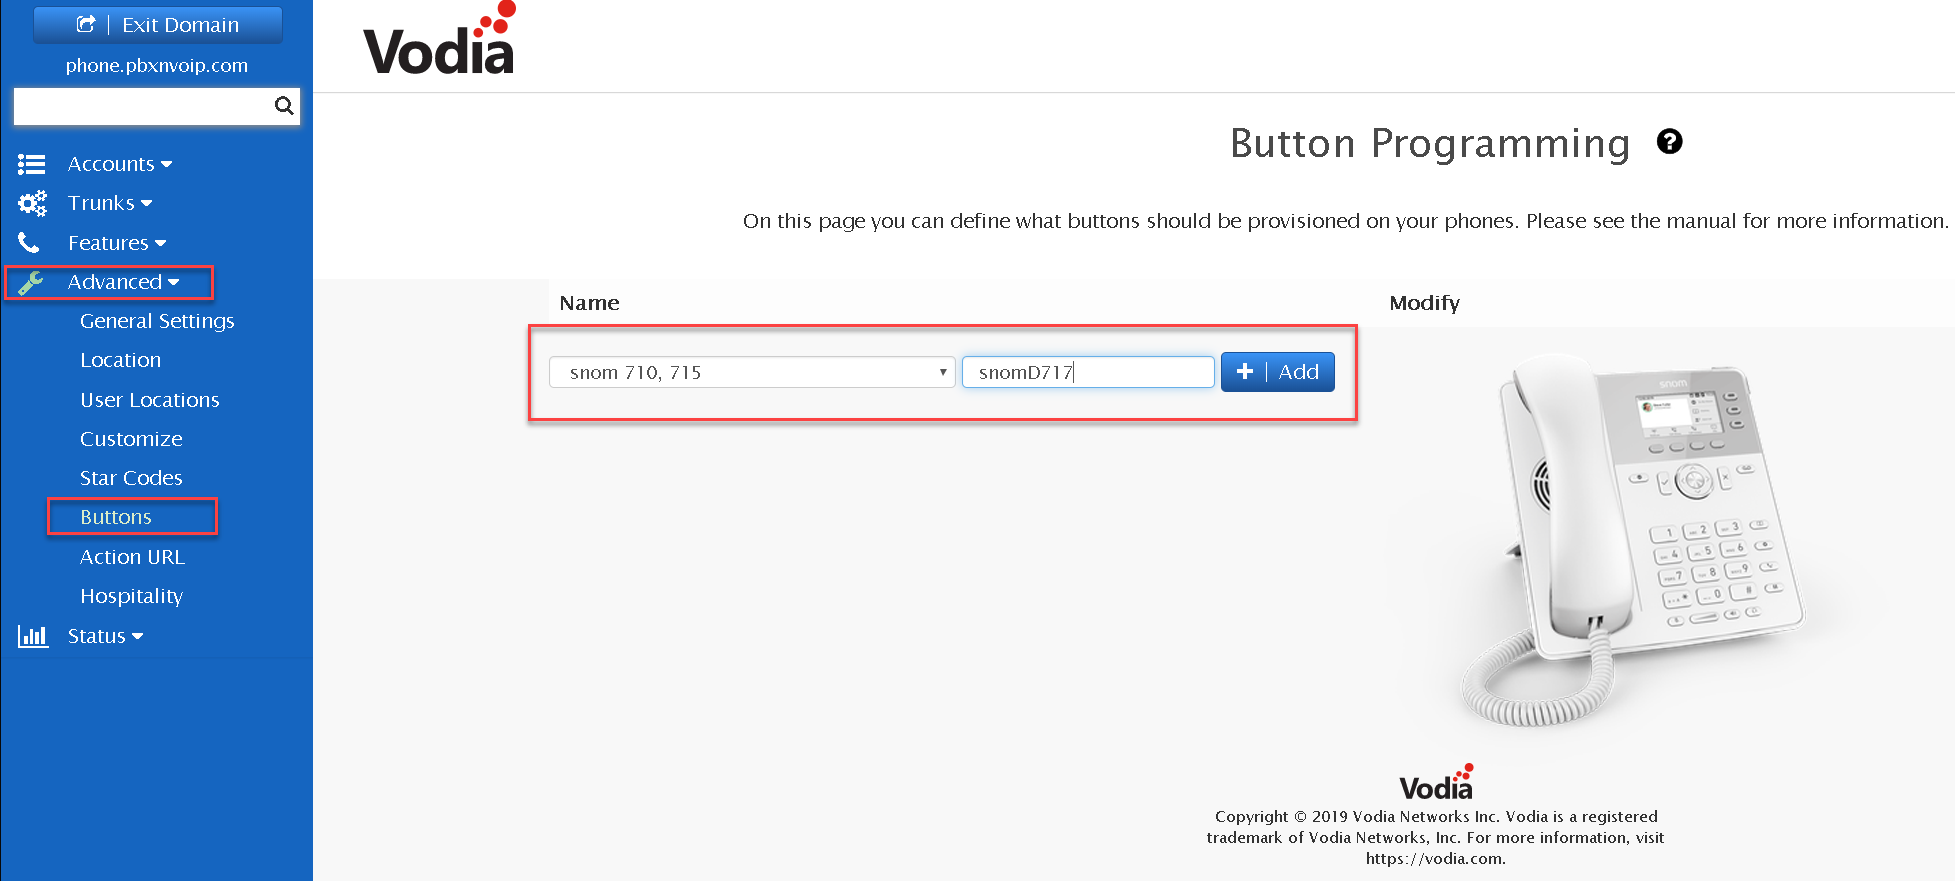
The button creator is a domain feature, so you'll need to be on the domain level. Navigate to Advanced --> Buttons
- Choose the snom model template you will be using
- Name your snom button template then press add to complete the creation
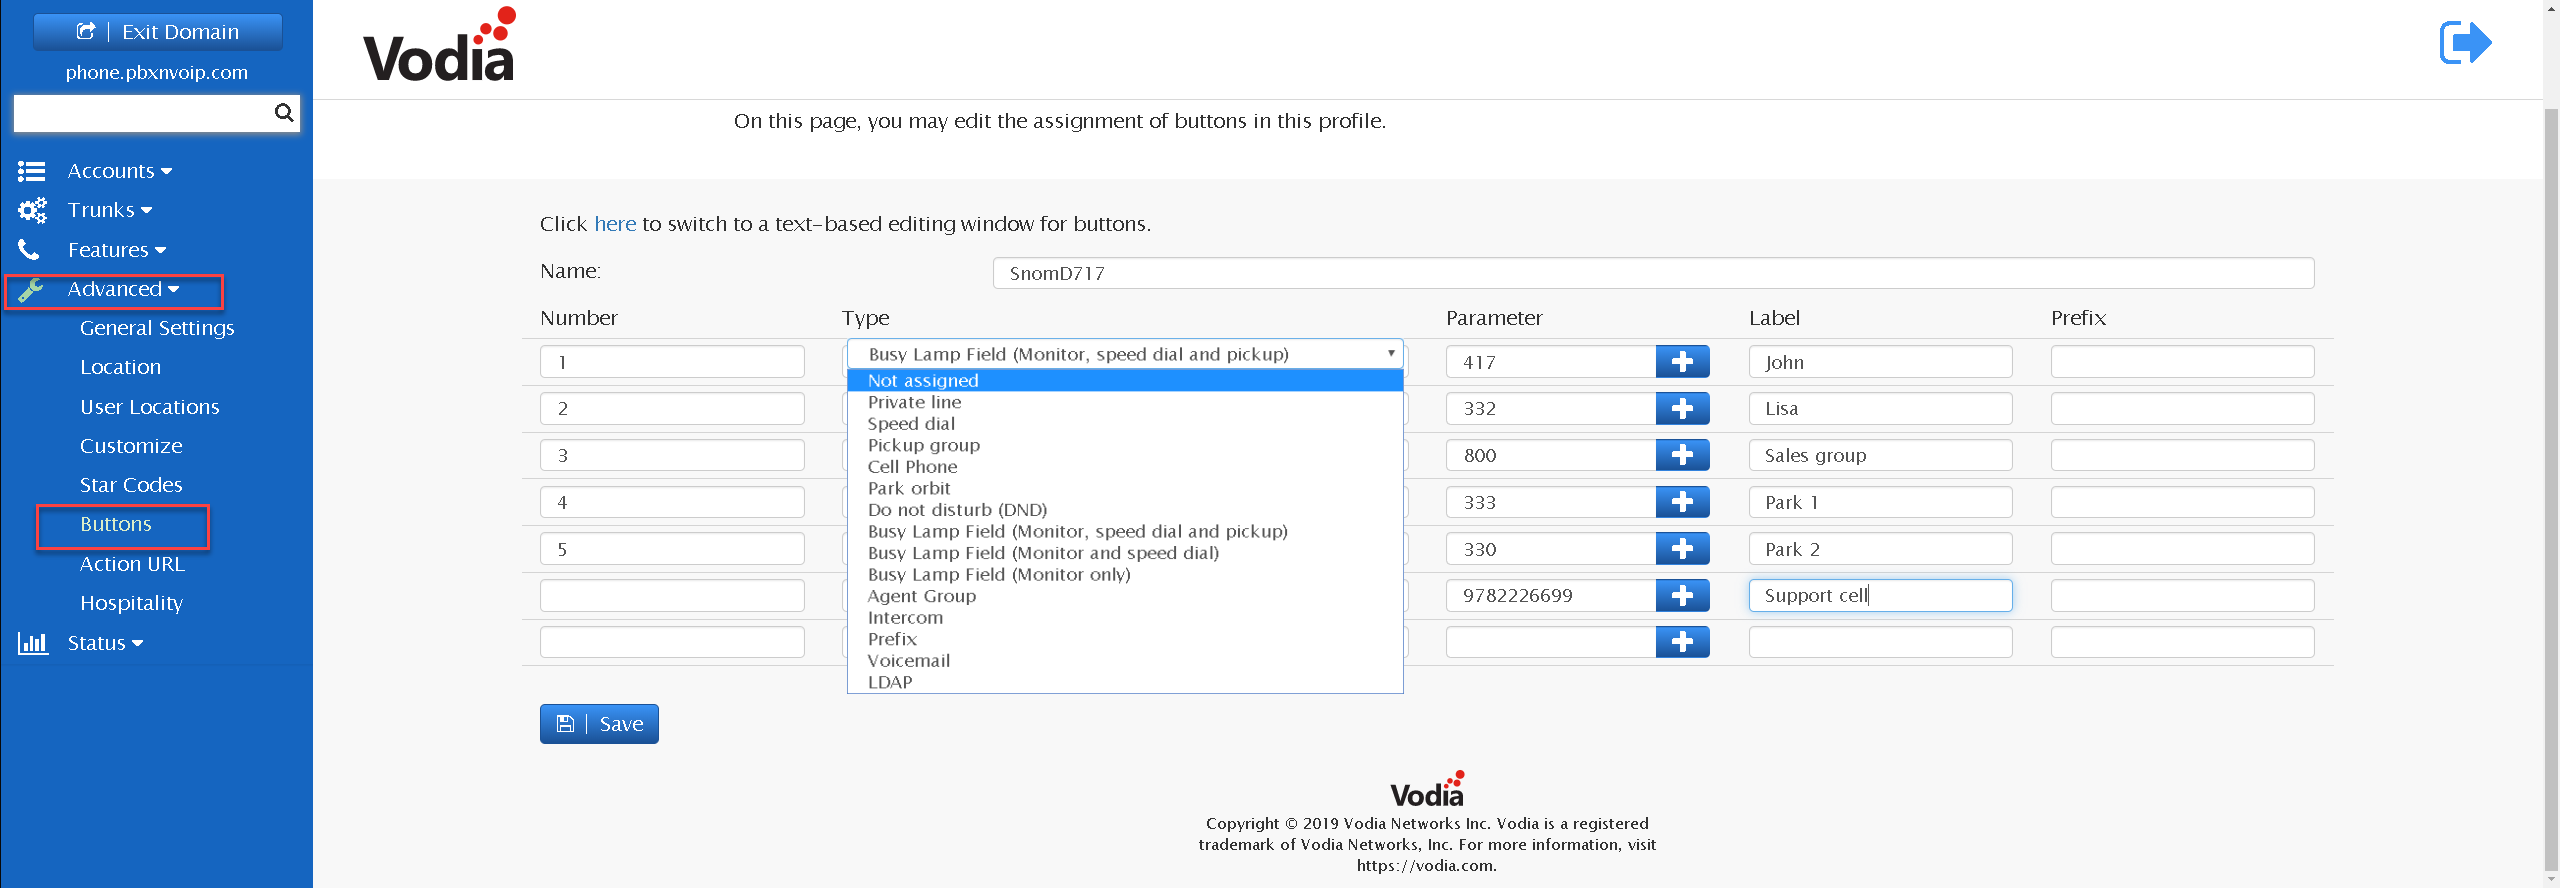
Button Configuration
Now that you have created your button template for your snom device, it's time to assign extensions, accounts, and features on the new template.
- Click on the edit icon to start building your button

- Then save when completed
Now that you have completed the button template, you can apply the button template to the extensions. Navigate to extensions and choose a user you would like to apply the template to found under the Buttons tab
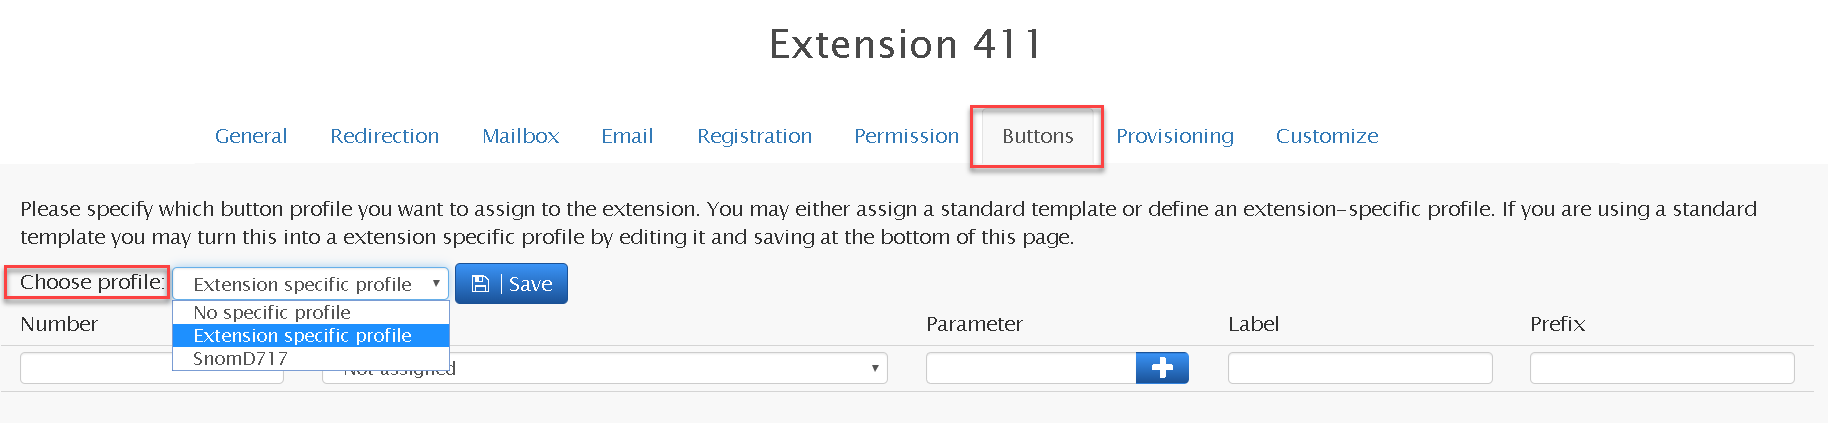
Choose the profile you have created and press save. The phone will reboot or update the buttons via sync.
For more information about configuring snom buttons